🧢 Beautiful ✨ Detailed πŸ’ Adorable

Mussel Amigurumi Pattern

Mussel Amigurumi Pattern
4.0β˜… Rating
2-3 Hours Time Needed
2.0K Made This
βœ‚οΈ

Beginner Friendly Level

Perfect for those just starting their crochet journey, with clear instructions and simple techniques

⏱️

Bite-Sized Project

Finishes in 2-4 hoursβ€”perfect for an afternoon of creative relaxation.

🎁

Tiny Treasure

Small, sweet, and gift-worthy creations that fit perfectly in the palm of your hand with detailed charm.

About This Mussel Amigurumi Pattern

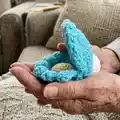
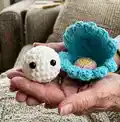
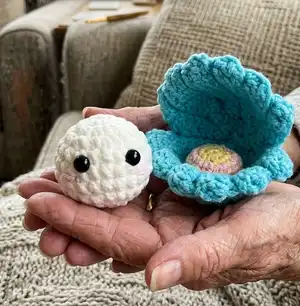
This pattern makes a tiny mussel (cockle) with a cute pearl inside using super bulky yarn. It includes a small spherical pearl amigurumi and two seashell pieces that are joined together. Simple stitches like single crochet, half double, and double crochet are used, plus a few finishing techniques for shaping.

Mussel Amigurumi Pattern crochet pattern - detailed view of completed project

Perfect for a quick handmade gift or keychain-sized treasure. The pattern includes materials, abbreviations, step-by-step rows, and clear assembly notes.

Why You'll Love This Mussel Amigurumi Pattern

I absolutely love this pattern because it transforms simple stitches into a delightful little scene β€” a pearl tucked inside a shell. I enjoy how quickly the project works up thanks to super bulky yarn, giving a satisfying result in just a few hours. I appreciate the gentle mix of flat shell shaping and spherical amigurumi skills, which keeps the project interesting without being difficult. I also love that you can easily customize colours to make each mussel unique, and the finished piece makes a lovely tiny gift or decor item.

Mussel Amigurumi Pattern step 1 - construction progress Mussel Amigurumi Pattern step 2 - assembly progress Mussel Amigurumi Pattern step 3 - details and accessories Mussel Amigurumi Pattern step 4 - final assembly and finishing

Switch Things Up

I love customizing this pattern by changing the shell color for different seasons β€” try pastel blues for spring or warm golds for a festive look.

I often switch yarn weight and hook size to make tiny keychains or larger display pieces; bulky yarn will make it fast and soft while thinner yarn creates a mini version.

I enjoy adding tiny embroidered eyelashes or freckles on the pearl to give each one a unique personality.

Try different eye sizes or use safety eyes for durability, or embroider eyes for a fully handmade finish if making toys for very young children.

I sometimes add a loop of yarn at the top and attach a keyring to turn the mussel into a cute keychain gift.

If you want a posable display, consider stitching a small felt base inside the shell to help the pearl sit upright.

I like to add sparkle thread or a small sequin on the shell edge for a touch of shimmer and playful detail.

For gifting, make a set of three pearls in gradient shades and nestle them in matching shells for a coordinated presentation.

I recommend experimenting with facial expressions by moving the eyes and mouth placement slightly to see how personality changes.

To create a collection, follow the same pattern but vary textures β€” use boucle or chenille yarn for whimsical, plush versions that children will love.

Common Mistakes & How to Fix Them

βœ— Placing safety eyes too low or too high can distort the facial expression; attach eyes between rows 4 and 5 with five stitches between them for correct placement. βœ— Forgetting to stuff as you go can make it difficult to achieve even shaping; stuff gradually while closing rounds to maintain a smooth, round pearl. βœ— Working without a stitch marker causes lost round starts and uneven shaping; use a stitch marker to mark the beginning of each round consistently. βœ— Crocheting with inconsistent tension will change final size and texture; maintain an even, relaxed tension and check gauge visually for consistent results.

Mussel Amigurumi Pattern

Create a charming tiny mussel with a cuddly pearl using this friendly crochet pattern. You will love how quickly the pieces come together with super bulky yarn and simple stitches. Clear step-by-step instructions, photos, and assembly notes guide you through every stage. Perfect for gifting or making a sweet addition to your amigurumi collection.

Beginner Friendly 2-3 Hours

Materials Needed for Mussel Amigurumi Pattern

β€” Main Fabric

  • 01
    Super Bulky yarn (Category 6) - main colors used: White for the pearl, Blue for the seashell (quantities vary by project, small amounts of each color required)
  • 02
    Accent color (optional) - Purple color (listed as an available color in materials)
  • 03
    Fiberfill stuffing - small amount for stuffing the pearl

β€” Tools Required

  • 01
    3.5mm (E) crochet hook
  • 02
    Stitch marker (stitch maker)
  • 03
    Sewing needle
  • 04
    Scissors
  • 05
    Plastic safety eyes 8mm (2 pieces)
  • 06
    Hot glue gun (hot gun glue)
  • 07
    Polyester stuffing (fiberfill)

Progress Tracker

0% Complete

β€” Pearl :

Round 1 :

6SC in a MR (6)

Round 2 :

6INC (12)

Round 3 :

(SC, INC) 6 times (18)

Round 4 :

(2SC, INC) 6 times (24)

Round 5-7 :

24SC (24)

Round 8 :

(2SC, DEC) 6 times (18)

Info :

Stuffing

Round 9 :

(SC, DEC) 6 times (12)

Round 10 :

6DEC (6)

Info :

Cut the yarn. Attach the eyes between rows 4 and 5, with 5 stitches between them. Embroider pink for the mouth.

β€” Seashell (Make 2) :

Info :

Begin with Blue yarn. From rows 2 to 11, crochet all stitches in the BLO. On even rows, start crocheting into the second stitch from the hook. On odd rows, start crocheting into the third stitch from the hook.

Round 1 :

13Ch, turn: 7DC, HDC, SC, 2Slst, turn (11)

Round 2 :

Ch, 11Slst, turn (11)

Round 3 :

3Ch, 8DC, HDC, SC, 2Slst, turn (12)

Round 4 :

Ch, 12Slst, turn (12)

Round 5 :

3Ch, 9DC, HDC, SC, 2Slst, turn (13)

Round 6 :

Ch, 13Slst, turn (13)

Round 7 :

2Ch, 9DC, HDC, SC, 2Slst, turn (13)

Round 8 :

Ch, 12Slst, turn (12)

Round 9 :

2Ch, 8DC, HDC, SC, 2Slst, turn (12)

Round 10 :

Ch, 11Slst, turn (11)

Round 11 :

2Ch, 7DC, HDC, SC, 2Slst (11)

Round 12 :

Thread the needle through the loops in pairs as shown in the image, with a total of 3 pairs. When you have all 4 loops on the needle, pass the thread through all 4 loops to create one stitch.

Info :

After completing the two seashell pieces, fold them in half and place the wrong sides together. Use SLST to join the two pieces together.

Info :

Starting from the single stitch in row 12, count backward to row 11, adding 7 stitches. Begin joining from this point. Make 15 SLST: 7Slst (row 11), Slst (row 12), 7Slst (row 1). Cut the yarn and finish product.

β€” Assembly :

Info :

Place the finished pearl inside the joined shell and adjust positioning. Ensure the face of the pearl is centered and visible when the shell is closed. Secure with a few stitches if desired or use a tiny dab of hot glue for a permanent hold.

Assembly Instructions

  • Attach the eyes to the pearl between rows 4 and 5, spacing them with 5 stitches between for even placement.
  • Embroider a small pink mouth on the pearl after eyes are attached to give a sweet expression.
  • Fold the two seashell pieces in half with wrong sides together and join them using slip stitches (SLST) around the edge to form the shell.
  • When joining the two shell pieces, start from the single stitch in row 12, count backward to row 11 adding 7 stitches, then make 15 SLST around: 7 SLST (row 11), 1 SLST (row 12), 7 SLST (row 1).
  • Place the stuffed pearl inside the assembled shell and secure with small stitches or a dot of hot glue if you want it fixed in place.

Important Notes

  • πŸ’‘Use stitch markers to mark the start of each round, particularly when working in continuous rounds and when changing shaping.
  • πŸ’‘Stuff the pearl gradually and evenly through the stuffing step to keep the sphere smooth and avoid lumps.
  • πŸ’‘Work the seashell rows in the back loop only (BLO) from rows 2 to 11 for the ribbed shell effect as instructed.
  • πŸ’‘Fold shell pieces with wrong sides together before joining so the right side faces outward when assembled.

This tiny mussel and pearl set is a delightful, quick project that makes a lovely gift or display piece. Perfect for gifting, keychains, or a sweet pocket-sized surprise. Make a few in different colors to create a charming little collection. 🧢🎁

You ask,

we answer.

FAQs

What size will the finished piece be?

The finished amigurumi measures approximately the size of a small palm when using super bulky yarn and a 3.5mm hook; exact size will vary with yarn and tension.

Can I use different yarn weights for this pattern?

Yes, you can use different yarn weights, but the final size and texture will change; choose a hook size appropriate for your yarn and adjust stuffing accordingly.

Do I need prior crochet experience for this pattern?

This pattern is beginner friendly, so basic knowledge of crochet stitches like SC, HDC, DC and working in BLO is helpful for best results.

How long does this project typically take to complete?

Most crafters finish this small project in about 2-3 hours, though time may vary depending on experience and whether you make both shells and decorations.