About This Mussel Amigurumi Pattern
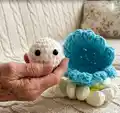
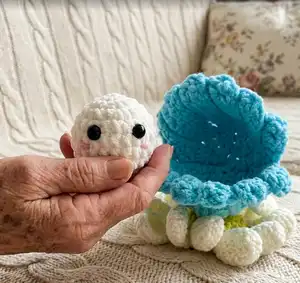
This pattern creates an adorable mussel (seashell) with a tiny pearl amigurumi inside. You will make a small pearl body and two matching seashell halves, join them, and finish with safety eyes and a blush detail. The design uses bulky yarn and basic crochet stitches for a quick, satisfying project.
Clear row-by-row instructions and photos help guide you through shaping and joining the shell pieces. Ideal for making a set of ocean-themed mini friends or a single sweet keepsake.
Why You'll Love This Mussel Amigurumi Pattern
I absolutely love this pattern because it turns simple stitches into a darling seaside friend that fits in your hand. I enjoy how quickly the pearl comes together and how satisfying it is to join the two seashell halves into a little shell home. The project is small but full of charm, making great gifts or little decorations. I also love that you can easily customize colors and details to create many variations.
Switch Things Up
I love experimenting with color for this pattern; try gradient blues for the shell or soft pastels for a whimsical look.
I often swap the super bulky yarn for a worsted weight and a smaller hook to create a mini keychain-sized version that is perfect for gifts.
I also like to embroider different facial expressions on the pearl to give each one a unique personality, from sleepy to surprised.
For a shimmery finish, consider adding a small strip of metallic or sparkly yarn around the shell edge to mimic the inner nacre of a real mussel.
I sometimes replace safety eyes with tiny embroidered eyes for a baby-safe version suitable for very young children.
Want an open shell display? Join the halves less tightly and add a felt cushion inside so the pearl can be removable and poseable.
I like to make matching sets — a few pearls with different shell colors — and present them in a small net bag for a themed gift.
Try varying the stuffing amount to make a softer, squishier pearl or a firmer round depending on the tactile feel you prefer.
If you want more texture, work the shell rows in alternating stitches (like HDC and DC) instead of the written sequence to create subtle ridges.
I also add tiny crocheted accessories like a little bow or tiny starfish sewn to the shell for extra charm and personalization.
Common Mistakes & How to Fix Them
✗ Skipping stitch markers during rounds causes you to lose your starting point; place a marker at the first stitch of each round to maintain accurate counts.
✗ Forgetting to stuff gradually leads to lumps and uneven shape; add small amounts of fiberfill little by little while shaping for a smooth finish.
✗ Placing safety eyes too late can make positioning difficult and uneven; attach the eyes between the specified rows before closing the head so you can space them evenly.
✗ Crocheting with inconsistent tension produces uneven shell edges and mismatched pieces; maintain steady tension and match stitch heights between the two seashell halves before joining.
✗ Not counting stitches on turning rows causes mismatched edges when folding and joining; always verify stitch counts on each row before folding the piece in half for assembly.