About This Mr. Pistachio The Dinosaur Amigurumi Pattern
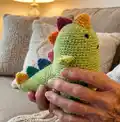
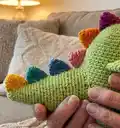
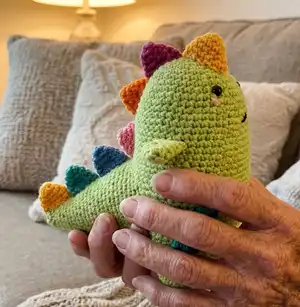
This pattern creates Mr. Pistachio, a small pistachio-green dinosaur amigurumi with colorful spikes and decorative dots. You will crochet legs that join into the body, shape a rounded head, a tapered tail, small arms, and seven spikes. The instructions include stitch counts for every round and clear finishing steps so you can assemble the toy exactly like the photo.
The design focuses on simple single crochet shaping and small colorwork spikes for charming detail. Perfect for gifting or creating a whimsical display piece.
Why You'll Love This Mr. Pistachio The Dinosaur Amigurumi Pattern
I absolutely love this pattern because it turns simple stitches into a character full of personality. I enjoyed designing the rounded body and little spikes that add so much charm with minimal effort. The join-from-the-legs technique makes the body seamless and neat, which I find especially satisfying. Sewing the details and dots allows for playful customization, so each finished dinosaur feels unique.
Switch Things Up
I love how easily this pattern can be customized by changing colors for the spikes and dots; try pastels for a soft nursery friend or brights for a playful gift.
I often change the yarn weight and hook size to make a family of dinos: a bulkier yarn makes a cuddly plush, while fine yarn and a smaller hook create keychain minis.
I sometimes embroider different expressions — a tiny smile, surprised O-mouth, or sleepy eyes — to change personality with minimal effort.
I like adding small accessories like a mini crochet scarf, a felt bow, or tiny glasses to give my dino a unique look for gifting.
Try placing spikes in different arrangements: fewer larger spikes or a double row down the back for a more dramatic silhouette.
If you want a poseable figure, try inserting light craft wire into the limbs before stuffing, which allows gentle shaping of arms and tail.
I enjoy mixing yarn textures: use a slightly fuzzy yarn for the spikes to create a tactile contrast with the smooth DK body.
For a baby-safe toy, embroider the eyes and nose instead of using safety eyes and ensure all tails are securely woven in.
To make a themed set, match yarn colors to holidays — orange and black for Halloween, pastel sets for Easter — for seasonal displays.
I recommend experimenting with placement of the dots and size of the tail to balance the overall silhouette until it looks just right to you.
Finally, I sometimes add a tiny loop at the top of the head to hang the mini dino as an ornament or bag charm — it only takes a couple of extra stitches.
Common Mistakes & How to Fix Them
✗ Skipping the joining chains between the legs will make the body gap and look uneven; follow Rnd 8 exactly and slip stitch the legs together before crocheting around to create a seamless join.
✗ Not stuffing as you go makes shaping difficult and can leave lumps; start stuffing at Rnd 9 and continue gradually while working up the body to maintain an even shape.
✗ Placing safety eyes too early or too late causes misplacement; follow the instruction to place safety eyes between rounds 34-35 and check positioning before final stuffing and embroidery.
✗ Forgetting to leave long tails when fastening off prevents neat sewing; always leave long tails on limbs, spikes and tail to stitch them securely into place without extra patching.