About This Minimals Frog Amigurumi Pattern
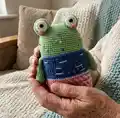
This pattern creates a modern, minimal-style frog amigurumi with striped body details and a tiny cross bag. You will work a single-piece body (head/body/legs) with separate eyes, snout, arms and a small bag for finishing touches. Color changes follow the included symbol chart so you can recreate the striped outfit exactly.
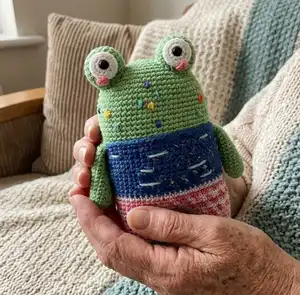
Photo guides and a symbol color chart are included to make color changes simple and visual. The finished doll measures about 15 cm (5.9 inches) when made with the suggested hook and yarn.
Why You'll Love This Minimals Frog Amigurumi Pattern
I absolutely love this pattern because it mixes a simple amigurumi silhouette with playful colorwork that feels modern and fresh. I enjoy how the minimal shapes let small accessory details like the cross bag really stand out. The design is compact and portable, so it is perfect for quick gift projects or to practice color changes. I also love that photos and a symbol chart make following the color stripes much easier.
Switch Things Up
I love to experiment with color changes when making this frog; try soft pastels for a gentler look or bold high-contrast stripes for a playful style.
I often make a mini keychain version by using thinner yarn and a smaller hook to create a tiny pocket-sized frog.
I sometimes replace the plastic eyes with embroidered eyes for a softer, baby-safe option and a different facial expression.
I use different yarn textures like cotton for a firmer finished toy or acrylic for a squishier, washable doll.
I add little accessories like a tiny scarf, hat, or different colored bag to make themed versions for holidays or gifts.
I recommend trying a slightly larger hook for a looser fabric and a cuddly plush style, or a smaller hook for a tight fabric and neat color stripes.
I like to embroider freckles or a smile on the snout for extra personality—experiment with placement before stitching permanently.
If I want posable limbs, I sometimes insert a thin wire or pipe cleaner into the arms before flattening and sewing them on for gentle posing.
For gift sets I create a small matching friend (like a tiny fish or lily pad) using the same palette to make a coordinated pair.
I suggest swapping the cross bag color and strap style to match outfits; a contrasting strap color makes the accessory pop on the finished doll.
Common Mistakes & How to Fix Them
✗ Not checking the symbol color chart before crocheting each round can cause mismatched striping; always consult page 1 and change yarn colors at the indicated rounds.
✗ Forgetting to mark the center space when dividing the legs can result in uneven leg placement; use stitch markers and identify the 6 center stitches before splitting to make the legs symmetrical.
✗ Overstuffing the head and body will distort the shape and make sewing parts difficult; stuff gradually and shape with small amounts of fiberfill until you reach a firm but pliable shape.
✗ Failing to leave a long tail when fastening off the eyes or snout makes sewing them on harder; fasten off with a long tail and use it to sew parts securely in place.