About This Mini Mouse Amigurumi Pattern
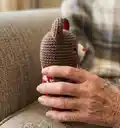
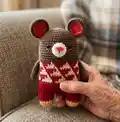
This pattern creates a small, stylized Mini Mouse amigurumi with a colorwork sweater motif and simple limbs. It uses worsted weight yarn and a 3mm hook to achieve a compact 15cm finished toy. The instructions include detailed round-by-round steps, a symbol color chart, and clear assembly notes. You will finish with a cuddly, decorative toy that makes a sweet gift.
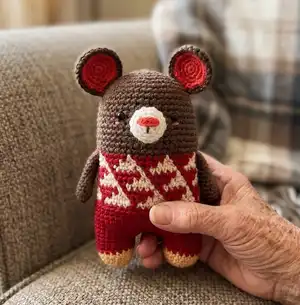
Color changes for the sweater are guided by the included symbol pattern on page 1. The pattern covers head, body, legs, arms, snout, and ears plus finishing tips for placement of features.
Why You'll Love This Mini Mouse Amigurumi Pattern
I absolutely love this pattern because it combines simple amigurumi construction with charming colorwork that gives the toy real personality. I enjoy the step-by-step clarity of the rounds — they make shaping predictable and satisfying. The small size makes this a quick, rewarding make that I can gift or display easily. I also appreciate the practical finishing tips like where to place the eyes and how to join the legs, which save time and frustration.
Switch Things Up
I love customizing this pattern by changing the sweater colors to create unique characters and personalities.
I sometimes swap the yarn color palette for pastel shades to make a softer, baby-friendly version.
I also experiment with different yarn weights and larger hooks to make a chunky, snuggly version of the toy.
I often replace plastic eyes with embroidered eyes for safety if the toy is intended for small children.
I add tiny accessories like a crocheted scarf, a felt bow, or a small hat to personalize each amigurumi.
I encourage trying different facial expressions by moving the snout placement or altering the mouth embroidery slightly.
I sometimes embroider little freckles or blush with yarn for extra character on the cheeks.
I use a small length of wire in the arms for posability when I want a poseable figure for display.
I create matching sets by varying only the colorwork chart so they look like a coordinated family or collection.
I enjoy gifting these with a tiny handmade tag that notes the yarns used — it makes each piece feel special and documented.
Common Mistakes & How to Fix Them
✗ Changing yarn colors without following the symbol chart will misalign the motif; follow the symbol pattern on page 1 and change colors exactly at the indicated rounds.
✗ Not using stitch markers when dividing the legs can cause incorrect stitch placement; mark the 31st stitch of Round 36 and the center spaces to identify leg starts before separating.
✗ Understuffing or overstuffing the legs and head will distort the shape; stuff gradually, check shaping frequently, and aim for firm but not rock-hard stuffing.
✗ Skipping the front loop closure technique will leave an open hole at the leg top; weave the yarn tail through the front loop of each remaining stitch and pull tight to close securely.
✗ Forgetting to flatten the arms instead of stuffing will make assembly awkward; follow the instructions and flatten the arms without stuffing so they sew neatly to the sides.