About This Minimal Monkey Amigurumi Pattern
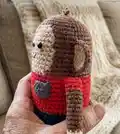
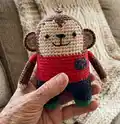
This pattern creates a minimalist monkey amigurumi about 15 cm (5.9 in) tall using worsted weight yarn and a 3.0 mm hook. The design uses color-change charts for the body and legs and written rounds for the head and details. Clear symbol patterns and photos are included to help you place eyes, cheeks, ears, and the pocket.

Includes complete instructions for head, body, legs, arms, ears, pocket, and finishing steps. Ideal for makers who enjoy colorwork and small toy assembly.
Why You'll Love This Minimal Monkey Amigurumi Pattern
I absolutely love this pattern because it combines simple shapes with charming colorwork to create a character that feels modern and lovable. I designed the charted body so you can easily follow color changes without complex counting. I also enjoy how quickly the piece comes together — you can crochet a full doll in a weekend. The tiny details like the pocket, cheek blush, and ear edging make each finished monkey unique and full of personality.
Switch Things Up
I love how easy it is to customize this monkey: change the body colors to create seasonal outfits or use pastel tones for a baby-friendly version.
I sometimes swap the green foot tips for bright yellow or pink to give each monkey its own personality and charm.
If you want a larger plush, I recommend using bulky yarn and a 5mm hook to scale the entire pattern up proportionally.
To make a tiny keychain version, use fingering weight yarn and a 2.5mm hook and replace the stuffing with less fiberfill for a firmer result.
I like adding embroidered eyebrows or different mouth shapes to create moods from cheeky to sleepy—experiment before attaching eyes permanently.
Try adding a removable scarf or tiny crocheted hat for seasonal gifts; I often make simple accessories to match the recipient.
If you prefer safety eyes over glued ones, use the recommended 5mm eyes with washers for secure placement before stuffing the head.
I sometimes attach a small bell inside the body or a loop to hang the monkey as an ornament for added function.
For textured fur, you can switch to a boucle or slightly fuzzy yarn for the brown areas while keeping the face smooth for contrast.
I recommend practicing the ear edging technique on scrap yarn first so the beige/brown join looks neat when assembled.
Common Mistakes & How to Fix Them
✗ Skipping stitch markers when dividing the legs can cause misplacement of the leg openings; place markers and count stitches carefully before splitting to ensure symmetry.
✗ Forgetting to change yarn color based on the symbol chart will ruin the intended design; refer to the color grid and switch yarn at the exact rounds shown in the illustrations.
✗ Overstuffing the head or body makes shaping difficult and lumpy; stuff gradually and evenly, checking shape frequently while adding fiberfill.
✗ Sewing parts without pinning first leads to uneven placement and crooked features; pin each arm, ear, and pocket in place and check positions before stitching permanently.