🧢 Beautiful ✨ Detailed πŸ’ Adorable

Mini Whale Amigurumi Pattern

Mini Whale Amigurumi Pattern
4.2β˜… Rating
1-2 Hours Time Needed
1.6K Made This
βœ‚οΈ

Beginner Friendly Level

Perfect for those just starting their crochet journey, with clear instructions and simple techniques

⏱️

Quick Make

Complete in under 2 hoursβ€”lightning fast fun for instant gratification and quick gifts.

🎁

Tiny Treasure

Small, sweet, and gift-worthy creations that fit perfectly in the palm of your hand with detailed charm.

About This Mini Whale Amigurumi Pattern

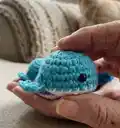
This mini whale pattern creates a sweet, pocket-sized amigurumi using basic crochet techniques. You will make a simple rounded body, a contrasting belly, and a small tail to sew on. It is perfect for using scrap yarn and makes a charming handmade gift.

Mini Whale Amigurumi Pattern crochet pattern - detailed view of completed project

The pattern uses worsted weight yarn and 6mm safety eyes, with clear rounds and an easy assembly. No advanced stitches requiredβ€”perfect for quick makes and beginners.

Why You'll Love This Mini Whale Amigurumi Pattern

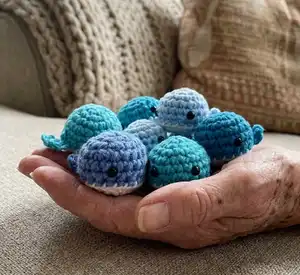
I absolutely love this pattern because it turns small amounts of yarn into an adorable, finished toy so quickly. I enjoy how each whale can have its own personality just by changing color and eye placement. The simple construction makes it relaxing to crochet while still producing a satisfying, polished result. I also appreciate that it is a perfect scrap-busting project β€” you can make a whole pod in one afternoon.

Mini Whale Amigurumi Pattern step 1 - construction progress Mini Whale Amigurumi Pattern step 2 - assembly progress Mini Whale Amigurumi Pattern step 3 - details and accessories Mini Whale Amigurumi Pattern step 4 - final assembly and finishing

Switch Things Up

I love experimenting with colors, so try pastel shades for a softer, baby-friendly whale or bright jewel tones for a playful look.

I often change the belly color to a contrasting shade to make the face pop and add visual interest.

I sometimes substitute safety eyes with embroidered eyes for a child-safe version perfect for baby gifts.

If you want a bigger whale, I change to a bulkier yarn and a larger hook to get a chunkier finished toy.

To make a tiny keychain, I use fingering weight yarn and a smaller hook, then attach a split ring to the top when finished.

I like to add a tiny embroidered smile or freckles to give each whale a distinct personality and expression.

For a more realistic fin or tail, I modify the tail shaping by adding an extra row of stitches before finishing.

I sometimes add a small loop at the top of the body so the whale can be hung as an ornament or charm.

Try mixing yarn textures like cotton for a firm toy or acrylic for a softer, squishier whale depending on the use.

I recommend testing eye placement on a pin first so you can adjust expressions before permanently attaching eyes or stitching the belly.

Common Mistakes & How to Fix Them

βœ— Attaching safety eyes too low or too high will change the whale's expression; place the eyes between the 5th and 6th rows and space them 4 stitches apart as instructed. βœ— Forgetting to stuff while sewing can make the body collapse later on; begin stuffing about half-way through assembly and add more as you close the opening. βœ— Weaving in ends only at the end causes a messy finish and loose tails; weave in ends as you go and leave a long tail where the pattern asks for sewing. βœ— Skipping stitch counts during increases will make the body shape uneven; count stitches after each increase round to ensure you have the correct stitch totals.

Mini Whale Amigurumi Pattern

Make a delightful mini whale amigurumi that is perfect for gifts, keychains, or a shelf of tiny sea friends. This pattern uses simple stitches and a small amount of worsted weight yarn so you can crochet several in one afternoon. Clear rounds and easy assembly make it ideal for quick, satisfying makes.

Beginner Friendly 1-2 Hours

Materials Needed for Mini Whale Amigurumi Pattern

β€” Main Fabric

  • 01
    Worsted weight yarn (#4) (Red Heart Soft Yarn was used for these)
  • 02
    Small amounts of contrasting yarn for belly (white or light color) as needed

β€” Tools Required

  • 01
    One pair of 6mm safety eyes
  • 02
    Polyfil Stuffing

Progress Tracker

0% Complete

β€” Body :

Info :

Body (make 1)

Round 1 :

Using the color for the body, ch 2. Sc 6 into 2nd ch from hook. (6)

Round 2 :

Inc in each st around. (12)

Round 3 :

*Sc in next st, inc. Repeat from * around. (18)

Round 4 :

Sc in each st around. (18)

Round 5-6 :

repeat Round 4. F/o, weave in ends. (18)

Info :

*attach safety eyes in between the 5th and 6th rows, 4 st apart.*

β€” Belly :

Info :

Belly (make 1)

Round 1 :

Using the color for the belly, ch 2. Sc 6 into 2nd ch from hook. (6)

Round 2 :

Inc in each st around. (12)

Round 3 :

*Sc in next st, inc. Repeat from * around. (18)

Info :

F/o and leave long tail for sewing.

β€” Tail :

Info :

Tail (make 1)

Instruction :

Ch 3. Turn, sc into 2nd ch from hook. Sc in next st. Ch 3, sc in 3rd st from hook, sl st into the side of the next st. Ch 3, sc in 3rd st from hook, and sl st into the next st. Continue making sl st until you reach the bottom of your very first st. F/o and leave tail for sewing.

β€” Assembly :

Instruction :

Sew the belly to the body, begin stuffing about half-way through. Weave in ends.

Instruction :

Sew the tail in the 6th row of the body, directly behind the two eyes on the opposite side of the whale.

Info :

Enjoy! Follow us on Instagram @crocheting or find our etsy shop "The Crocheting" for more!

Assembly Instructions

  • Sew the belly to the body, begin stuffing about half-way through to ensure a rounded shape and even fill.
  • Weave in ends after attaching the belly so the edges are neat and the belly is secured.
  • Sew the tail into the 6th row of the body, positioning it directly behind the two eyes on the opposite side of the whale.
  • Attach safety eyes between the 5th and 6th rows, spacing them 4 stitches apart before final stuffing and closing.

Important Notes

  • πŸ’‘Attach safety eyes between the 5th and 6th rows and space them 4 stitches apart for the correct facial placement.
  • πŸ’‘Begin stuffing the body about halfway through assembly and continue stuffing as you close to maintain a smooth shape.
  • πŸ’‘Leave a long tail on the belly and tail pieces for sewing so you can join them securely to the body.
  • πŸ’‘Weave in ends and secure all joins firmly to ensure the mini whale holds up to handling.

This mini whale was designed to bring a little ocean joy to your handmade collection. Make a whole pod in different colors to brighten someone's day. Perfect for gifts, keychains, or a tiny decorative touch for any room. πŸ‹πŸ§Ά

You ask,

we answer.

FAQs

What size will the finished piece be?

The finished mini whale is approximately 2-3 inches (5-8 cm) long when made with standard worsted weight yarn and small hook sizes typical for amigurumi.

Can I use different yarn weights for this pattern?

Yes, you can use different yarn weights, but the final size will change; using a bulkier yarn will give a larger whale while thinner yarn will create a tiny version.

Do I need prior crochet experience for this pattern?

This pattern is beginner friendly and uses basic stitches like single crochet and increases, so beginners with basic knowledge should be able to follow it.

How do I attach the safety eyes correctly?

Attach the 6mm safety eyes between the 5th and 6th rows, spacing them 4 stitches apart, and secure the safety backs firmly before final stuffing and closing.