About This Mini Turtle Amigurumi Pattern
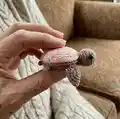
This pattern teaches you to crochet a tiny turtle amigurumi, including shell, belly, legs, tail and head. Clear round-by-round instructions and helpful photos guide you through joining and finishing steps. The design is versatile so you can change colors and add embroidery for a personalized touch. Perfect for small gifts and keychain-sized friends.
Worked mostly in single crochet and joined in the BLO, the shell and belly join creates the legs and tail. The pattern includes an alternative head for plush yarn and tips for adding safety eyes or half-beads.
Why You'll Love This Mini Turtle Amigurumi Pattern
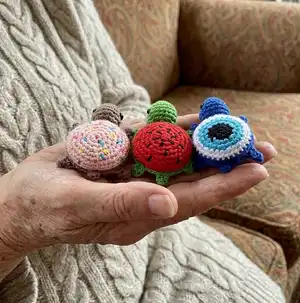
I absolutely love this pattern because it transforms simple rounds into a charming little turtle that fits in the palm of your hand. I enjoy how the shell and belly join sequence naturally forms legs and a tail while you stitch, which feels clever and satisfying. The pattern allows for playful customization with colors and embroidery so each turtle can have its own personality. Making these tiny toys is fast, joyful and perfect for using leftover yarn from other projects.
Switch Things Up
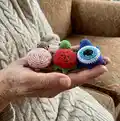
I love customizing these mini turtles by swapping yarn colors to create different personalities and moods.
I sometimes use bright, toy-friendly colors for a playful look or muted earthy greens for a more realistic turtle.
Try using thicker yarn and a larger hook to make a chunky, cuddly version that's easier to handle as a small toy.
Or go the opposite way and use finer thread and a tiny hook to make an even smaller keychain-sized turtle.
I often replace safety eyes with embroidered eyes for baby-safe toys and a soft look.
Adding embroidery on the shell makes each turtle feel handmade and special — try spiral motifs or small flowers for variety.
You can glue a small magnet inside the belly to turn the turtle into a fridge magnet gift.
I sometimes attach a keyring during the joining step so the turtle becomes an instant keychain accessory.
Consider using sparkly or variegated yarn for the shell to add texture and visual interest without extra embroidery.
I recommend experimenting with stuffing firmness to achieve different silhouettes — firmer stuffing for a rounder body, lighter stuffing for a softer squishable toy.
Common Mistakes & How to Fix Them
✗ Joining shell and belly before aligning wrong sides can create gaps; always place shell and belly facing wrong sides together before joining and work in BLO of both pieces.
✗ Forgetting to work in BLO when joining will hide the intended edge; ensure you crocheted the joining round into the back loops only of both pieces.
✗ Skipping stitch counts during joining makes the legs and tail placement uneven; follow the exact sequence of 3sc, ch4, etc., and keep track by counting to maintain a total of 36 stitches.
✗ Overstuffing the head or body will distort the shape; stuff gradually and evenly until you reach a firm but not stretched finish to keep shape neat.
✗ Placing safety eyes too close or too far apart changes expression; insert safety eyes between the rounds indicated (rounds 5-6 for small head) leaving 8-9 sc between eyes as directed.