About This Mini Parrot Amigurumi Pattern
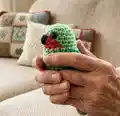
This pattern creates a tiny amigurumi parrot about 7 cm (3 in) tall, crocheted from the top down with lightweight cotton yarn. It features simple shaping, color changes for a two-tone face and an embroidered beak for personality. You will enjoy quick rounds, minimal sewing and an adorable result that makes lovely gifts or decorations.
Designed to be crocheted with Phildar Coton 3 (or similar cotton), each parrot works up quickly and holds shape well with fiberfill. Explanatory pictures are included to help with the beak and wing assembly.
Why You'll Love This Mini Parrot Amigurumi Pattern
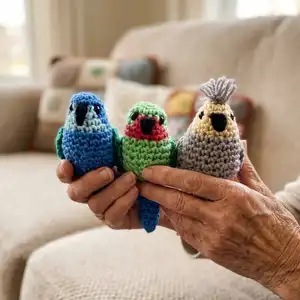
I absolutely love this pattern because it captures a lot of personality with very few stitches and simple shaping. I enjoy how quickly a whole flock can be made, allowing for playful color combinations and gifting. The tiny size makes these parrots perfect for keychains, decor or little surprises that brighten someone�s day. I also love that the pattern uses common stitches and minimal sewing, so it�s satisfying and accessible.
Switch Things Up
I love how easy it is to customize this mini parrot by changing yarn colors — try pastel palettes for a soft look or neon brights for extra fun.
You can change the size by swapping yarn weight and hook; bulky yarn with a larger hook makes a chunky parrot, while finer yarn and a smaller hook makes a tiny keychain bird.
I often add embroidered details like tiny eyelashes or cheek spots to change the expression and personality of each bird.
For more interest, vary the tail: make it longer, add stripes, or work extra rows to create a fan-shaped tail.
I sometimes substitute safety eyes with French knot embroidered eyes for a fully handmade look and to keep them toy-safe for all ages.
Try different wing shapes — longer, narrower or layered wings — by adjusting rounds and adding small picot edges for texture.
I occasionally add a small felt or crocheted leaf as a perch accessory for display or gift presentation.
To make a set, mix colors and sizes and mount the birds on a wooden dowel or branch with hot glue for a charming decorative piece.
If you want posability, you can insert a small wire stem into the body before stuffing and closing to gently shape the neck or tail.
Don't hesitate to add tiny accessories like a crocheted hat, scarf, or tiny beads for a collar — small touches make each parrot unique and gift-ready.
Common Mistakes & How to Fix Them
✗ Skipping stitch markers during rounds can lead to losing track of the beginning of rounds; place a stitch marker at the start of every round and move it up as you go.
✗ Not changing colors at the exact stitch can cause uneven color transitions around the face; always change yarn in the last stitch as instructed to keep edges neat.
✗ Overstuffing the body makes shaping difficult and causes bulging in small pieces; stuff gradually and lightly to keep a smooth rounded shape.
✗ Sewing wings and eyes without pinning first can result in uneven placement; pin or baste the parts in place and check symmetry before final sewing.
✗ Rushing the invisible decrease will leave gaps; take time to do the invisible decrease correctly and check your stitch count after each decrease round.