🧶 Beautiful ✨ Detailed 💝 Adorable

Magic Pine Cone Amigurumi Pattern

Magic Pine Cone Amigurumi Pattern
3.9★ Rating
2-3 Hours Time Needed
2.5K Made This
✂️

Intermediate Level

Ideal for those with basic crochet experience, featuring slightly more advanced stitches and techniques to expand your skills.

⏱️

Bite-Sized Project

Finishes in 2-4 hours—perfect for an afternoon of creative relaxation.

🧸

Cute Companion

An adorable friend to cherish, handcrafted with love to bring comfort and joy for years to come.

About This Magic Pine Cone Amigurumi Pattern

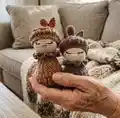
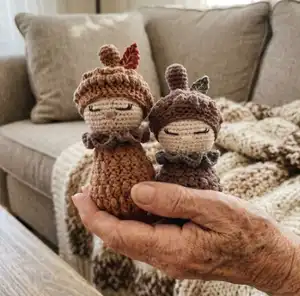
This pattern makes a small, textured pine cone amigurumi featuring bobble stitch texture, a tiny hat, collar, stalk and leaf. The design uses cotton yarn and a 2.5mm hook to create fine detail and a neat finish. Instructions include step-by-step rounds, a bobble stitch tutorial and assembly notes to complete a 14 cm finished piece.

Magic Pine Cone Amigurumi Pattern crochet pattern - detailed view of completed project

Perfect for intermediate crocheters who enjoy texture and shaping. The pattern includes material lists, abbreviations, color charts and clear sewing/embroidery placement details.

Why You'll Love This Magic Pine Cone Amigurumi Pattern

I absolutely love this pattern because it combines a cozy autumn aesthetic with playful textured stitches that really bring the character to life. I enjoy designing small pieces that are quick to make but still offer satisfying detail through the bobble stitch. This pattern lets me experiment with color and tiny embroidery details like lashes and a blushy cheek. It is compact, giftable and always a joy to finish and display.

Magic Pine Cone Amigurumi Pattern step 1 - construction progress Magic Pine Cone Amigurumi Pattern step 2 - assembly progress Magic Pine Cone Amigurumi Pattern step 3 - details and accessories Magic Pine Cone Amigurumi Pattern step 4 - final assembly and finishing

Switch Things Up

I love how easy it is to customize this pine cone by changing yarn colors and textures.

I sometimes swap the main brown for a soft neutral or a pastel to create a whimsical friend rather than an autumn piece.

Want it smaller or larger? Change yarn weight and hook size; for a chunkier, cuddlier pine cone use a bulkier yarn and larger hook.

I often replace the cotton with a slightly fuzzy yarn for a softer, doll-like finish, but be aware it reduces stitch definition.

Try different bobble stitch counts to make the scales more or less pronounced — adding an extra loop increases relief.

For seasonal sets, make a group with varied hat colors and embroidered expressions to give each character a personality.

I sometimes add tiny safety eyes or a small embroidered smile to vary the facial expression and character.

Swap the golden embroidery thread on the leaf for metallic or contrasting thread to create a focal detail.

Make a keychain version by reducing hook size and yarn weight, and adding a small metal ring to the hat or stalk.

I also enjoy creating outfits or mini accessories like scarves or tiny acorns to pair with the pine cone for display or gifting.

Common Mistakes & How to Fix Them

✗ Skipping the stitch marker while working continuous rounds leads to losing the start of the round; place a stitch marker at the first stitch and move it each round to maintain correct stitch counts. ✗ Overstuffing the head or body can distort the shape and show through the stitches; stuff gradually and evenly, using small amounts until you reach a firm but not overly tight fill. ✗ Not counting stitches after increases and decreases causes the rounds to drift from the pattern; count your stitches at the end of each round and correct any discrepancies immediately. ✗ Pulling bobble stitch loops too tightly makes the bobble flat and indistinct; maintain a consistent, moderate tension when pulling loops and finish the bobble by pulling through all loops evenly. ✗ Forgetting to leave a long tail when fastening off prevents easy sewing and assembly; always leave enough yarn when fastening off to sew parts securely without adding extra joins later.

Magic Pine Cone Amigurumi Pattern

Create a tiny, whimsical pine cone amigurumi perfect for gifts, decor, or a cozy pocket companion. This pattern guides you through textured bobble stitches, simple shaping, and sweet facial embroidery. You will enjoy clear step-by-step rounds, a materials list, and assembly tips to finish a charming 14 cm character.

Intermediate 2-3 Hours

Materials Needed for Magic Pine Cone Amigurumi Pattern

— Main Fabric

  • 01
    Scheepjes Catona n° 404 - 1 x 25 grams (used for face / light details)
  • 02
    Scheepjes Catona n° 507 - 1 x 50 grams (main brown color option)
  • 03
    Scheepjes Catona n° 387 - 1 x 25 grams (green for leaf)
  • 04
    Scheepjes Stone Washed n° 804 - 1 x 50 grams (variation body/head color option)
  • 05
    Scheepjes Catona n° 157 - 1 x 50 grams (variation accent color)
  • 06
    Scheepjes Catona n° 504 - 1 x 25 grams (variation accent color)
  • 07
    Cotton yarn (general) as specified for colors above, small amounts for embroidery and facial details

— Tools Required

  • 01
    Crochet hook size 2.5mm
  • 02
    Yarn needle for sewing and weaving ends
  • 03
    Cotton yarn (see color chart) - small skeins
  • 04
    Yarn for embroidering (contrast color for lashes and nose)
  • 05
    Fiberfill (polyester stuffing)
  • 06
    Scissors
  • 07
    Stitch marker(s)
  • 08
    Embroidery/golden thread for leaf veins (optional)

Progress Tracker

0% Complete

— How to make a bobble stitch :

Info :

Yarn over, insert the hook into stitch, pull up a loop, yarn over and pull through 2 loops only (like the beginning of one double crochet stitch) : we have 2 loops on the hook;

Info :

Yarn over, insert the hook into the same stitch as before, pull up a loop, yarn over and pull through 2 loops only : we have 3 loops on the hook;

Info :

Yarn over, insert the hook into the same stitch as before, pull up a loop, yarn over and pull through 2 loops only : we have 4 loops on the hook;

Info :

Yarn over, insert the hook into the same stitch as before, pull up a loop, yarn over and pull through 2 loops only : we have 5 loops on the hook;

Info :

Yarn over, pull through all 5 loops at once;

Info :

Single crochet in next stitch;

Info :

Repeat the number of times indicated.

Info :

It is possible to vary the thickness of the bobble stitch. For example, to obtain more relief, we can repeat the work 5 times instead of 4 to have 6 loops on the hook.

— Head :

Round 1 :

6sc in a magic ring (6)

Round 2 :

inc x 6 (12)

Round 3 :

(1sc, inc) x 6 (18)

Round 4 :

(2sc, inc) x 6 (24)

Round 5 :

(3sc, inc) x 6 (30)

Round 6 :

(4sc, inc) x 6 (36)

Round 7 :

(5sc, inc) x 6 (42)

Round 8 :

(6sc, inc) x 6 (48)

Round 9-15 :

Sc in all st [7 rounds] (48)

Round 16 :

(6sc, dec) x 6 (42)

Round 17 :

(5sc, dec) x 6 (36)

Round 18 :

(4sc, dec) x 6 (30)

Round 19 :

(3sc, dec) x 6 (24)

Info :

Fasten off and leaving enough yarn for sewing. Stuff firmly.

— Leaf :

Round 1 :

4sc in a magic ring (4)

Round 2 :

(1sc, inc) x 2 (6)

Round 3 :

(2sc, inc) x 2 (8)

Round 4 :

(3sc, inc) x 2 (10)

Round 5 :

(4sc, inc) x 2 (12)

Round 6-8 :

Sc in all st [3 rounds] (12)

Round 9 :

(2sc, dec) x 3 (9)

Round 10 :

(1sc, dec) x 3 (6)

Info :

Fasten off and leaving enough yarn for sewing. Do not stuff.

— Collar :

Info :

Work in rows with green yarn: Ch27, start in the 2nd ch from the hook.

Round 1 :

26sc, ch2, turn (26)

Round 2 :

3Dc in all st, ch1, turn (78)

Round 3 :

1Hdc in all st (78)

Info :

Fasten off and leaving enough yarn for sewing.

— Body :

Round 1 :

6sc in a magic ring (6)

Round 2 :

inc x 6 (12)

Round 3 :

inc x 12 (24)

Round 4 :

(BS, 1sc) x 12 (24)

Round 5 :

(1sc, inc) x 12 (36)

Round 6 :

(BS, 1sc) x 18 (36)

Round 7 :

(2sc, inc) x 12 (48)

Round 8 :

(BS, 1sc) x 24 (48)

Round 9 :

Sc in the back loop of all st (48)

Round 10 :

(BS, 1sc) x 24 (48)

Round 11 :

(2sc, dec) x 12 (36)

Round 12 :

(BS, 1sc) x 18 (36)

Round 13 :

Sc in all st (36)

Round 14 :

(BS, 1sc) x 18 (36)

Round 15 :

(4sc, dec) x 6 (30)

Round 16 :

(BS, 1sc) x 15 (30)

Round 17 :

(3sc, dec) x 6 (24)

Round 18 :

(BS, 1sc) x 12 (24)

Round 19 :

Sc in all st (24)

Info :

Fasten off and hide the yarn. Stuff firmly.

— Stalk :

Round 1 :

6sc in a magic ring (6)

Round 2 :

inc x 6 (12)

Round 3 :

(3sc, inc) x 3 (15)

Round 4 :

Sc in the back loop of all st (15)

Round 5 :

Sc in all st (15)

Round 6 :

(3sc, dec) x 3 (12)

Round 7 :

Sc in all st (12)

Round 8 :

(2sc, dec) x 3 (9)

Round 9-11 :

Sc in all st [3 rounds] (9)

Info :

Fasten off and leaving enough yarn for sewing. Stuff firmly.

— Hat :

Round 1 :

6sc in a magic ring (6)

Round 2 :

inc x 6 (12)

Round 3 :

inc x 12 (24)

Round 4 :

(BS, 1sc) x 12 (24)

Round 5 :

(1sc, inc) x 12 (36)

Round 6 :

(BS, 1sc) x 18 (36)

Round 7 :

(2sc, inc) x 12 (48)

Round 8 :

(BS, 1sc) x 24 (48)

Round 9 :

(3sc, inc) x 12 (60)

Round 10 :

(BS, 1sc) x 30 (60)

Round 11 :

(3sc, dec) x 12 (48)

Round 12 :

(6sc, dec) x 6 (42)

Round 13 :

(5sc, dec) x 6 (36)

Round 14 :

(4sc, dec) x 6 (30)

Info :

Fasten off and hide the yarn.

— Assembling :

Info :

With golden thread, embroider the veins of the leaf.

Info :

Sew the stalk to the top of the hat.

Info :

Sew the leaf between the stalk and the hat.

Info :

Sew the head and body together.

Info :

Embroider the nose between round 14 and round 15, 3 sts long. Embroider the base of the eyes between round 13 and round 14, 3 sts long. Embroider the lashes one row above.

Info :

You can use blush to color the cheeks.

Info :

Attach the collar around the neck and put the hat on the head.

Assembly Instructions

  • With golden thread, embroider the veins of the leaf before attaching it to the hat for a neat finish.
  • Sew the stalk to the top center of the hat, then place and sew the leaf between the stalk and the hat to hide the join.
  • Sew the head to the top opening of the body, aligning center stitches so the face sits evenly and securely.
  • Embroider facial details: the nose between round 14 and 15 (3 sts long), the base of the eyes between rounds 13 and 14 (3 sts long), and the lashes one row above.
  • Attach the collar around the neck with small even stitches and put the hat on the head, adjusting placement for a balanced look.

Important Notes

  • 💡Each part is worked in continuous rounds (do not join rounds with a slip stitch) unless instructed otherwise in the pattern.
  • 💡Use a stitch marker to mark the beginning of each round to help you keep accurate stitch counts and placement.
  • 💡The color of the round/row will be indicated with a square just before the round/row instructions in the pattern.
  • 💡Fasten off leaving enough yarn for sewing where noted to make assembly easier and cleaner.

Congratulations on finishing your Magic Pine Cone! This little amigurumi is full of texture and autumn charm, perfect for gifting or cozy display. Thank you for supporting handmade pattern design and happy crocheting! 🧶✨🍂

You ask,

we answer.

FAQs

What size will the finished piece be?

The finished amigurumi measures about 14 cm tall when using the recommended yarn and 2.5mm hook.

Can I use different yarn weights for this pattern?

Yes, but changing yarn weight will affect the final size and texture; adjust your hook size accordingly and check stitch counts as you go.

Do I need prior crochet experience for this pattern?

This pattern is rated intermediate, so basic knowledge of continuous rounds, increases, decreases and bobble stitches is recommended.

How long does this project typically take to complete?

Most crafters complete this project in 2-3 hours, though time may vary depending on experience and how much finishing work you do.