๐Ÿงถ Beautiful โœจ Detailed ๐Ÿ’ Adorable

Keychain Mini Penguin Amigurumi Pattern

Keychain Mini Penguin Amigurumi Pattern
4.3โ˜… Rating
2-3 Hours Time Needed
2.4K Made This
โœ‚๏ธ

Intermediate Level

Ideal for those with basic crochet experience, featuring slightly more advanced stitches and techniques to expand your skills.

โฑ๏ธ

Bite-Sized Project

Finishes in 2-4 hoursโ€”perfect for an afternoon of creative relaxation.

๐Ÿงธ

Cute Companion

An adorable friend to cherish, handcrafted with love to bring comfort and joy for years to come.

About This Keychain Mini Penguin Amigurumi Pattern

This pattern makes a tiny keychain penguin using sport/fine weight yarn and a 2.00 mm hook. It includes full round-by-round instructions for head details, body shaping, wings, paws, tail, beak and simple assembly. The design is perfect for gifting or making a whole flock of colorful mini penguins.

Keychain Mini Penguin Amigurumi Pattern crochet pattern - detailed view of completed project

You will learn how to work continuous rounds, join color sections, embroider sleepy eyes and attach small parts securely. Clear photos and step notes guide placement and finishing.

Why You'll Love This Keychain Mini Penguin Amigurumi Pattern

I absolutely love this pattern because it turns simple stitches into a characterful little friend that feels handmade and special. I enjoy the compact sizeโ€”these keychain penguins are quick to make and perfect for trying new color combinations. The pattern lets me practice shaping and sewing skills while producing a useful finished item. I also love how forgiving the design is: small adjustments to yarn or stuffing change the personality of each penguin.

Keychain Mini Penguin Amigurumi Pattern step 1 - construction progress Keychain Mini Penguin Amigurumi Pattern step 2 - assembly progress Keychain Mini Penguin Amigurumi Pattern step 3 - details and accessories Keychain Mini Penguin Amigurumi Pattern step 4 - final assembly and finishing

Switch Things Up

I love how versatile this mini penguin is for customization; try changing the body color to create seasonal or themed versions.

I often adjust the yarn weight and hook to make different sizesโ€”use finer yarn for micro keychains or bulkier yarn for a plush version.

I like to swap the sleepy embroidered eyes for tiny safety eyes to give a wide-awake look, or use pastel yarns for a softer aesthetic.

I sometimes add tiny accessories like a crocheted scarf, bow, or miniature hat to make each penguin unique and gift-ready.

I recommend trying different beak colors or slightly changing its placement to alter the character's expression and charm.

I sometimes embroider tiny rosy cheeks with pink thread to add warmth to the face and make the penguin even more endearing.

I also experiment with bead or sequin embellishments on the wings for a sparkly, playful finish for party favors.

When making a set, I vary the wing positions slightly before sewing to create playful poses across the group.

For a posable version, I have inserted thin wire into the wings before stuffing so they can be gently shaped after assembly.

I love combining yarn brands and texturesโ€”trying cotton for a crisp finish or acrylic for a softer, more durable toy.

Don't be afraid to adjust stuffing levels to create either a squishy or firm feel; it changes the personality of the finished penguin.

Common Mistakes & How to Fix Them

โœ— Skipping the stitch marker when working in continuous spiral rounds can cause you to lose track of the beginning; place a marker at the first stitch of each round to keep accurate counts. โœ— Not stuffing as you go leads to uneven shapes and lumps; add small amounts of stuffing gradually while shaping to maintain a smooth body and head contour. โœ— Changing tension between color sections results in visible ridges or mismatched sizes; maintain consistent tension throughout and check alignment before sewing pieces together. โœ— Forgetting to leave long sewing tails makes assembly difficult and fiddly; always fasten off leaving a generous length for sewing and hiding ends inside the toy. โœ— Using safety eyes without checking placement may give an unnatural expression; mark and check eye placement between rows 10 and 11 and at about 7-8 stitches apart before fixing them. โœ— Overstuffing the head and body makes sewing joins bulky and uneven; stuff firmly but not excessively so parts sit flat and seams are easy to join.

Keychain Mini Penguin Amigurumi Pattern

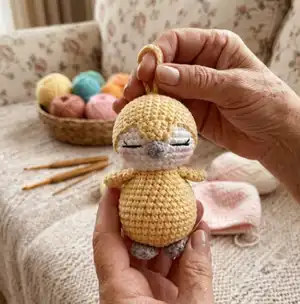
Make a sweet, pocket-sized penguin keychain with this detailed amigurumi pattern. You will enjoy clear step-by-step rounds for the head, body, wings, paws, tail and tiny beak. The pattern uses sport/fine weight yarn and a 2.00 mm hook to create a 9.5 cm (3.7 in) mini penguin you can personalize. Perfect for gifts, bag charms, or little collectibles.

Intermediate 2-3 Hours

Materials Needed for Keychain Mini Penguin Amigurumi Pattern

โ€” Main Fabric

  • 01
    Yarn Art Jeans (50g/160 m, 55% cotton / 45% acrylic, Sport / Fine): color No 62 (white)
  • 02
    Yarn Art Jeans (50g/160 m, 55% cotton / 45% acrylic, Sport / Fine): color No 88 (yellow)
  • 03
    Yarn Art Jeans (50g/160 m, 55% cotton / 45% acrylic, Sport / Fine): color No 80 (light gray)
  • 04
    Suitable yarn alternative: Alize Cotton Gold (55% cotton 45% acrylic, 100g/330m)
  • 05
    Suitable yarn alternative: Schachenmayr Catania Originals (100% cotton, 50g/125m, 5 ply)
  • 06
    Hollowfibre stuffing (small amounts for head and body)

โ€” Tools Required

  • 01
    Crochet hook size 2.00 mm (US B, UK 14)
  • 02
    Polyester stuffing (hollowfibre)
  • 03
    Thin black embroidery thread for eyes
  • 04
    Black beads or safety eyes 4-5 mm (optional)
  • 05
    Yarn needle for sewing details and joining parts
  • 06
    Scissors
  • 07
    Stitch marker or a piece of scrap yarn
  • 08
    Keychain fittings (ring, chain, clasp)

Progress Tracker

0% Complete

โ€” Head :

Info :

Use the white yarn.

Round 1 :

6sc in MR (6)

Round 2 :

6 inc (12)

Round 3 :

(1sc, inc)*6 times (18)

Round 4 :

1sc, inc, (2sc, inc)*5 times,1sc (24)

Round 5 :

(3sc, inc)*6 times (30)

Round 6 :

2sc, inc, (4sc, inc)*5 times,2sc (36)

Round 7-12 :

36 sc (6 rounds)

Round 13 :

2sc, dec, (4sc, dec)*5 times,2sc (30)

Round 14 :

(3sc, dec)*6 times (24)

Round 15 :

1sc, dec, (2sc, dec)*5 times,1sc (18), slst.

Info :

Fasten the thread, leave a long end for sewing. If you are using safety eyes, place them between rows 10 and 11 of the head at 7-8 sc. Head tightly stuffed with filler (Image 1-2).

Info :

Crochet another head part:

Info :

Use the yellow yarn.

Round 1 :

6sc in MR (6)

Round 2 :

6 inc (12)

Round 3 :

(1sc, inc)*6 times (18)

Round 4 :

1sc, inc, (2sc, inc)*5 times,1sc (24)

Round 5 :

(3sc, inc)*6 times (30)

Round 6 :

2sc, inc, (4sc, inc)*5 times,2sc (36)

Round 7-13 :

36 sc (7 rounds) (Image 3-5)

Info :

Fasten the thread, leave a long end for sewing. Since the volume and height of your penguin's head may differ from mine after filling, the 13th row may not be necessary.
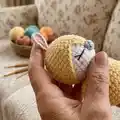
Info :

From the end of the 13th row count forward 16 sc and join the new yarn to the 17th sc, then crochet (Image 6):

Round 1 :

ch1 (this is the 1st sc of the row),5 sc, turn the detail (6) (Image 7-8)

Round 2 :

from the second sc 5 sc, turn the detail (5) (Image 9-10)

Round 3 :

from the second sc 4 sc, turn the detail (4)

Round 4 :

from the second sc 3 sc, turn the detail (3)

Round 5 :

from the second sc 2 sc (2)

Info :

Thread secure, hide the end of the thread. Sew this part to the head (Image 12-14).

โ€” Beak :

Info :

Use the light gray yarn

Round 1 :

6 sc in MR

Round 2 :

6 sc, slst.

Info :

Fasten the thread, leave a long end for sewing. Beak sew right under, wedge-shaped part of the penguin's face. (Image 15)

Info :

We embroider eyes in the way as on the photos (Image 16 -20).

Info :

If you are sewing eyes, place them between rows 10 and 11 of the head at a distance of 7-8 sc (Image 21).

โ€” Body :

Info :

Use the yellow yarn.

Round 1 :

6sc in MR (6)

Round 2 :

6 inc (12)

Round 3 :

(1sc, inc)*6 times (18)

Round 4 :

1sc, inc, (2sc, inc)*5 times,1sc (24)

Round 5 :

(3sc, inc)*6 times (30)

Round 6 :

2sc, inc, (4sc, inc)*5 times,2sc (36)

Round 7-10 :

36 sc (4 rounds)

Round 11 :

(10sc, dec) *3 (33)

Round 12 :

33sc

Round 13 :

(9sc, dec) *3 (30)

Round 14 :

30sc

Round 15 :

(8sc, dec) *3 (27)

Round 16 :

(7sc, dec) *3 (24)

Round 17 :

(6sc, dec) *3 (21)

Round 18 :

(5sc, dec) *3 (18), slst.

Info :

Thread secure, hide the end of the thread. Head tightly stuffed with filler. (Image 22-23)

Info :

Sew the head to the body of the penguin. (Image 24-26)

โ€” Wings (2 parts) :

Info :

Use the yellow yarn.

Round 1 :

6 sc in MR

Round 2 :

(1sc, inc) *3 (9)

Round 3 :

9 sc (9)

Round 4 :

(2sc, inc) *3 (12)

Round 5 :

(3sc, inc) *3 (15)

Info :

Detail fold in half and crochet 7 sc. Fasten the thread, leave a long end for sewing. (Image 27)

Info :

Wings sew between the 17 and 18 rows of the body of a penguin. (Image 28)

โ€” Paws (2 parts) :

Info :

Use the light gray yarn.

Round 1 :

6 sc in MR

Round 2 :

(1sc, inc)*3 times (9)

Round 3-4 :

9sc (2 rounds)

Info :

Detail fold in half and crochet 4 sc. Fasten the thread, leave a long end for sewing. (Image 29)

Info :

We sew to the body at a distance 1 - 2 sc.

โ€” Tail (1 detail) :

Info :

Use the yellow yarn.

Round 1 :

6 sc in MR

Round 2 :

(1sc, inc)*3 times (9)

Info :

Detail fold in half and crochet 4 sc. Fasten the thread, leave a long end for sewing. (Image 30) Sew on the body as shown in the photo above. (Image 31)

Info :

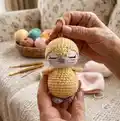
Place keychain ring and your mini penguin is done!

Assembly Instructions

  • Sew the wedge-shaped yellow head detail to the white face section so the beak will sit centered just under the wedge, aligning edges before stitching (see Images 12-14).
  • Attach the beak just under the wedge-shaped part of the face using the long tail from the beak, securing tightly with hidden stitches (Image 15).
  • Sew the head to the body by matching the opening of the head to the top of the body and whipstitching evenly around to avoid gaps (Image 24-26).
  • Place and sew wings between the 17th and 18th rows of the body so they sit symmetrically on each side (Image 28).
  • Sew the folded paws and tail using the long sewing tails; position paws 1-2 stitches apart for balance and place the tail centered at the back (Image 29-31).
  • If using a keychain, stitch through the top stitches of the head and attach keychain fittings securely before finishing; hide ends inside the body.

Important Notes

  • ๐Ÿ’กThis pattern is written using US crochet terminology and is appropriate for crocheters with basic to intermediate amigurumi skills.
  • ๐Ÿ’กWork in a continuous spiral unless otherwise stated and use a stitch marker to mark the beginning of each round.
  • ๐Ÿ’กFasten off always with needle join to get a neat result and leave long sewing tails for assembly.
  • ๐Ÿ’กStuff your amigurumi as you go with hollowfibre, stuffing firmly but not overfilling to maintain correct shape.
  • ๐Ÿ’กUse thin embroidery thread for sleepy eyes or small safety eyes (4-5 mm) placed between rows 10 and 11 at about 7-8 sc apart.

This little Keychain Mini Penguin is a sweet and speedy project that makes perfect gifts and bag charms. Create a whole flock in different colors and give them to friends and family. Small, charming, and full of personality โ€” a joyful little make to brighten any day. ๐Ÿงถ๐Ÿงโœจ

You ask,

we answer.

FAQs

What size will the finished piece be?

If you use the recommended yarn and a 2.00 mm hook, the finished penguin measures approximately 9.5 cm tall (3.7 inches).

Can I use different yarn weights for this pattern?

Yes, but changing yarn weight will affect the final size; use an appropriate hook for your chosen yarn and expect a larger or smaller penguin.

Do I need prior crochet experience for this pattern?

This pattern is rated intermediate, so basic knowledge of single crochet, increases, decreases, continuous rounds, and simple sewing is recommended.

How long does this project typically take to complete?

Most crocheters finish this mini keychain in about 2-3 hours, though time varies with experience and finishing details.