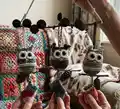
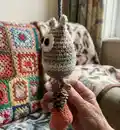
Create tiny, charming Hopeful Owls to hang on branches or give as sweet gifts. This pattern uses DK yarn and a 3.5mm hook to produce small amigurumi owls with ear tufts, button eyes and a little stocking. You will love how quickly each owl comes together and how unique each one looks using mixed yarns and simple finishing techniques.
Progress Tracker
0% Complete
— Owl body :
Round 1 :
make a Magic Circle of 6dc
Round 2 :
2dc in each stitch (12sts)
Round 3 :
(1dc, 2dc in the next st) x 6 (18sts)
Round 4 :
(2dc, 2dc in the next st) x 6 (24sts)
Round 5 :
(3dc, 2dc in the next st) x 6 (30sts)
Round 12 :
(3dc, dc2tog) x 6 (24sts)
Round 14 :
(6dc, dc2tog) x 3 (21sts)
Round 15 :
(5dc, dc2tog) x 3 (18sts)
Round 17 :
(7dc, dc2tog) x 2 (16sts)
Info :
Do not fasten off yet. Stuff your owl, not too firmly.
Ear tufts :
To make the ear tufts, slst into the next stitch and make 6ch, now press the top of your owl flat and slst into the same stitch and through into the one behind. Make another 6ch and slst in the same place. Now double crochet along the top of your owl joining the back and front together (this is 6dc for me) until you have only one stitch left (front and back). Slip stitch into the last stitch and make 6 ch, slst into the same place and make another 6ch, slst into the same place again. Fasten off and leave enough yarn to tidy up neatly.
— Stocking :
Round 1 :
Make a Magic Circle of 6dc
Round 2 :
2dc in every stitch (12sts)
Round 6 :
12dc around (mark the next stitch with a stitch marker) 1ch turn
Info :
You are now making the heal and will work in rows from R1 to 3.
Round 9 :
6dc and fasten off leaving a 15cm length of yarn.
Info :
Press together the back of heal and sew up the seam with the yarn, tidy away all the ends.
Round 10 :
Begin a new round from the marked stitch. With a knot on your hook and a 15cm yarn tail, make 1dc in the marked stitch and then 5dc (6sts). Continue with 7 more dc around the heal, spaced evenly. Start your next round in the first dc of this round. (13sts)
Round 11 :
Work 13dc around
Round 12-14 :
Work 13dc around
Info :
Now dc about another 10 or 11 stitches until you are at the centre back of your stocking and from here you finish the top edge as follows: Slip stitch into the next stitch and make 2ch, slip stitch into the next 2 stitches and make another 2ch, repeating this pattern around the top edge. When you reach the back of stocking again with 2ch on your hook, slst into your first slst and made 16ch. (This is for your loop, but do not create loop yet)
Info :
Fasten off leaving a 15cm length of yarn. Tidy away any loose ends and use the yarn tail to tidy any gapping you may get when re-joining your yarn after sewing up the heal.
— Eyes :
Round 1 :
Make a Magic circle of 6dc
Round 2 :
2dc in each stitch, slst into the next st. (12sts) Fasten off leaving 10cm.
Info :
Repeat and make another disc leaving a 25cm length of yarn when you fasten off.
Info :
Use the shorter piece of yarn to stitch the discs together encompassing 3 stitches. Sew a button in the centre of each disc, or offset a little to get your owl to look in different directions. Use the long piece of yarn to stitch the eyes to your owl. I like to catch the stitches at the back of the eye discs so that you cannot see them and this helps them to stand out too.
— Beak :
Info :
Use a little yellow/beige yarn to stitch on a beak. I do a V with two stiches and fill in with about another 3 stitches.
— Feet :
Info :
Use the same yellow/beige yarn to attach your owl to the stick. Work just offset from the centre bottom of your owl and run stitches right through the owl and around the stick 3 times to make one foot and then wrap the yarn twice around the top of the foot between the owl and the stick and do the same again for the other foot further along the stick. Secure the yarn end.
— Attach Stocking :
Info :
Run the chain end of the stocking right between the feet of your owl with a yarn needle and secure to the back of the stocking. Tidy away the end.
— Top Loop :
Info :
Make another length of 30 chain for a loop and attach to the top of your owl just below the top stitches at the back. You could use a piece ribbon if you prefer.
— Owl Bag Charm :
Info :
For the bag charm you will need to add a lobster clip to the top of your owl. Secure the clip within the two centre dc when closing up the top of your owl. There are 6dc on the top edge so it will be st3 and st4 and include the swivel part of the clip. Or simply stitch on afterwards. Instead of a stick you could make some little feet on the owl itself as in the picture.
— Optional Wings :
Round 1 :
Magic circle of 6dc
Round 2 :
make 2dc in each st (12sts)
Round 3 :
Slst into the next 10sts, 3ch, dc in 2nd chain from hook, treble into the next chain, miss the next dc and slst into the one after. Fasten off with 15cm piece of yarn to stitch to your owl.
Make a flock of Hopeful Owls to decorate a tree, bag or room — they are perfect for tiny gifts and decorations. Each owl is full of character and made from leftover DK yarn for a sustainable, handmade touch. Give them as sweet tokens or keep a few for yourself — they will bring smiles. 🧶🎁