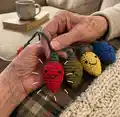
About This Holiday Lights Amigurumi Pattern
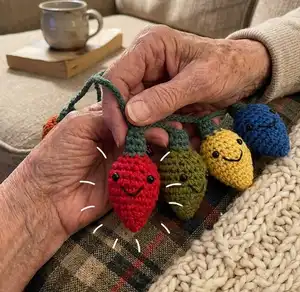
This pattern makes charming amigurumi holiday light bulbs that string together to form a garland. Each bulb is small, quick to make, and perfect for using up leftover worsted weight yarn. The design includes optional safety eyes and simple embroidered faces for personality. You can customize colors and spacing to suit your holiday decor.
Worked in continuous rounds with basic single crochet shaping. Includes clear row-by-row instructions and finishing tips.
Why You'll Love This Holiday Lights Amigurumi Pattern
I absolutely love this pattern because it turns simple stitches into something festive and delightful. I enjoy how quickly each bulb comes together, letting me make an entire garland in an afternoon. The design is highly customizable, so I can mix and match colors to suit different holidays or rooms. It also uses basic techniques, making it accessible while still producing very satisfying results. Seeing a mantel or doorway lit with handmade bulbs always brings a smile and makes gifting so special.
Switch Things Up
I love experimenting with colors on this pattern; try pastels for a soft, vintage garland or neon shades for a modern pop.
I sometimes change yarn weight and hook size to create mini and jumbo bulbs for a layered look on a mantel.
I often mix in metallic or sparkly yarn for one or two accent bulbs to catch the light and add holiday sparkle.
I like to embroider tiny freckles or different mouths to give each bulb its own personality and charm.
I sometimes skip safety eyes and use tiny felt circles or French knots for a softer, child-safe finish.
I suggest varying the spacing on the chain: try dense spacing for a fuller look or wide spacing for a subtle, elegant strand.
I recommend adding a small loop at the top of each bulb for easy hanging as individual ornaments instead of a garland.
I enjoy combining these bulbs with greenery or ribbon between bulbs for a mixed-media mantel display that feels crafted and cohesive.
I also make matching tiny gift tags and attach one bulb to a wrapped present as a cheerful handmade accent.
I sometimes add wired beads or small bells inside the top to give each bulb a bit of weight and a soft jingle when moved.
Common Mistakes & How to Fix Them
✗ Skipping the magic ring step can leave a visible hole at the top of the bulb; start with a tight 3-stitch magic ring to create a neat closed center.
✗ Not counting stitches after increases or decreases leads to uneven shaping and mismatched bulbs; count after each round and mark your rounds when necessary.
✗ Overstuffing bulbs causes them to bulge and lose shape; stuff gradually with small amounts of polyfil until the bulb is firm but still slightly yielding.
✗ Attaching safety eyes after stuffing can be awkward and misaligned; add safety eyes before stuffing and check placement before closing the top.
✗ Leaving long tails unweaved will make finishing messy and unstable; break off yarn and weave in ends securely after final round to keep seams tidy.