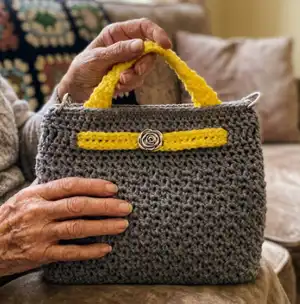
Make a stylish, structured crochet bag with a textured shell stitch body and bold accent strap. This pattern guides you step-by-step through creating a reinforced base with optional plastic canvas, a decorative belt strap, and comfortable handles. Perfect for crocheters wanting a finished purse with professional structure and modern style. You will gain new skills while making a useful, gift-ready accessory.
Progress Tracker
0% Complete
— Notes :
Info :
1. Similar #4 weight yarns may be substituted; please check gauge. Yarn substitutes include Red Heart Yarns Nylon Crochet Thread and Lion Brand 24/7 Cotton. 2. Beginning ch-1 does NOT count as stitch. 3. Sl st to 1st stitch of each round to join.
— Special Stitches :
Info :
v-st (v-stitch) = (dc, ch 1, dc) in same
— Base :
Row 1 (RS) :
With A, ch 17, sc in 2nd ch from hook and in each across, turn����������������������������������������������� sc.
Row 2 :
Ch 1, sc in each across, turn.
Rows 3-38 :
Repeat Row 2, after Row 38, do NOT turn, do NOT fasten off.
Info :
Cut plastic canvas to fit Base dimensions.
Round 1 :
Place plastic canvas on WS, working through both Base and plastic canvas, ch 1, *sc in each across to corner, ch 1; repeat from * around, join, do NOT turn�����������������������������������������������8 sc, 4 ch-1 sps.
Round 2 :
Working in BLO, sl st in next, ch 1, *sc in each across to next ch-1 sp, (sc, ch 1, sc) in next ch-1 sp, skip 1; repeat from * around, join��������������������������2 sc, 4 ch-1 sps.
— Body :
Round 1 :
Skipping all corner ch-1 sps, ch 4 (counts as (dc, ch 1)), dc in same (v-st made), skip 1, sc in next, skip 1, *v-st in next, skip 1, sc in next, skip 1; repeat from * around, join, turn�����������������������������������������8 v-sts, 28 sc.
Round 2 :
Sl st in next ch-1 sp, (ch 1, sc) in same ch-1 sp, skip 1, v-st in next sc, *sc in next ch-1 sp, skip 1, v-st in next sc; repeat from * around, join, turn.
Round 3 :
Ch 4 (counts as (dc, ch 1)), dc in same (v-st made), skip 1, sc in next, skip 1, *v-st in next, skip 1, sc in next, skip 1; repeat from * around, join, turn.
Rounds 4-15 :
Repeat Rounds 2-3, do NOT turn after Round 15.
Round 16 :
Ch 1, hdc in each around, skipping all ch-1 sps, join���������������������������������������4 hdc.
Round 17 :
Ch 1, hdc in each around.
Round 18 :
Ch 4 (counts as tr), tr in each around, join������������������������������������4 tr.
Info :
Cut plastic canvas to fit side dimensions. With A, sew pieces together. Insert plastic canvas in bag.
Round 19 :
Ch 1, working through both bag and plastic canvas, hdc in each around, join�������������������������������4 hdc.
Round 20 :
Ch 1, hdc in each around, join.
Round 21 :
Ch 1, sc in each around, join with invisible join.
Info :
Fasten off, weave in ends.
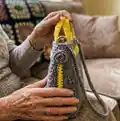
— Belt Strap :
Belt Strap :
With B, ch 68, sc in 2nd ch from hook and in each across to last, 3 sc in last, rotate to work other side of starting ch, sc in each across to last, 2 sc in last, join���������������������������������������38 sc. Fasten off. Working from WS of back, starting in back center, weave Belt Strap through Round 17 around as desired, sew ends together. Sew button to center of Belt.
— Handle (make 2) :
Row 1 :
With B, ch 4, sc in 2nd ch from hook and in each across, turn������������������������������� sc.
Row 2 :
Ch 1, sc in each across, turn.
Info :
Fasten off, weave in ends. Sew Handles to bag as desired.
— Lining (optional) :
Info :
With fabric of choice, cut 2 pieces following outline of Panels, hand sew together, insert in bag, secure Lining to bag. Sew magnetic button at center top edge of Lining if desired.
— Finishing :
Info :
Attach 1 keyring to each side of bag, attach chain as desired.
This Giada Crochet Bag pattern combines structured construction with pretty textured stitches to make a polished, everyday purse. It includes optional reinforcement with plastic canvas and lining instructions for a durable, professional finish. Make one in classic neutrals or brighten it up with a contrasting accent strap for a custom look. 🧶✨