About This Ghost in Pumpkin Amigurumi Pattern
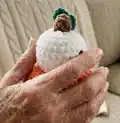
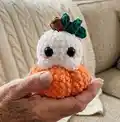
This pattern creates a tiny Ghost tucked into a pumpkin — a perfect miniature amigurumi for Halloween gifts and decor. It uses chenille/velvet-style yarn to make a plush pumpkin body combined with a bobble-stitch ghost head for texture. The pattern guides you through color changes, sewing pumpkin ribs, and optional tendril details.

Clear round-by-round instructions make it easy to follow, even when shaping and adding bobble texture. Includes tips for color changes, eye placement, and finishing touches to make a polished miniature piece.
Why You'll Love This Ghost in Pumpkin Amigurumi Pattern
I absolutely love this pattern because it transforms simple stitches into a character full of personality with very little time investment. I enjoy the contrast between the plush pumpkin body and the bumpy bobble-stitch ghost head — it adds lots of charm. I also appreciate how forgiving the construction is: slight differences only add to the handmade look. Sharing it has been a joy because crafters tell me it makes an excellent quick gift or seasonal decoration.
Switch Things Up
I love experimenting with colors: try pastel orange and cream for a softer, vintage-style ghost in pumpkin or deep jewel tones for a richer look.
If you want a larger piece, switch to a bulkier chenille yarn and a larger hook or use DK yarn and a smaller hook for a miniature keychain-sized friend.
Change the eye style to embroidered eyes for a safer toy for small children or swap to smaller safety eyes for a cuter, more delicate face.
Customize the number of ribs on the pumpkin by spacing your sewing points closer together for more ridges or further apart for fewer, deeper ribs.
I often add tiny accessories like a mini hat or embroidered mouth to give different personalities to each ghost.
For a seasonal set, make multiple pumpkins in varying sizes and stack smaller ghosts on top for a tiered display.
Try metallic or variegated yarn for the tendril to add a whimsical sparkle to your finished piece.
Adjust the blush placement and intensity for different expressions — a little felt or subtle yarn dye works beautifully.
If you want a poseable figure, insert a small length of wire into the stem or through the body when stuffing to create a slight bend.
I also like to sew tiny props like a crocheted candy or leaf into the ghost's hands to make it gift-ready and unique.
Common Mistakes & How to Fix Them
✗ Skipping the color change technique can leave loose loops; to avoid this, leave two loops on the hook before changing color and secure small tails together to prevent gaps.
✗ Forgetting to place safety eyes at the correct rounds will misplace facial features; place 12mm eyes between rounds 8-9 with 2-3 visible stitches between them for proper alignment.
✗ Not stuffing evenly causes lumps or flattened shapes; stuff the head and pumpkin gradually and firmly, finishing stuffing before final decreases to maintain round shape.
✗ Sewing ribs unevenly will give an unbalanced pumpkin look; mark equal spacing (about 5-6 stitches apart) and sew each rib with the same tension to create symmetrical ridges.