🧶 Beautiful ✨ Detailed 💝 Adorable

Emma Doll Amigurumi Pattern

Emma Doll Amigurumi Pattern
4.7★ Rating
12-15 Hours Time Needed
1.6K Made This
✂️

Intermediate Level

Ideal for those with basic crochet experience, featuring slightly more advanced stitches and techniques to expand your skills.

⏱️

Multi-Day Project

A rewarding 12+ hour journey—perfect for dedicated crafters who love detailed work.

🧸

Cute Companion

An adorable friend to cherish, handcrafted with love to bring comfort and joy for years to come.

About This Emma Doll Amigurumi Pattern

This pattern guides you through creating Emma, a 21-inch crochet doll with clothes and accessories. You will work the limbs, torso, head, hair, dress, and rain boots with photo references to guide placement. Techniques include invisible color changes, OCH overlay chains, working in front/back loops, and sewn-on decorations.

Emma Doll Amigurumi Pattern crochet pattern - detailed view of completed project

The pattern contains detailed round-by-round instructions and special technique notes, plus materials and video QR references. It is ideal for making a polished finished doll with sturdy boots and secure sewn details.

Why You'll Love This Emma Doll Amigurumi Pattern

I absolutely love this pattern because it combines characterful design with clear, photographed steps that make complex shaping accessible. I enjoyed designing the layered outfit—dress, sweater, and boots—to give Emma personality and play value. The use of overlay chain (OCH) and spike stitches adds lovely texture and a handmade touch that I find very satisfying. Sewing the flower, leaf and stem onto the dress is one of my favorite finishing touches because it brings the whole look together.

Emma Doll Amigurumi Pattern step 1 - construction progress Emma Doll Amigurumi Pattern step 2 - assembly progress Emma Doll Amigurumi Pattern step 3 - details and accessories Emma Doll Amigurumi Pattern step 4 - final assembly and finishing

Switch Things Up

I love how easy it is to customize Emma's outfit and personality by changing yarn colors and small details.

You can use pastel shades for a softer look, or bright, bold colors to make a playful statement.

If you want a smaller version, choose a lighter weight yarn and a smaller hook; for a chunkier cuddle doll, switch to bulky yarn and a bigger hook.

I often swap the hair technique—use velvet yarn for full fringed hair or braided strands for a neater finish.

Try embroidering different facial expressions: tiny mouths and varied eye spacing change the doll's character dramatically.

For posability, consider adding wire inside the limbs before stuffing, or add button joints for a vintage look.

Add seasonal accessories like a tiny crochet scarf, hat, or backpack to create a themed series of dolls.

Experiment with different shoe soles—felt or cork inserts give different feels and stability for display dolls.

I also like making matching mini versions of the dress as keychains using the same stitches scaled down.

Finally, combine yarn textures such as smooth acrylic for the body and boucle or velvet for hair to create tactile contrasts.

Common Mistakes & How to Fix Them

✗ Skipping stitch markers during rounds makes it hard to track the start of rounds; use a marker at the first stitch of every round to keep your count accurate. ✗ Not stuffing as you go can create lumps or make it hard to shape body parts later; stuff gradually and firmly while you work to keep even shaping. ✗ Changing colors without using the invisible color change leaves visible joined loops; follow the invisible color change instructions and skip the color-change slip stitch in the next round. ✗ Forgetting to insert the straw in the neck will make the head tilt; place the beverage straw into the neck before stuffing to stabilize the head. ✗ Not cutting cardboard shoe soles to the recommended size may make the boots too tight; cut the sole 1–2 mm smaller than your crochet sole for best fit and glue or insert before finishing the boot. ✗ Pulling yarn too tight when making OCH or overlay chains can distort the fabric; feed the yarn from under the material with relaxed tension to keep the overlay even.

Emma Doll Amigurumi Pattern

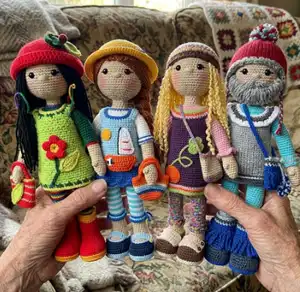
Make a charming 21-inch Emma crochet doll with this detailed, photo-illustrated pattern. You will work garments and accessories as well as the doll body with clear round-by-round instructions. The pattern uses medium weight yarns and gives helpful tips for shaping, color changes, and assembly so you can achieve a polished result. Perfect for crafters who enjoy a rewarding, multi-piece amigurumi project.

Intermediate 12-15 Hours

Materials Needed for Emma Doll Amigurumi Pattern

— Main Fabric

  • 01
    Caron One Pound Yarn (16 oz. / 454 g, 812 yd. / 742 m, medium 4) - Color A: lace (skin tone) and Color B: scarlet for boots/trim
  • 02
    Red Heart Super Saver (198 g / 7 oz, 333 meters / 364 yards per ball, medium 4) - Color C: mexicana (variegated), D: gold, E: spring green, F: hunter green
  • 03
    Loops & Threads Impeccable Solids (4.5 oz / 127.5 g, 285 yd / 260 m per ball, medium 4) - Color G: citron (leaf)
  • 04
    Bernat Velvet Yarn (300 g / 10.5 oz, 288 m / 315 yd bulky 5) - Color H: blackbird (hair)
  • 05
    Assorted small amounts of contrast yarns for accessories and details (refer to pattern photos for selection)

— Tools Required

  • 01
    Crochet hook size 3.5 mm
  • 02
    Scissors
  • 03
    Stitch markers
  • 04
    Tapestry/sewing needle
  • 05
    Polyester fiberfill stuffing (fiberfill)
  • 06
    12 mm safety eyes (2 pieces)
  • 07
    Cardboard or thin plastic for shoe soles (cut to pattern)
  • 08
    Embroidery floss (black) for eyelashes and facial details
  • 09
    Reddish crayon for blush
  • 10
    Drinking straw approximately 4.5 in / 11.5 cm for neck support
  • 11
    Pins for assembly

Progress Tracker

0% Complete

— Arms :

Info :

Make 2. Start with color A yarn. Crochet 4 chains. Begin working from the 2nd ch from the hook. Continue working around the foundation chain.

Round 1 :

2 sc, 3 sc in last ch, on the other side of the foundation chain, sc, inc [8]

Round 2 :

8 sc [8]

Round 3 :

(inc, 3 sc) x 2 [10]

Round 4 :

(inc, 4 sc) x 2 [12]

Round 5 :

(inc, 5 sc) x 2 [14]

Round 6 :

14 sc [14]

Round 7 :

3 ch, (continue working on the chain, beginning from the 2nd ch from the hook), 2 sc, sc in the first st of Rnd 6, 13 sc, 2 sc in the foundation chain free loops [18]

Round 8 :

inc, 16 sc, inc [20]

Round 9 :

dec 3 sc together as 1 sc, 6 sc, dec 3 sc together as 1 sc, 5 sc, dec 3 sc together as 1 sc [14]

Round 10 :

dec, 10 sc, dec [12]

Round 11-12 :

12 sc [12]

Info :

Stuff with fiberfill.

Round 13 :

(inc, 5 sc) x 2 [14]

Info :

Stuff with fiberfill as you go.

Round 14-18 :

14 sc [14]

Info :

Invisible color change (2a) Do not forget to skip the color change ss in the next rnd.

Info :

Change to color F.

Round 19-34 :

14 sc [14]

Info :

Stuff with fiberfill as you go.

Info :

Finishing a piece worked on the round: Fasten off and weave in ends.

Info :

Work with color C.

Info :

OCH = Overlay chain yarn over the material.

Round 18B :

OCH 14 yarn over the material [14]

Info :

Fasten off and weave in ends.

— Legs :

Info :

Make 2. Work with color D. Crochet 9 chains. Begin working from the 2nd ch from the hook. Continue working around the foundation chain.

Round 1 :

7 sc, 5 sc in last ch, turn to work on the other side of the foundation chain, 6 sc, 3 sc in last ch [21]

Round 2 :

7 sc, 5 inc, 7 sc, 2 inc [28]

Round 3 :

8 sc, (inc, sc) x 5, 7 sc, 3 inc [36]

Round 4 :

9 sc, (inc, 2 sc) x 5, 8 sc, inc, 2 sc, inc [43]

Round 5 :

14 sc, (inc, 3 sc) x 3, 12 sc, inc, 3 sc, inc [48]

Round 6 :

12 sc, inc, 13 sc, inc, 21 sc [50]

Info :

Using this sole as a pattern, cut out 1-2 mm smaller sole from cardboard or stiff plastic material (for a washable doll). Make 2.

Round 7 :

BLO 50 sc [50]

Info :

Change to color B. Invisible color change.

Round 8-11 :

50 sc [50]

Round 12 :

10 sc, (2 sc, dec) x 6, 16 sc [44]

Round 13 :

44 sc [44]

Round 14 :

10 sc, (sc, dec) x 6, 16 sc [38]

Info :

Insert the cardboard/plastic sole inside the shoe.

Round 15 :

38 sc [38]

Round 16 :

9 sc, 8 dec, 13 sc [30]

Round 17 :

5 sc, (dec, sc) x 6, 7 sc [24]

Info :

Regular color change (2b) - Change to color C.

Round 18 :

BLO 6 sc, 2 dec, sc, 2 dec, 9 sc [20]

Info :

Stuff foot.

Section :

Right Leg

Round 19-48 :

20 sc [20]

Info :

Stuff with fiberfill as you go.

Round 49 :

(9 sc, inc) x 2 [22]

Round 50 :

22 sc [22]

Info :

Fasten off and weave in ends.

Info :

Work with color D.

Info :

Hook orientation top to bottom (5a).

Round 7B :

FLO 50 ss [50] Insert hook top to bottom.

Info :

Fasten off and weave in ends.

Round 8B :

OCH 50 yarn over the material [50]

Info :

Fasten off and weave in ends.

Info :

Left Leg: Work rnds 1-49 as right leg. Rnd 50: 22 sc, 4 ch [26] Make sure the chains coincide with the center of the inside part of the leg; you may need to work one additional stitch to reach the center. Do not cut the yarn. Make sure you finish both boots before continuing with the hip.

— Hips :

Info :

Connect chain with sc st to the interior middle side of right leg. Crochet in rounds.

Round 51 :

22 sc, 4 sc (in the chain), 22 sc, 4 sc (in the chain) [52]

Info :

Continue crocheting to the middle of the right leg, 11 sc. Rnd 52 starts at the middle of the right side of the hip.

Round 52-54 :

52 sc [52]

Round 55 :

(dec, 24 sc) x 2 [50]

Round 56 :

50 sc [50]

Round 57 :

(dec, 23 sc) x 2 [48]

Round 58 :

48 sc [48]

Round 59 :

(dec, 22 sc) x 2 [46]

Round 60 :

46 sc [46]

Round 61 :

(dec, 21 sc) x 2 [44]

Round 62 :

44 sc [44]

Info :

Work with color C to the center of the right side of the waist, 1 sc. Rnd 63 starts at this point.

— Sweater :

Info :

Change to color F. Invisible color change.

Round 63 :

(21 sc, inc) x 2 [46]

Round 64 :

46 sc [46]

Round 65 :

(22 sc, inc) x 2 [48]

Round 66-80 :

48 sc [48]

Round 81 :

(22 sc, dec) x 2 [46]

Info :

Attach the arms in the next rnd. Pin the right arm on rnd 81, between sts 3 and 7. Pin left arm on rnd 81, between sts 26 and 30.

Round 82 :

2 sc, 5 sc (working together one right arm st with one torso st), 18 sc in the back, 5 sc (working together one left arm st with one torso st), 16 sc in the front [46]

Info :

Do not work on the sts in the armpit. You will work on the shoulder's sts, and torso's front and back sts from now on.

Round 83 :

2 sc, in the outside of the right arm (4 sc, inc, 4 sc), in the back 18 sc, in the outside of the left arm (4 sc, inc, 4 sc), in the front 16 sc [56]

Round 84-85 :

56 sc [56]

Round 86 :

(26 sc, dec) x 2 [54]

Round 87 :

(7 sc, dec) x 6 [48]

Round 88 :

3 sc, in the right shoulder 5 dec, 14 sc, in the left shoulder 5 dec, 11 sc [38]

Round 89 :

2 sc, 4 dec, 5 sc, dec, 5 sc, 4 dec, 4 sc, dec, 2 sc [28]

Round 90 :

2 sc, 2 dec, 10 sc, 2 dec, 8 sc [24]

Round 91 :

(sc, dec) x 8 [16]

Info :

Keep working to the right shoulder center 3 sts. Rnd 92 starts at this point. Stuff the torso up to the shoulders.

— Neck :

Info :

Tip: To keep the head from tilting, insert a piece of a wide beverage straw into the neck and halfway into the head. Stuff around the straw.

Info :

Change to color A. Invisible color change.

Round 92-99 :

16 sc [16]

Round 100 :

8 dec [8]

Info :

Fasten off, pass the yarn tail through the loops of the last 8 stitches with the sewing needle, and pull to close the hole. Weave in ends.

— Dress :

Info :

Work with color E. Chain 68. Ss st connecting the last chain with the first one to make a circumference. Work in rounds.

Round 1-2 :

68 sc [68]

Info :

ws = woven stitch

Round 3-5 :

34 ws [34 ws]

Round 6 :

68 sc [68]

Round 7 :

(15 sc, dec) x 4 [64]

Round 8-10 :

32 ws [32 ws]

Round 11 :

64 sc [64]

Round 12 :

(14 sc, dec) x 4 [60]

Round 13-15 :

30 ws [30 ws]

Round 16 :

60 sc [60]

Round 17 :

(8 sc, dec) x 6 [54]

Round 18-20 :

27 ws [27 ws]

Round 21 :

54 sc [54]

Round 22 :

(7 sc, dec) x 6 [48]

Round 23-25 :

24 ws [24 ws]

Round 26-27 :

48 sc [48]

Round 28-30 :

24 ws [24 ws]

Round 31 :

48 sc [48]

Round 32 :

15 sc, 12 ch, skip 8 sts, 16 sc, 12 ch, skip 8 sts, sc [56]

Round 33 :

15 sc, 14 sc around the chain, 16 sc, 14 sc around the chain, sc [60]

Round 34 :

(8 sc, dec) x 6 [54]

Info :

Change to color F. Invisible color change.

Spike :

Rnd 35: sc, dec, sc, spike, 3 sc, (spike, sc, dec, sc) x 9, spike [44]

Info :

Change to color G. Invisible color change.

Round 36 :

sc, (spike, 3 sc) x 10, spike, 2 sc [44]

Round 37 :

44 ss [44]

Info :

Fasten off and weave in ends. Work with color F in the foundation chain free loops.

Round 1B :

(3 sc, spike) x 17 [68]

Info :

Change to color G.

Round 2B :

sc, spike, (3 sc, spike) x 17 [68]

Round 3B :

68 ss [68]

Info :

Fasten off and weave in ends.

— Flower :

Info :

Work with color D. Chain 5, ss in first chain to make a ring.

Round 1 :

ch, 14 sc around the ring [14]

Info :

Change to color B.

TRtog :

Rnd 2: ss in the first sc, 3 ch, (4 TRtog inserting the hook twice in the next sc and twice in the following st, 3 ch, ss in next st) x 3, 4 TRtog inserting the hook twice in the next sc and twice in the following st, 3 ch, ss in first rnd ch [26]

Info :

Fasten off and weave in ends.

Info :

OCH = Overlay chain yarn under the material. Pin the flower to the desired place in the dress and attach it using OCH 30 yarn under the material around the circle with color D. Make sure you feed the yarn from under the material.

— Leaf :

Info :

Work with color G. Chain 14. Begin from 2nd ch from the hook.

Round 1 :

3 sc, 2 hdc, 2 dc, tr, 2 dc, hdc, sc, 3 sc in last ch, continue working in the foundation chain back loops, sc, hdc, 2 dc, tr, 2 dc, 2 hdc, 3 sc [27]

Round 2 :

FLO 13 ss, inc ss, 13 ss [28]

Info :

Fasten off and weave in ends. Pin the leaf to the desired place in the dress and attach it using OCH through the leaf's center. Make sure you feed the yarn from under the material.

— Stem :

Info :

Embroider with color F and OCH yarn under the material a stem connecting the dress front bottom with the leaf and flower. The number of OCH will change depending on the placement of the flower. Double the stem thickness by passing a second time over the same stitches. Put the dress on before attaching the head.

— Head :

Info :

Work with color A.

Round 1 :

6 sc in ring [6]

Round 2 :

6 inc [12]

Round 3 :

(sc, inc) x 6 [18]

Round 4 :

(sc, inc, sc) x 6 [24]

Round 5 :

(3 sc, inc) x 6 [30]

Round 6 :

(2 sc, inc, 2 sc) x 6 [36]

Round 7 :

(5 sc, inc) x 6 [42]

Round 8 :

(3 sc, inc, 3 sc) x 6 [48]

Round 9 :

(7 sc, inc) x 6 [54]

Round 10 :

(4 sc, inc, 4 sc) x 6 [60]

Round 11-23 :

60 sc [60] (13 Rnds)

Round 24 :

(4 sc, dec, 4 sc) x 6 [54]

Round 25 :

(7 sc, dec) x 6 [48]

Info :

Insert safety eyes in rnd 16 at the distance of 8 stitches from each other.

Assembly Instructions

  • Attach arms to the torso by aligning and pinning them on round 81: right arm between sts 3 and 7, left arm between sts 26 and 30; sew securely using a whipstitch working through arm and torso stitches.
  • Insert a beverage straw into the neck and halfway into the head before final stuffing to keep the head from tilting; stuff around the straw and close the neck by pulling the yarn tail through the last stitches.
  • Pin the dress on before attaching the head; embroider and attach the flower and leaf with OCH from under the material, then sew the head onto the neck opening so the dress remains in place.
  • Insert the cardboard or thin plastic sole into each rain boot before finishing the boot crown, then stitch securely and weave in ends so the sole sits flat and stable.
  • Sew the leaf and flower onto the front of the dress using OCH (overlay chain) from underneath, and embroider the stem with color F to join the motifs to the dress.
  • Position and secure safety eyes in round 16, spaced 8 stitches apart; embroider eyelashes and mouth after eyes are fixed, using small, restrained stitches for a neat finish.

Important Notes

  • 💡Work all sections of this pattern with a 3.5 mm hook for the gauge specified; changing hook size will alter final measurements.
  • 💡Use stitch markers to keep track of the beginning of rounds and important placement points like arm and head attachment rounds.
  • 💡Stuff pieces firmly but not overly tight; average stuffing helps the doll stand and keeps shapes smooth and consistent.
  • 💡Pin parts in place before sewing to ensure symmetry and correct positioning; photos in the pattern are useful placement references.

This Emma Doll pattern guides you to create a lovable spring-themed amigurumi with clothes and accessories you will adore. The detailed rounds, photos, and special techniques give you everything you need to finish a polished 21-inch doll. Make one for yourself or as a heartfelt handmade gift—each doll will be unique and full of character. 🧶🌷

You ask,

we answer.

FAQs

What size will the finished piece be?

The finished amigurumi measures approximately 21 inches / 53 cm tall when using the recommended yarns and 3.5 mm hook.

Can I use different yarn weights for this pattern?

Yes, you can use different yarn weights, but this will affect the final size; use an appropriate hook and check gauge if you change yarn weight.

Do I need prior crochet experience for this pattern?

This pattern is rated intermediate, so basic knowledge of amigurumi techniques, invisible decreases, and color changes is recommended.

How long does this project typically take to complete?

Most crafters take multiple days to finish this multi-piece pattern; plan on about 12-15 hours overall depending on experience and finishing details.