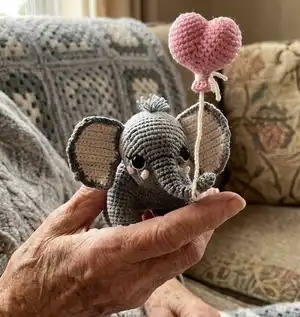
Make your own tiny Elephant Elf with this detailed crochet pattern. You will find step-by-step rounds, clear photos, and helpful assembly tips so you can create a cuddly handmade companion. Perfect as a heartfelt gift or a beloved desk friend, this pattern guides you through shaping, sewing and finishing touches. Grab your yarn and hooks and bring this charming little elephant to life.
Progress Tracker
0% Complete
— TRUNK & FACE (Yarn A) :
Round 1 :
2 loops, 6sc in 2nd loop from hook (amigurumi ring) (6l)
Round 7 :
[2sc, inc]x2 (8l)
Round 11 :
[3sc, inc]x2 (10l)
Round 13 :
[4sc, inc]x2 (12l)
Round 15 :
[5sc, inc]x2 (14l)
Round 16 :
[6sc, inc]x2 (16l)
Info :
Cut a piece of decorative wire 2 - 3 cm (0,8 - 1,2 inches) longer than the trunk (see photo 1). Twist one end of the wire into a loop, and twist the other end into the ring (of diameter equal to the trunk opening) with the help of round nose pliers (see photo 2). Wrap the place of twisting with electrical tape (see photo 3). Insert crochet trunk to the wire.
Info :
Crochet and fix the wire on two points to the trunk - before every increase, crocheting the next round (see photos 4-6). If you decide not to use wire, then skip these steps and continue crochet.
Round 17 :
[7sc, inc]x2 (18l)
Round 18 :
3sc, [sc, inc]x6, 3sc (24l)
Round 19 :
3sc, [2sc, inc]x6, 3sc (30l)
Round 20 :
3sc, [3sc, inc]x6, 3sc (36l)
Round 21 :
[5sc, inc]x6 (42l) Fill the trunk with synthepus. Cut and fix the thread.
— LEGS 4 pcs (Yarn A) :
Round 1 :
2 loops, 8sc in 2nd loop from hook (amigurumi ring) (8l)
Round 2 :
[sc, 3sc in the next loop]x4 (16l)
Round 3 :
2sc, inc, [3sc, inc]x3, sc (20l)
Round 4 :
20sc only through back loops (20l)
Round 5 :
[dec]x2, 4sc, [inc]x4, 4sc, [dec]x2 (20l)
Info :
Cut and fix the thread. Don’t remove the pins of the round’s beginning, they also note the place of the legs’ and the belly’s connection (see photo 7).
— BELLY (Yarn B) :
Round 1 :
4 loops, turning, 3sc (starting from the 2nd loop from the hook) (3l)
Round 2-3 :
1 loop, turning, 3sc (3l)
Info :
Crocheted the belly around the perimeter in a counter-clockwise direction from the point "Start" (see photo 8).
Round 4 :
3sc in the corner, 1sc down the side, 3sc in the corner, 3sc across, 3sc in the corner, 1sc up the side, 3sc in the corner, 3sc across (20l)
Info :
In the next round you need to crochet the belly around the perimeter in a counter-clockwise direction from the point "Start" and join the legs (see photo 9). To connect the details insert the hook initially into the leg, and then into the belly.
Round 5 :
1sc, join the 1st leg with sc, 19sc around the leg (see photos 10-13); 3sc down; join the 2nd leg with sc, 19sc around the leg (see photos 14, 15); 5sc across; join the 3rd leg with sc, 19sc around the leg (see photos 16, 17); 3sc up; join the 4th leg with sc, 19sc around the leg (see photos 18, 19); 4sc across (see photos 20) (96l)
Info :
Don’t cut the thread. Sew holes under the thighs of both legs using extra thread (see photo 21). Start crocheting the body.
— BODY & HEAD (Yarn A) :
Info :
Mark with a pin the junction of the face with the body. To do this, move the pin on the 18th loop from the beginning of the face round (see photo 22).
Round 8 :
45sc along the body, crochet 6sc of the face together with 6sc of the body, then crochet 45sc along the body (see photo 25)
Round 9 :
[13sc, dec]x3, [5sc, inc]x6, [13sc, dec]x3 (126l) (see photo 26)
Round 10 :
[12sc, dec]x3, [2sc, dec]x3, [2sc, inc]x6, [2sc, dec]x3, [12sc, dec]x3 (120l)
Round 11 :
[11sc, dec]x3, 42sc, [11sc, dec]x3 (114l)
Info :
Put an extra pin on the 32nd loop clockwise from the round’s beginning (see photo 27).
Round 12 :
86sc, 6 loops, sc in the loop marked with a pin (the last sc becomes the beginning of the new round, you need to move the pin) (see photos 28-30)
Info :
After 12th round, the shape has two holes - hole for the head (left) and hole for the back (right). We continue to work with the left hole for the head (see photos 32, 33).
Round 14 :
[sc, dec]x2, 42sc, [sc, dec]x4 (54l)
Round 15 :
[dec]x2, 42sc, [dec]x4 (48l)
Round 18 :
[6sc, dec]x6 (42l)
Round 19 :
[5sc, dec]x6 (36l)
Info :
Insert safety eyes between the rounds 20 and 21 (count from the top of the trunk), the distance between them is approximately 14 stitches, don’t fix yet (see photo 34).
Round 20 :
[4sc, dec]x6 (30l)
Round 21 :
[3sc, dec]x6 (24l)
Round 22 :
[2sc, dec]x6 (18l)
Round 23 :
[sc, dec]x6 (12l)
Info :
Completely fill the head.
Info :
Cut a circle out of white felt, it should be a little larger than the resulting hole (see photo 67, 68). Insert it into the hole in order to synthepus does not cling to the needle during closing the detail.
Info :
Trim the thread. Pass the thread through all the loops using the yarn needle. Tighten and secure. See the holes between the neck and the head (see photo 69).
— BACK (Yarn A) :
Round 1 :
[9sc, dec]x6 (60l)
Round 2 :
[8sc, dec]x6 (54l)
Round 4 :
[7sc, dec]x6 (48l)
Info :
Fill the legs with synthepus.
Round 5 :
[6sc, dec]x6 (42l)
Round 6 :
[5sc, dec]x6 (36l)
Round 7 :
[4sc, dec]x6 (30l)
Round 8 :
[3sc, dec]x6 (24l)
Round 9 :
[2sc, dec]x6 (18l)
Round 10 :
[sc, dec]x6 (12l)
Info :
Cut a circle out of white felt, it should be a little larger than the resulting hole. Insert it into the hole in order to synthepus does not cling to the needle during closing the detail (see photo 74). Trim the thread. Pass the thread through all the loops using the yarn needle. Tighten and secure. See the holes between the neck and the back (see photo 75).
— THOES (TOES), 3 pcs on each leg (Yarn B, in two folds) :
Info :
Embroider 3 toes on each leg with French knot (see photos 76-81).
— TAIL (Yarn A) :
Info :
Leave the long end of the thread, it will be needed for sewing. Crochet 10 loops (see photo 82). Make a brush at the end of the tail: use the hook to pull out the loop on 1 cm (0,4 inches). Wrap the thread around the loop and tighten it tightly, creating a knot (see photos 83, 84). In the same way make 4 more loops (see photo 85-87). Swipe your scissors through the loops and cut it in half one by one (see photo 88). Cut the thread and trim the brush and fluff it with the needle (see photo 89). Sew the tail to the body (see photo 90).
Info :
Don’t cut the thread, but "squeeze" the head to the body with a few stitches (see photo 91-93).
— FORELOCK (Yarn A) :
Info :
Forelock positioned in the top of the head. Insert the needle and pull out the thread, then insert it in the same place (see photo 61). Do not tighten the thread to the end, but leave a 1 cm (0,4 inches) long "loose stitch" (see photo 62). Secure the "loose stitch" from the wrong side, making a knot. Make another 4 loops in the same way (see photo 63, 64). Swipe your scissors through all loops and cut it in half (see photo 65). Trim the forelock from both sides to get a triangular shape (see photos 66).
Round 20 :
[4sc, dec]x6 (30l)
Round 21 :
[3sc, dec]x6 (24l)
Round 22 :
[2sc, dec]x6 (18l)
Round 23 :
[sc, dec]x6 (12l)
— CHEEKS, 2 pcs (Pink threads mouline) :
Round 1 :
2 loops, 6sc in 2nd loop from hook (amigurumi ring), sl st in 1st sc (6l)
Info :
Cut and fix the thread, leaving a long end for sewing. Sew the cheeks to the head with the wrong side outward (see photos 50, 51).
— TUSKS, 2 pcs (Yarn B) :
Info :
Tusks are crocheted the form of a cord of two threads at once. At the beginning leave the long end of the thread (see photo 52). Put the end of the thread on the hook (see photo 53), then grab the working thread and pull it through two loops on the hook (see photo 54, 55). Crochet 5 more loops in the same way (see photo 56). Trim and secure the thread, leaving a long end for sewing (see photo 57). Sew the tusks to the head (see photos 58-60).
— EARS (2 pcs) :
Info :
The inner part of the ear is crocheted with Yarn B, and the outer part with Yarn A according to the same pattern (see photo 94).
Round 1 :
9 loops, turning, 8sc (starting from the 2nd loop from the hook) (8l)
Round 2 :
inc, 6sc, inc (10l)
Round 6 :
inc, 8sc, inc (12l)
Round 10 :
dec, 8sc, dec (10l)
Round 16 :
2dc, 2sc, dec (5l) Cut and fasten the thread on the inner ear, and do not cut on the outer ear. Fold the left and right ears as shown in photos 95, 96.
Right ear (by the observer) - Round 17 :
15sc up, 8sc straight, 15sc down, 5sc straight (43l)
Right ear - Round 18 :
3 sl st, [P* small]x2, [P* big]x3
Info :
Picot small = 3 loops, dc in the 1st loop, skip 1sc, sl st into the next sc (see photos 100-103). Picot big = 5 loops, dc in the 1st loop, skip 2sc, sl st into the next sc (see photos 104-108). Cut and fix the thread, leaving a long end for sewing.
Left ear (by the observer) - Round 17 :
5sc straight, 15sc up, 8sc straight, 15sc down (43l)
Left ear - Round 18 :
1 loop, turning, 3 sl st, [P* small]x2, [P* big]x3
Info :
Cut and fix the thread, leaving a long end for sewing. Sew the ears to the head, pre-fixing them with needles for cutting, in order to achieve perfect symmetry (see photos 109-111).
— BALLOON :
HEART (Yarn C) - Round 1 :
2 loops, 6sc in 2nd loop from hook (amigurumi ring) (6l)
Round 3 :
[sc, inc]x6 (18l)
Round 5 :
[2sc, inc]x6 (24l)
Info :
Cut and fix the thread. Crochet the second detail according to the same scheme, do not cut the thread. To connect the details insert the hook initially into the first detail (from the inside to the outside), and then into the second detail (from the outside to the inside) (see photos 112).
Round 7 (incomplete round) :
crochet 6sc of the first detail together with 6sc of the second detail, then crochet 18sc along the second detail (see photo 113)
Round 8 :
crochet 18sc on the first part, crochet 18sc on the second part (36l) (see photo 114)
Round 9 :
[4sc, dec]x6 (30l)
Round 10 :
[3sc, dec]x6 (24l)
Round 11 :
[2sc, dec]x6 (18l) Start stuffing the heart with synthepus.
Round 12 :
[sc, dec]x6 (12l)
Round 13 :
12sc (12l) Completely fill the heart.
Round 16 :
[inc]x6, sl st in 1st sc (12l) Cut and fix the thread, push the end of the thread into the heart (see photo 117).
BALLOON ROPE (Yarn B) :
Cut off a piece of wire approximately 20 cm (7,9 inches) long (see photo 118). Wrap the wire with a thread as follows: Glue the thread to the wire leaving the long end of the thread free (see photo 119). Spread a small section of the wire with glue and wrap it tightly with the thread in a spiral (see photo 120). Repeat until all the wire is wrapped to the end (see photo 121). Using a paint brush to cover the wire with the thread with transparent glossy acrylic glaze and leave it to dry completely (see photo 122). Using a hook to pull the free long end of the thread through the bottom of the heart and pull the wire inward (see photo 123). Wrap the bottom of the ball with the thread and make a bow (see photos 124-127). Attach the balloon rope to the leg or to the trunk (see photos 128, 129). Embrace your elephant!
This adorable Elephant Elf pattern gives you a tiny companion full of character and charm. Follow the clear rounds and photo guidance to shape ears, trunk, and a sweet heart balloon for the perfect finishing touch. Make one for a friend or as a special keepsake — it stitches up into a delightful handmade gift. 🧶💕