🧢 Beautiful ✨ Detailed πŸ’ Adorable

Desert Crochet Cactus Amigurumi Pattern

Desert Crochet Cactus Amigurumi Pattern
4.7β˜… Rating
2-3 Hours Time Needed
3.4K Made This
βœ‚οΈ

Intermediate Level

Ideal for those with basic crochet experience, featuring slightly more advanced stitches and techniques to expand your skills.

⏱️

Bite-Sized Project

Finishes in 2-4 hoursβ€”perfect for an afternoon of creative relaxation.

🧸

Cute Companion

An adorable friend to cherish, handcrafted with love to bring comfort and joy for years to come.

About This Desert Crochet Cactus Amigurumi Pattern

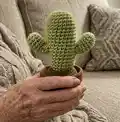
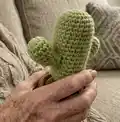
This pattern teaches you to crochet a small potted cactus with a soil base and a variety of cactus styles. It uses DK weight yarn and a US 4 (3.5mm) hook and includes optional arms and tiny flowers. The instructions are written in American terminology and include both round and flat construction techniques for different cactus shapes.

Desert Crochet Cactus Amigurumi Pattern crochet pattern - detailed view of completed project

You will receive full round-by-round instructions and clear abbreviations to follow along. The finished cactus fits inside a small terracotta pot and makes a perfect handmade gift.

Why You'll Love This Desert Crochet Cactus Amigurumi Pattern

I absolutely love this pattern because it turns simple stitches into a delightful little plant that brings personality to any space. I enjoy how quickly it comes together, making it perfect for gift-making or last-minute projects. The combination of round shaping and a small panel for the tall cactus offers a fun variety of techniques. Creating the tiny flowers is one of my favourite finishing touches β€” they always add a bit of charm and make each cactus unique.

Desert Crochet Cactus Amigurumi Pattern step 1 - construction progress Desert Crochet Cactus Amigurumi Pattern step 2 - assembly progress Desert Crochet Cactus Amigurumi Pattern step 3 - details and accessories Desert Crochet Cactus Amigurumi Pattern step 4 - final assembly and finishing

Switch Things Up

I love customizing these cacti β€” changing yarn color or weight instantly changes the style. Try pastel greens for a soft look or bright greens for a fun, modern cactus.

If you want a chunkier cactus, switch to a bulky yarn and a larger hook; this will create a squishier, more decorative plant perfect for a shelf display.

Make a mini keychain by using fingering weight yarn and a much smaller hook for a tiny portable cactus that fits on bags and keys.

I often add wire or a pipe cleaner inside the arms to pose them; this gives you fun, bendable shapes that hold an expression or curve.

Experiment with different flower colours and sizes β€” small felt flowers or crocheted petals in contrasting colours look charming on top of the cactus.

To create a collection, vary the pot sizes and make tall, round, and barrel cactus shapes using the provided panels and rounds for diverse textures.

Try embroidering tiny prickles with contrasting thread for a more detailed finish and a realistic look.

I sometimes glue a bit of faux moss or sand inside the pot under the soil for extra realism and texture in displays.

For a sturdier display, glue the soil to the base of the pot before sewing the cactus in place so it sits securely in high-traffic areas.

Use metallic thread sparingly for tiny decorative accents or a stitched name tag to personalize each cactus as a gift.

Common Mistakes & How to Fix Them

βœ— Skipping stitch markers during increases can make it hard to keep track of rounds; place a marker at the start of every round and move it as you work. βœ— Overstuffing the cactus or soil causes lumps and distortion; stuff gradually and evenly, adding small amounts until you reach the desired shape. βœ— Forgetting to count stitches on increase rounds results in an incorrect circumference; count after each increase round to ensure correct stitch totals. βœ— Working decreases in the wrong loops will change the look of the invisible decrease; work decreases in the front loops only when the pattern specifies for invisible shaping. βœ— Not leaving a long enough tail when fastening off makes sewing parts together difficult; leave a long tail for sewing and finishing so you can stitch pieces securely.

Desert Crochet Cactus Amigurumi Pattern

Create a charming miniature cactus to brighten any shelf or desk with this full crochet pattern. You will make a soil base, cactus body and optional arms and flowers using DK weight yarn and a 3.5mm hook. The pattern includes step-by-step rounds, clear abbreviations, and assembly instructions so you can finish a sweet potted cactus in an afternoon. Perfect for gifting or decorating your home with handmade goodness.

Intermediate 2-3 Hours

Materials Needed for Desert Crochet Cactus Amigurumi Pattern

β€” Main Fabric

  • 01
    Yarn A: Brown DK weight yarn - approximately 20g (for soil)
  • 02
    Yarn B: Green DK weight yarn - approximately 20g (for cactus body and arms)
  • 03
    Yarn C: Small quantity of pink or white DK weight yarn - small amount for flower (optional)
  • 04
    Yarn D: (used as change colour for flowers) small quantity of contrasting DK weight yarn for petals

β€” Tools Required

  • 01
    US 4 (3.5mm) Crochet Hook
  • 02
    Stitch marker
  • 03
    Sewing needle
  • 04
    Scissors
  • 05
    Acrylic toy stuffing
  • 06
    Small terracotta plant pot – approx 6cm x 6.8cm x 4cm
  • 07
    Pipe cleaner (optional for bendable arms)

Progress Tracker

0% Complete

β€” Soil :

Round 1 :

MR 6

Round 2 :

*Inc (12)

Round 3 :

*1 SC, Inc (18)

Round 4 :

1 SC, *Inc, 2 SC until last stitch, 1 SC (24)

Round 5 :

*3 SC, Inc (30)

Round 6 :

2 SC, *Inc, 4 SC until last 2 stitches, 2 SC (36)

Info :

Note: If your pot is larger continue increasing in this way until the circumference of the soil fits just inside the pot as pictured below.

At round 7 :

Round 7-15: SC around (36)

Info :

Note: If your pot is larger continue until soil fits just inside the pot as pictured below.

Info :

Begin stuffing soil, continue stuffing as you go.

Round 16 :

2 SC, *Dec, 4 SC until last 2 stitches, 2 SC (30)

Round 17 :

*3 SC, Dec (24)

Round 18 :

1 SC *Dec, 2 SC until last stitch, 1 SC (18)

Round 19 :

*1 SC, Dec (12)

Round 20 :

*Dec (6)

Round 21 :

FO.

β€” Body :

Using Yarn B :

Round 1: MR 6 (6)

Round 2 :

*Inc (12)

Round 3 :

*1 SC, Inc (18)

Round 4 :

1 SC, *Inc, 2 SC until last stitch, 1 SC (24)

Round 5-19 :

SC around (24)

Round 20 :

1 SC *Dec, 2 SC until last stitch, 1 SC (18)

Info :

FO – leave tail for sewing.

Info :

Stuff firmly.

β€” Arms (Make 2) :

Using Yarn B :

Round 1: MR 6 (6)

Round 2 :

*Inc (12)

Round 3-8 :

SC around (12)

Round 9 :

(for this last row stop working in rounds) turn and do not CH, SC 8.

Info :

FO – leave tail for sewing

Info :

Lightly stuff.

Info :

If you want the arms to have more of a bend, fold a short piece of pipe cleaner so it is the length of the arm. Place inside with the stuffing.

β€” Assembly :

Info :

Sew the body of the cactus to the soil at approximately round three of the soil pattern.

Info :

To sew the arms to the cactus. Place the arms with pins to the body approximately 6 rounds up from the bottom of the body of the cactus and on opposite sides.

Info :

Place the arms facing upwards, so row 9 is facing downwards.

Info :

Sew the arm of the cactus to the body of the cactus. If you have used pipe cleaner, once sewn in place bend the pipe cleaner to create an upwards curve.

β€” Cactus (Tall) :

Using Yarn B :

CH 24

Row 1 :

In 2nd Loop from the hook, SC, repeat for remaining 22 stitches, CH1 turn

Row 2 :

In 2nd loop from the hook, SC in the back looks only for all 23 stitches, CH 1 turn

Info :

Repeat row 2 until piece measures 11cm.

Info :

Weave through one side of the cactus, drawstring close as pictured.

Info :

Sew up the side of the cactus by crocheting through the stem of the first row and the back loop of the last row.

Info :

Stuff firmly.

Info :

Weave the other side of the cactus as above and drawstring to close.

β€” Flowers (Optional) :

Using Yarn C :

Round 1: MR 6

Info :

Change to Yarn D:

Round 2 :

SS to the first stitch, in the same stitch: 2 CH, 2 TR, 1 DC. For the remaining 5 stitches: SS to the next stitch, 2 CH 2 TR, 1 DC. SS to the first stitch.

Info :

FO.

Assembly Instructions

  • Sew the body of the cactus to the soil at approximately round three of the soil pattern to secure the body into the pot.
  • Position the arms with pins to the cactus body approximately 6 rounds up from the bottom, on opposite sides, and sew them in place so row 9 is facing downwards.
  • If you added pipe cleaner to the arms, bend the pipe cleaner after sewing to create an upward curve and secure with additional stitches if needed.
  • Weave the tall cactus panel by drawstringing one side closed, stuff firmly, then sew up the side by crocheting through the stem of the first row and the back loop of the last row.
  • Attach optional flowers by sewing them to the top of the cactus, positioning petals to cover the seam and secure with small stitches.

Important Notes

  • πŸ’‘This pattern uses American crochet terminologyβ€”MR means magic ring and SC means single crochet throughout the instructions.
  • πŸ’‘If you are not familiar with the Magic Ring technique you can replace MR with 2 Chains and work into the second chain from the hook as the start.
  • πŸ’‘The pattern uses an invisible decrease created by decreasing in the front loops only when specified for a neat finish.
  • πŸ’‘Use stitch markers to keep track of the beginning of rounds and count stitches after increase and decrease rounds to maintain the correct stitch counts.

This sweet Desert Crochet Cactus pattern gives you a little handmade plant perfect for shelves, desks or gifts. The set includes soil, body, optional arms and tiny flowers for delightful finishing touches. Make a collection of different shapes and sizes to create a miniature desert garden. 🧢🌡✨

You ask,

we answer.

FAQs

What size will the finished piece be?

The finished cactus fits a small terracotta pot approximately 6cm x 6.8cm x 4cm and each cactus height will vary by shape but is roughly 8-12 cm tall using the recommended yarn and hook.

Can I use different yarn weights for this pattern?

Yes, you can use different yarn weights but this will affect the final size; if you change yarn weight, adjust your hook size accordingly and expect the cactus and soil to scale proportionally.

Do I need prior crochet experience for this pattern?

This pattern is rated intermediate and uses common stitches and shaping techniques; basic knowledge of single crochet, increases, decreases and working in rounds is recommended.

How long does this project typically take to complete?

Most crocheters complete a single cactus and soil in 2-4 hours, though time will vary based on style chosen and experience level.