๐Ÿงถ Beautiful โœจ Detailed ๐Ÿ’ Adorable

Cupid Whale Amigurumi Pattern

Cupid Whale Amigurumi Pattern
4.5โ˜… Rating
5-7 Hours Time Needed
2.0K Made This
โœ‚๏ธ

Intermediate Level

Ideal for those with basic crochet experience, featuring slightly more advanced stitches and techniques to expand your skills.

โฑ๏ธ

Weekend Treat

Takes 5-7 hours, making it an enjoyable project to finish over a couple of days.

๐Ÿงธ

Cute Companion

An adorable friend to cherish, handcrafted with love to bring comfort and joy for years to come.

About This Cupid Whale Amigurumi Pattern

This pattern creates a small, heart-topped Cupid Whale amigurumi with a decorative water fountain on its head. You will work the body in color changes to create the belly detail, crochet separate fins, a tail, flippers, cheeks, a water fountain and a heart. Detailed rounds are provided for each piece so you can follow along easily.

Cupid Whale Amigurumi Pattern crochet pattern - detailed view of completed project

The pattern uses YarnArt Jeans yarn and a 2.5mm hook with safety eyes and fiberfill for a firm, neat finish. Clear assembly notes and photos help position pieces accurately.

Why You'll Love This Cupid Whale Amigurumi Pattern

I absolutely love this pattern because it combines sweet shaping with playful details like the heart-topped fountain. I enjoy how the color changes create a crisp belly contrast that gives the whale personality. The separate fountain and heart make assembly fun and allow for small variations in color and placement. I also appreciate that the pattern is modular โ€” you can change yarn colors to create many different characters while using the same instructions.

Cupid Whale Amigurumi Pattern step 1 - construction progress Cupid Whale Amigurumi Pattern step 2 - assembly progress Cupid Whale Amigurumi Pattern step 3 - details and accessories Cupid Whale Amigurumi Pattern step 4 - final assembly and finishing

Switch Things Up

I love how easy it is to customize this Cupid Whale by switching yarn colors; try pastel shades for a softer nursery toy or bold hues for a playful shelf buddy.

You can make the whale larger or smaller simply by changing your yarn weight and hook size; bulky yarn with a larger hook will produce a cuddlier whale while finer yarn creates a pocket-sized charm.

I like to vary the fountain petals by making them in gradient colors for an ombre effectโ€”crocheting the four fountain petals in slightly different shades gives a unique finished piece.

Try different heart styles: crochet a flat heart instead of a 3D one for a lighter top, or embroider a tiny message on the heart before stuffing for a sweet gift.

Swap the safety eyes with embroidered eyes for a baby-safe toy, and use embroidered cheeks instead of crocheted ones for a subtle look.

For a nautical theme, add a tiny crocheted sailor hat or a striped belly by working a few rounds in alternating colors before finishing the body.

Make a family set by creating matching whales in different colors and sizes; place them together as a charming mobile or shelf display.

I sometimes add a small loop at the top of the fountain so the whale can hang as an ornament; a few extra chains secured inside work perfectly for this.

Use fuzzy or textured yarn for the body to create a soft cuddly version that feels cozy to hold, and remember to adjust hook size and stuffing for best results.

Have fun mixing yarn brands and texturesโ€”combining a smooth cotton for details with a matte acrylic body can make elements like the heart and belly pop beautifully.

Common Mistakes & How to Fix Them

โœ— Skipping stitch markers during rounds makes it easy to lose track of the start; place a stitch marker at the beginning of every round to avoid miscounts. โœ— Not changing color neatly at the specified stitch will leave gaps; finish the last pull-through with the new color and carry yarn or weave in ends securely. โœ— Overstuffing the head or body will distort shaping and make sewing parts awkward; stuff gradually and check shaping often to keep the silhouette smooth. โœ— Forgetting to insert safety eyes before closing the head can make placement impossible later; place eyes between the rounds suggested in the pattern and secure them before stuffing further.

Cupid Whale Amigurumi Pattern

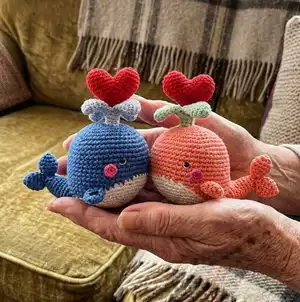
Create an adorable Cupid Whale amigurumi with this complete crochet pattern. You will make a squishy whale body, cute tail and fins, a heart-topped water fountain, and sweet facial details. The pattern includes clear rounds, color-change notes, and assembly photos to guide you through every step. Perfect for gifting or decorating nurseries with a handmade touch.

Intermediate 5-7 Hours

Materials Needed for Cupid Whale Amigurumi Pattern

โ€” Main Fabric

  • 01
    Color A: white YarnArt Jeans 01 (50g, 160m)
  • 02
    Color B: blue YarnArt Jeans 17 (50g, 160m)
  • 03
    Color C: baby blue YarnArt Jeans 75 (50g, 160m)
  • 04
    Color D: red YarnArt Jeans 90 (50g, 160m)
  • 05
    Color E: fuchsia YarnArt Jeans 59 (50g, 160m)
  • 06
    Polyester fiberfill for stuffing (small amount)

โ€” Tools Required

  • 01
    Crochet hook size 2.5mm
  • 02
    1 pair of safety eyes size 5mm
  • 03
    Tapestry needles
  • 04
    Brown thread (for optional facial embroidery)
  • 05
    Pins for assembly
  • 06
    Stitch markers
  • 07
    Scissors
  • 08
    Polyester fiberfill

Progress Tracker

0% Complete

โ€” Body (yarn A) :

Info :

We will change color if the letter color changes: (if you do not know how to change color, see Crochet Tips at the end of the pattern) Red letter: yarn A Black letter: yarn B

Round 1 :

sc 7 into a magic loop (7)

Round 2 :

inc 7 (14)

Round 3 :

[sc 1, inc] 7x (21)

Round 4 :

[sc 1, inc, sc 1] 7x (28)

Round 5 :

[sc 3, inc] 7x (35)

Round 6 :

[sc 2, inc, sc 2] 7x (42)

Round 7 :

[sc 5, inc] 7x, change to yarn B (49)

Round 8 :

sc 3, inc, sc 3, sc 3, inc, [sc 6, inc] 2x, sc 6, inc, [sc 6, inc] 2x, sc 3 (56)

Round 9 :

sc 7, inc, sc 1, sc 6, inc, [sc 7, inc] 2x, sc 1, sc 6, inc, [sc 7, inc] 2x (63)

Round 10 :

sc 4, inc, sc 6, sc 2, inc, [sc 8, inc] 2x, sc 4, sc 4, inc, [sc 8, inc] 2x, sc 4 (70)

Round 11 :

sc 13, sc 27, sc 30 (70)

Round 12 :

sc 14, sc 25, sc 31 (70)

Round 13 :

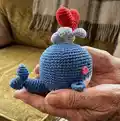
sc 15, sc 23, sc 16, we will divide the body & the tail from this rnd (pic 1), skip the next 16 sts, continue to crochet the next rnd (pic 2&3) (54)

Round 14 :

sc 16, sc 21, sc 17 (54)

Round 15 :

sc 18, sc 17, sc 19 (54)

Round 16 :

sc 20, sc 13, sc 21, break yarn A (54)

Round 17-24 :

sc 54 (8 rnds), insert eyes between rnd 20&21, 17 sts apart (pic 13&14) (54)

Round 25 :

[sc 7, dec] 6x (48)

Round 26 :

[sc 6, dec] 6x (42)

Round 27 :

[sc 5, dec] 6x (36)

Round 28 :

[sc 4, dec] 6x, stuff firmly (30)

Round 29 :

[sc 3, dec] 6x (24)

Round 30 :

[sc 2, dec] 6x (18)

Round 31 :

[sc 1, dec] 6x (12)

Round 32 :

(blo) sc 12 (12)

Round 33-37 :

sc 12 (5 rnds), do not stuff this part (12)

Round 38 :

dec 6 (6)

Info :

Break the yarn, weave in the last 6 sts (pic 4).

โ€” Tail (yarn B) :

Round 1 :

sc 12, skip the next 2 sts, join with the 1st st of this rnd (pic 8&9) (12)

Round 2 :

[sc 4, dec] 2x (10)

Round 3 :

sc 10, stuff firmly (10)

Round 4 :

dec 5 (5)

Info :

Break the yarn, weave in the last 5 sts (pic 10). Break the yarn, weave in the last 6 sts (pic 4).

โ€” Tail Fins (yarn B, X2) :

Round 1 :

sc 3 into a magic loop (3)

Round 2 :

inc 3 (6)

Round 3 :

[sc 1, inc] 3x (9)

Round 4 :

[sc 2, inc] 3x (12)

Round 5-6 :

sc 12 (2 rnds) (12)

Round 7 :

dec 6 (6)

Info :

Break the yarn, weave in the last 6 sts.

โ€” Flippers (yarn B, X2) :

Round 1 :

sc 5 into a magic loop (5)

Round 2 :

inc 5 (10)

Round 3 :

sc, hdc, dc, [dc inc] 4x, dc, hdc, sc (14)

Info :

Break the yarn with a long rest to sew later. Sew the Fins on the tail & Flippers, Cheeks on both side (pic 15&16).

โ€” Cheeks (yarn E, X2) :

Round 1 :

sc 6 into a magic loop (6)

Info :

Break the yarn with a long rest to sew later.

โ€” Water Fountain (yarn C, X4) :

Round 1 :

sc 6 into a magic loop (6)

Round 2 :

inc 6 (12)

Round 3-5 :

sc 12 (3 rnds) (12)

Round 6 :

[sc 4, dec] 2x (10)

Round 7 :

[sc 3, dec] 2x (8)

Info :

Break the yarn with a long rest to sew later. Make another 3 pieces the same way, but do not break the yarn on the 4th piece (pic 17), continue to crochet the following rnds:

Round 8 :

sc 4 on the 4th piece, sc 4 on the 3th piece, sc 4 on the 2nd piece, sc 4 on the 1st piece = 16 sts (pic 18-19-20-21), slst on the 1st st to make a ring (pic 22) (16)

Round 9 :

[sc 2, dec] 4x (12)

Round 10 :

[sc 4, dec] 2x (10)

Round 11 :

[sc 3, dec] 2x (8)

Round 12-17 :

sc 8 (6 rnds), stuff firmly (8)

Info :

Break the yarn , weave in the last 8 sts (pic 23). Join yarn C on the remaining sts of the upper part (pic 24), crochet:

Round 1 (join) :

sc 16 (4 sts for each piece) (pic 25) (16)

Round 2 :

dec 8, stuff firmly (8)

Info :

Break the yarn , weave in the last 8 sts (pic 26). Use tapestry needle to create a dent in the middle of the fountain (pic 27&28). Use your finger to bend each piece (pic 29&30). Put the water fountain inside the hole (pic 31&32).

โ€” Heart (yarn D) :

Round 1 :

sc 6 into a magic loop (6)

Round 2 :

inc 6 (12)

Round 3 :

[sc 1, inc] 6x (18)

Round 4-5 :

sc 18 (2 rnds) (18)

Info :

Break the yarn, make the 2nd piece the same way but do not break the yarn, join with the 1st piece (pic 31), and continue to crochet the following rnds:

Round 6 :

sc 18 (on the 1st piece), sc 18 (on the 2nd piece) (36)

Round 7 :

sc 36 (36)

Round 8 :

[sc 4, dec] 6x (30)

Round 9 :

[sc 3, dec] 6x (24)

Round 10 :

[sc 2, dec] 6x, stuff firmly (18)

Round 11 :

[sc 1, dec] 3x (12)

Round 12 :

dec 6 (6)

Info :

Break the yarn, weave in the last 6 sts (pic 34). Put the heart above the water fountain (pic 35), and we have finished the Cupid Whale!

Assembly Instructions

  • Use the tapestry needle to sew the remaining sts on the body closed (see pics 11 & 12), ensuring the seams are neat and secure.
  • Insert safety eyes between rounds 20 & 21, 17 sts apart (see pics 13 & 14), and embroider a small white line under each eye with white thread for detail.
  • Sew the tail to the opening left when dividing the body and tail (after rnd 13 division), lining up the tail seam and sewing firmly with matching yarn.
  • Attach the water fountain into the hole at the top of the head (pic 31 & 32) and position the heart above it, securing both pieces with a tapestry needle.
  • Sew flippers and tail fins into place: flippers on either side of the body and tail fins at the tail tip, using photos 15 & 16 as placement guides.
  • Sew cheeks on both sides of the face using the long yarn ends from the cheek pieces and place them slightly below the eye line for a cute look.

Important Notes

  • ๐Ÿ’กUse stitch markers to mark the beginning of each round and any points where you need to divide or join pieces for accuracy.
  • ๐Ÿ’กStuff firmly but gradually when the pattern instructs to stuff firmly; overstuffing can alter the shape and make sewing difficult.
  • ๐Ÿ’กWhen changing yarn colors, carry the yarn inside or weave in ends as you go to keep the inside tidy and avoid loose tails during assembly.
  • ๐Ÿ’กPlace safety eyes before closing the head; secure the back washers tightly and check placement against the photos for symmetry.

This Cupid Whale pattern brings a playful little friend to life with a heart-topped fountain and lots of charm. The modular pieces let you customize colors and details for a unique handmade gift. Follow the clear rounds and photos to make a polished, huggable whale youll love to give and display. ๐Ÿงถ๐Ÿ’–

You ask,

we answer.

FAQs

What size will the finished piece be?

The finished Cupid Whale measures approximately 10-14 cm tall depending on yarn tension and hook size when using the recommended yarn and 2.5mm hook.

Can I use different yarn weights for this pattern?

Yes, you can use different yarn weights, but this will affect the final size and stitch counts; adjust your hook accordingly and check gauge by making a small swatch.

Do I need prior crochet experience for this pattern?

This pattern is rated intermediate and assumes you know basic amigurumi techniques such as magic ring, working in rounds, increases and decreases, and basic color changes.

How long does this project typically take to complete?

Most crocheters finish this project in 5-7 hours, depending on experience, how many pieces you make at once, and assembly time.