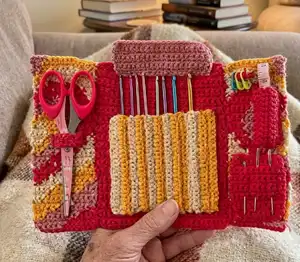
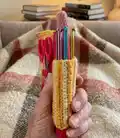
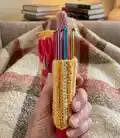
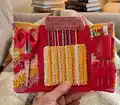
Create a beautiful, practical crochet hook case that keeps your hooks, scissors, needles and measuring tape tidy and easy to find. This pattern uses single crochet and intarsia color techniques to produce a pretty heart-themed foldable case. You will learn how to read a chart, make multiple panels and pockets, and sew everything together for a neat, professional finish. Perfect as a handmade gift or a personal organizer for your crochet tools.
Progress Tracker
0% Complete
— About the Pattern :
Info :
The case is made up using single crochet. For the color changes, I suggest using the intarsia method.
Info :
Intarsia guide: https://youtu.be/2iWqTPRQkWc or refer to next page.
Info :
Feel free to use the "carry the yarn" method, but this may result to the carrying color peeking through. I highly suggest NOT to use the "fair-isle method" because the inside work should also be neat.
Info :
Skill Level: Advanced Beginners
Info :
The asterisks, * * are used to indicate the repeats.
Info :
Always CH1 for the turning CH in every row.
Info :
Gauge: 7cm x 7cm = 12 STs x 14 rows using SC, yarn weight 3 and 3.5mm.
Info :
This pattern is a one-size crochet hook case, suitable for a hook height of 15cm. Measurements of the case are provided on the planning chart. If you want to customize the size, refer to the next page.
— How to Read a Graph :
Info :
Even Rows: the wrong side of your work, this should be the inside of your case. EVEN rows (circle) are read from left to right.
Info :
Odd Rows: the correct side of your work, this should be the outside of your case. ODD rows (square) are read from right to left.
— How to do Intarsia :
Step 1 :
SC until where you have to change colors.
Step 2 :
Drop the 1st yarn to the back, bring the 2nd yarn and pull through with that color. Do not carry the dropped yarn with you; it stays in place until you need it again.
Step 3 :
Leave the 1st yarn behind, then continue SC using the 2nd color.
Step 4 :
When working on the wrong side, drop the yarn towards you; when on the correct side, drop the yarn at the back. This keeps intarsia floats neat on the inside.
— Planning Chart :
Info :
Use the non-colored digital sketch as a guide for choosing colors and planning the panels and patches.
— Customize the Case Size :
Info :
By customizing the case size, you can extend as much as 12cm horizontally and vertically. In the original graph, 13 grids were used for the width and 37 rows for the height of one half-heart portion. The graph below has additional 10 grids for the width (5 grids in each portion) and additional 9 rows for the height.
Info :
To customize or increase the size you: 1. Must follow the General Rules (#1 - #5). 2. May use a larger hook and/or 3. add more stitches/rows.
— General Rule :
Info :
1. The middle portion is twice wider than the right portion.
Info :
2. Both right and left portion should have the same number of STs.
Info :
3. All portions (middle, left, and right) should have the same number of rows.
Info :
4. The size of the patches should not exceed any of the portions.
Info :
5. The smallest heart should locate at the center of the case. For example: If you want 42 rows, divide that by 2 = 21 rows and start counting 21 rows up and 21 rows down from the 27th row. The farthest rows (21st rows from the middle) are where you will start and finish the row. To avoid confusion, your 1st row should start at an odd number.
— Step 1: Middle Portion :
Item (P1) :
a. Grab the 1st color (dark pink). CH27. In the 2nd CH from hook, make 1 SC.
Item (P1) :
b. *make 1SC in each st until the last st. CH1, turn.* Repeat * to * until you have 37 rows.
Info :
The height should be (about 4cm) longer than your crochet hook. If it doesn't, add more rows.
Item (P1) :
c. CH1, leave a long tail (worth the height of the middle portion) for sewing.
— Step 2: Right Portion :
Info :
We will be following the graph on the right for the right portion.
Info :
The foundation CH does NOT count as a row.
Item (P2) :
a. Grab the 1st color, CH14.
Item (P2) :
b. Start row 1 by following the graph on the right. When you reach the last ST of the 37th row, FO.
Info :
Tip: If you want the inner to look neat, try to make the wrong side neat as well.
— Step 3: Left Portion :
Info :
We will be following the graph on the left for the left portion.
Info :
The foundation CH does NOT count as a row.
Item (P3) :
a. Grab the 1st color, CH13.
Item (P3) :
b. Grab the 2nd color and CH1 more. Reminder: Do not CH14, only do CH13 with 1st color, then do one more chain with 2nd color.
Item (P3) :
c. Start row 1 by following the left graph. When you reach the last ST of the 37th row, FO.
— Step 4: Hook Pockets :
Info :
2 rows of SC are allocated for 1 crochet hook. However, for crochet hooks 5mm, 5.5mm, 6mm and above, 3 rows will be allocated for each hook.
Info :
For ergonomic crochet hooks, you may want to have 4 (or more) rows for 1 crochet hook.
Item (P4) :
a. Grab 3rd color, CH22, or when it reaches 11cm. In the 2nd ch from hook, 1SC.
Item (P4) :
b. *make 1SC in each ST until the last ST. CH1, turn.* Repeat for another row. When you reach the last ST, grab the opposite color and pull through.
Item (P4) :
c. Repeat Step 4b, changing colors for 7 times.
Item (P4) :
d. When you reach the last ST, grab the opposite color, and pull through. SC for 3 rows - CH1 for turning CH.
Item (P4) :
e. After 3 rows, cut yarn, and repeat Step 4d for 2 more sets - you should have 3 sets total of 3 rows. FO.
— Step 5: Other Patches :
Info :
We will now make patches for the stitch markers, needles, measuring tape, scissors, and a cover for the hooks.
Item :
a. Follow the guide below, or customize the patch length according to your liking. CH1 more for the foundation CH. CH1 for turning CH for every row. FO after reaching the last row, leaving enough tail for sewing. Refer to page 4 for the patch measurements.
Info :
Patch guide (as shown): Top hook cover: 23 SC each row, 7 rows total. Small top pocket: 1 SC each row, 7 rows total. Scissors strap: 2 SC each row, 4 rows total (have lesser rows if scissors are thinner). Measuring tape patch: 6 SC each row, 10 rows total (adjust if measuring tape is thinner). Needle patch: 10 SC each row, 14 rows total (do not let the patch width exceed the front panel width).
— Step 6: Sewing :
Info :
The sewing part will take most of your time, so be patient in this step.
Item :
a. Sew the following patches in your preferred way, according to the guide on the next page. I used the mattress stitch to sew the panels and running stitch for the patches.
Info :
Mattress Stitch Tutorial: https://youtu.be/LsFjyL_YX4M?t=39
Info :
Running Stitch Tutorial: https://youtu.be/W4nhj8kMpAI
Info :
Very important: do not let the sewing thread be visible on the outside, especially when you are using a thread color that is different to the other patch.
Info :
Sewing tips: 1. I separated the ply of the yarn to create a thinner thread. 2. For sewing parts going up/down, I sewed through the yellow highlights. 3. For the sewing parts going right/left, I sewed like I'm weaving ends.
Info :
Sewing guide: same color of the solid and broken lines are sewn together. Pin and check placement before sewing. I switched the location of the measuring tape patch and disregarded the middle patch at the right side in my sample.
— Step 7: Lock :
Info :
In order to secure the case, we need a lock. You may find other ways on how you want to secure the case, but I made a heart string.
Info :
Abbreviations (US) for this section: TC - treble crochet, DC - double crochet, SLST - slip stitch.
Item :
Heart: a. Grab the 3rd color yarn, make a magic ring. CH2, make 3 TC into the ring, then 3 DC, then CH1. 1TC into the ring. CH1, 3DC into the ring, then 3TC. CH2, SLST into the ring. FO.
Item :
String: b. Make 1 SLST each in the 2 CHs, then another 1 SLST each in the next 4 STs. Then CH enough for the string. I made mine about 13 in. FO.
Item :
c. Attach yarn at the pink dot below. 1 SLST each in the next 4 STs. Then CH enough for the string. FO.
— Finishing :
Info :
And your Case is finished! Make sure to cut your weaved ends ♥
Info :
Thank you so much once again for showing your support!
This crochet hook case pattern is a delightful balance between practicality and playful colorwork, designed to keep your tools organized and beautiful. Whether you make it for yourself or as a heartfelt handmade gift, it adds charm to every craft session. Enjoy the process of colorwork, stitching and sewing—each step brings your case to life. 🧶💖