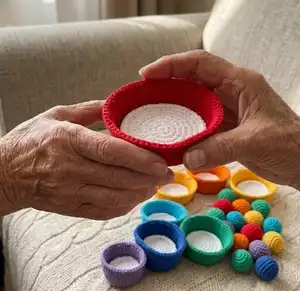
Make a colorful, tactile counting toy your child will love. This pattern guides you through crocheting seven bowls, 28 balls, ten numbered circles, and three signs. Clear step-by-step rounds and helpful photos make it easy to follow so you can create an engaging educational set to practice counting and colors.
Progress Tracker
0% Complete
— Bowls :
Purple bowl (with purple yarn) - Round 1 :
R1: Magic Ring + 7 sc => 7
Info :
Tip! Before pulling the tail to close the ring, insert the hook in the first stitch; in this way you will keep it loose and it will be easier to work in the 1st stitch of row 2
Purple bowl - Round 2 :
R2: inc X 7 sc => 14
Purple bowl - Round 3 :
R3: (1 sc + 1 inc) X 7 => 21
Purple bowl - Round 4 :
R4: (1 sc + 1 inc + 1 sc) X 7 => 28
Purple bowl - Round 5 :
R5: (3 sc + 1 inc) X 7 => 35
Purple bowl - Round 6 :
R6: (2 sc + 1 inc + 2 sc) X 7 => 42
Purple bowl - Round 7 :
R7: BLO sc X 42 => 4
Purple bowl - Round 8 - Round 13 :
R8 - R9 - R10 - R11 - R12 - R13: sc X 42 => 42
Purple bowl - Round 14 :
R14: (chain 1 + 1 slip stitch) X 42
Info :
Cut the yarn, hide the thread and the first bowl is finished.
Dark Blue bowl (with dark blue yarn) - Round 1 :
R1: Magic Ring + 7 sc => 7
Dark Blue bowl - Round 2 :
R2: inc X 7 sc => 14
Dark Blue bowl - Round 3 :
R3: (1 sc + 1 inc) X 7 => 21
Dark Blue bowl - Round 4 :
R4: (1 sc + 1 inc + 1 sc) X 7 => 28
Dark Blue bowl - Round 5 :
R5: (3 sc + 1 inc) X 7 => 35
Dark Blue bowl - Round 6 :
R6: (2 sc + 1 inc + 2 sc) X 7 => 42
Dark Blue bowl - Round 7 :
R7: (5 sc + 1 inc) X 7 => 49
Dark Blue bowl - Round 8 :
R8: BLO sc X 49 => 49
Dark Blue bowl - Round 9 - Round 14 :
R9 - R10 - R11 - R12 - R13 - R14: sc X 49 => 49
Dark Blue bowl - Round 15 :
R15: (chain 1 + 1 slip stitch) X 49
Info :
Cut the yarn, hide the thread and the 2nd bowl is finished.
Light Blue bowl (with light blue yarn) - Round 1 :
R1: Magic Ring + 7 sc => 7
Light Blue bowl - Round 2 :
R2: inc X 7 sc => 14
Light Blue bowl - Round 3 :
R3: (1 sc + 1 inc) X 7 => 21
Light Blue bowl - Round 4 :
R4: (1 sc + 1 inc + 1 sc) X 7 => 28
Light Blue bowl - Round 5 :
R5: (3 sc + 1 inc) X 7 => 35
Light Blue bowl - Round 6 :
R6: (2 sc + 1 inc + 2 sc) X 7 => 42
Light Blue bowl - Round 7 :
R7: (5 sc + 1 inc) X 7 => 49
Light Blue bowl - Round 8 :
R8: (3 sc + 1 inc + 3 sc) X 7 => 56
Light Blue bowl - Round 9 :
R9: BLO sc X 56 => 56
Light Blue bowl - Round 10 - Round 15 :
R10 - R11 - R12 - R13 - R14 - R15: sc X 56 => 56
Light Blue bowl - Round 16 :
R16: (chain 1 + 1 slip stitch) X 56
Info :
Cut the yarn, hide the thread and the 3rd bowl is finished.
Green bowl (with green yarn) - Round 1 :
R1: Magic Ring + 7 sc => 7
Green bowl - Round 2 :
R2: inc X 7 sc => 14
Green bowl - Round 3 :
R3: (1 sc + 1 inc) X 7 => 21
Green bowl - Round 4 :
R4: (1 sc + 1 inc + 1 sc) X 7 => 28
Green bowl - Round 5 :
R5: (3 sc + 1 inc) X 7 => 35
Green bowl - Round 6 :
R6: (2 sc + 1 inc + 2 sc) X 7 => 42
Green bowl - Round 7 :
R7: (5 sc + 1 inc) X 7 => 49
Green bowl - Round 8 :
R8: (3 sc + 1 inc + 3 sc) X 7 => 56
Green bowl - Round 9 :
R9: (7 sc + 1 inc) X 7 => 63
Green bowl - Round 10 :
R10: BLO sc X 63 => 63
Green bowl - Round 11 - Round 16 :
R11 - R12 - R13 - R14 - R15 - R16: sc X 63 => 63
Green bowl - Round 17 :
R17: (chain 1 + 1 slip stitch) X 63
Info :
Cut the yarn, hide the thread and the 4th bowl is finished.
Yellow bowl (with yellow yarn) - Round 1 :
R1: Magic Ring + 7 sc => 7
Yellow bowl - Round 2 :
R2: inc X 7 sc => 14
Yellow bowl - Round 3 :
R3: (1 sc + 1 inc) X 7 => 21
Yellow bowl - Round 4 :
R4: (1 sc + 1 inc + 1 sc) X 7 => 28
Yellow bowl - Round 5 :
R5: (3 sc + 1 inc) X 7 => 35
Yellow bowl - Round 6 :
R6: (2 sc + 1 inc + 2 sc) X 7 => 42
Yellow bowl - Round 7 :
R7: (5 sc + 1 inc) X 7 => 49
Yellow bowl - Round 8 :
R8: (3 sc + 1 inc + 3 sc) X 7 => 56
Yellow bowl - Round 9 :
R9: (7 sc + 1 inc) X 7 => 63
Yellow bowl - Round 10 :
R10: (4 sc + 1 inc + 4 sc) X 7 => 70
Yellow bowl - Round 11 :
R11: BLO sc X 70 => 70
Yellow bowl - Round 12 - Round 17 :
R12 - R13 - R14 - R15 - R16 - R17: sc X 70 => 70
Yellow bowl - Round 18 :
R18: (chain 1 + 1 slip stitch) X 70
Info :
Cut the yarn, hide the thread and the 5th bowl is finished.
Orange bowl (with orange yarn) - Round 1 :
R1: Magic Ring + 7 sc => 7
Orange bowl - Round 2 :
R2: inc X 7 sc => 14
Orange bowl - Round 3 :
R3: (1 sc + 1 inc) X 7 => 21
Orange bowl - Round 4 :
R4: (1 sc + 1 inc + 1 sc) X 7 => 28
Orange bowl - Round 5 :
R5: (3 sc + 1 inc) X 7 => 35
Orange bowl - Round 6 :
R6: (2 sc + 1 inc + 2 sc) X 7 => 42
Orange bowl - Round 7 :
R7: (5 sc + 1 inc) X 7 => 49
Orange bowl - Round 8 :
R8: (3 sc + 1 inc + 3 sc) X 7 => 56
Orange bowl - Round 9 :
R9: (7 sc + 1 inc) X 7 => 63
Orange bowl - Round 10 :
R10: (4 sc + 1 inc + 4 sc) X 7 => 70
Orange bowl - Round 11 :
R11: (9 sc + 1 inc) X 7 => 77
Orange bowl - Round 12 :
R12: BLO sc X 77 => 77
Orange bowl - Round 13 - Round 18 :
R13 - R14 - R15 - R16 - R17 - R18: sc X 77 => 77
Orange bowl - Round 19 :
R19: (chain 1 + 1 slip stitch) X 77
Info :
Cut the yarn, hide the thread and the 6th bowl is finished.
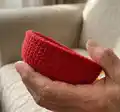
Red bowl (with red yarn) - Round 1 :
R1: Magic Ring + 7 sc => 7
Red bowl - Round 2 :
R2: inc X 7 sc => 14
Red bowl - Round 3 :
R3: (1 sc + 1 inc) X 7 => 21
Red bowl - Round 4 :
R4: (1 sc + 1 inc + 1 sc) X 7 => 28
Red bowl - Round 5 :
R5: (3 sc + 1 inc) X 7 => 35
Red bowl - Round 6 :
R6: (2 sc + 1 inc + 2 sc) X 7 => 42
Red bowl - Round 7 :
R7: (5 sc + 1 inc) X 7 => 49
Red bowl - Round 8 :
R8: (3 sc + 1 inc + 3 sc) X 7 => 56
Red bowl - Round 9 :
R9: (7 sc + 1 inc) X 7 => 63
Red bowl - Round 10 :
R10: (4 sc + 1 inc + 4 sc) X 7 => 70
Red bowl - Round 11 :
R11: (9 sc + 1 inc) X 7 => 77
Red bowl - Round 12 :
R12: (5 sc + 1 inc + 5 sc) X 7 => 84
Red bowl - Round 13 :
R13: BLO sc X 84 => 84
Red bowl - Round 14 - Round 19 :
R14 - R15 - R16 - R17 - R18 - R19: sc X 84 => 84
Red bowl - Round 20 :
R20: (chain 1 + 1 slip stitch) X 84
Info :
Cut the yarn, hide the thread and the 7th bowl is finished.
— Balls :
Balls - Info :
Make 28 total: 1 purple ball, 2 dark blue balls, 3 light blue balls, 4 green balls, 5 yellow balls, 6 orange balls, 7 red balls
Balls - Pattern Round 1 :
R1: Magic ring & 6 sc => 6
Balls - Round 2 :
R2: inc X 6 => 12
Balls - Round 3 :
R3: (1 sc + 1 inc) X 6 => 18
Balls - Round 4 :
R4: (2 sc + 1 inc) X 6 => 24
Balls - Round 5 - Round 7 :
R5 - R6 - R7: sc X 24 => 24
Info :
Start stuffing the ball as firmly as you like;
Balls - Round 8 :
R8: (2 sc + 1 dec) X 6 => 18
Balls - Round 9 :
R9: (1 sc + 1 dec) X 6 => 12
Balls - Round 10 :
R10: 6 DEC => 6
Info :
Sew this last row with a needle instead of the crochet. To do that just insert the needle in the BLO of every stitch and pull firmly at the end. Cut the yarn and hide the remaining thread.
— White circles for numbers :
Circle for number 1 - Round 1 :
R1: Magic Ring + 7 sc => 7
Circle 1 - Round 2 :
R2: inc X 7 sc => 14
Circle 1 - Round 3 :
R3: (1 sc + 1 inc) X 7 => 21
Circle 1 - Round 4 :
R4: (1 sc + 1 inc + 1 sc) X 7 => 28
Circle 1 - Round 5 :
R5: (3 sc + 1 inc) X 7 => 35
Circle 1 - Round 6 :
R6: sl X 35 => 35
Info :
Cut the yarn, hide the thread and the first circle is finished.
Circle for number 2 - Round 1 :
R1: Magic Ring + 7 sc => 7
Circle 2 - Round 2 :
R2: inc X 7 sc => 14
Circle 2 - Round 3 :
R3: (1 sc + 1 inc) X 7 => 21
Circle 2 - Round 4 :
R4: (1 sc + 1 inc + 1 sc) X 7 => 28
Circle 2 - Round 5 :
R5: (3 sc + 1 inc) X 7 => 35
Circle 2 - Round 6 :
R6: sl X 42 => 42
Info :
Cut the yarn, hide the thread and the 2nd circle is finished.
Circle for number 3 - Round 1 :
R1: Magic Ring + 7 sc => 7
Circle 3 - Round 2 :
R2: inc X 7 sc => 14
Circle 3 - Round 3 :
R3: (1 sc + 1 inc) X 7 => 21
Circle 3 - Round 4 :
R4: (1 sc + 1 inc + 1 sc) X 7 => 28
Circle 3 - Round 5 :
R5: (3 sc + 1 inc) X 7 => 35
Circle 3 - Round 6 :
R6: (2 sc + 1 inc + 2 sc) X 7 => 42
Circle 3 - Round 7 :
R7: (5 sc + 1 inc) X 7 => 49
Circle 3 - Round 8 :
R8: sl X 49 => 49
Info :
Cut the yarn, hide the thread and the 3rd circle is finished.
Circle for number 4 - Round 1 :
R1: Magic Ring + 7 sc => 7
Circle 4 - Round 2 :
R2: inc X 7 sc => 14
Circle 4 - Round 3 :
R3: (1 sc + 1 inc) X 7 => 21
Circle 4 - Round 4 :
R4: (1 sc + 1 inc + 1 sc) X 7 => 28
Circle 4 - Round 5 :
R5: (3 sc + 1 inc) X 7 => 35
Circle 4 - Round 6 :
R6: (2 sc + 1 inc + 2 sc) X 7 => 42
Circle 4 - Round 7 :
R7: (5 sc + 1 inc) X 7 => 49
Circle 4 - Round 8 :
R8: (3 sc + 1 inc + 3 sc) X 7 => 56
Circle 4 - Round 9 :
R9: sl X 56 => 56
Info :
Cut the yarn, hide the thread and the 4th circle is finished.
Circles for number 8, 9, 10 - make 3 :
R1: Magic Ring + 7 sc => 7. R2: inc X 7 sc => 14. R3: (1 sc + 1 inc) X 7 => 21. R4: (1 sc + 1 inc + 1 sc) X 7 => 28. R5: (3 sc + 1 inc) X 7 => 35. R6: (2 sc + 1 inc + 2 sc) X 7 => 42. R7: (5 sc + 1 inc) X 7 => 49. R8: (3 sc + 1 inc + 3 sc) X 7 => 56. R9: (7 sc + 1 inc) X 7 => 63. R10: (4 sc + 1 inc + 4 sc) X 7 => 70. R11: (9 sc + 1 inc) X 7 => 77. R12: (5 sc + 1 inc + 5 sc) X 7 => 84. Cut the yarn, hide the thread and the 7th circle is finished.
— Numbers 1 to 10 :
Number 1 with purple - Row 1 :
R1 Chain 20, turn
Number 1 - Row 2 :
R2: starting from the 2nd chain: dc X 4, 7 dc together, 8 dc
Info :
Sew the number to the first circle;
Number 2 with dark blue - Row 1 :
R1: Chain 27, turn
Number 2 - Row 2 :
R2: starting from the 4nd chain: dc x 5, 7 dc together, dc x 5, 2 dc in the same stitch, 1 dc, 3 dc in the same stitch, 1dc, 2 dc in the same stitch + 1 dc, 1 sl
Info :
Sew the number to the second circle;
Number 3 with light blue - first part Row 1 :
R1: Chain 12, turn
Number 3 first part Row 2 :
R2: starting from the 2nd chain: 1 dc, 2 dc in the same stitch, 1 dc, 3 dc in the same stitch, 1 dc, 2 dc in the same stitch, 1 sl
Number 3 second part Row 3 :
R3: Chain 10, turn
Number 3 second part Row 4 :
R4: starting from the 4nd chain: 1 dc, 2 dc in the same stitch, 1 dc, 3 dc in the same stitch, 1 dc, 2 dc in the same stitch, 1 sl
Info :
Sew the two parts from number 3 directly to the third circle;
Number 4 with green - Row 1 :
R1: Chain 16, turn
Number 4 - Row 2 :
R2: starting from the 4nd chain: dc X 13, turn
Number 4 - Row 3 :
R3: 1 sl (in the same stitch as the last dc from row 2), 1 sc, 1 hdc, 1 dc
Number 4 - Info :
Now we are going to work 4 tc: - the first tc starts from the base of the last dc - the other 3 tc start at the base of the last one (this allows us to work without a row foundation) - in order to turn make 4 dc in the same stitch (the base of the last tc) - 7 tc (each tc starts at the base of the last one). Cut the yarn and sew the letter to the 4th white base
Number 5 with yellow - Row 1 :
R1: Chain 28, turn
Number 5 - Row 2 :
R2: starting from the 4nd chain: dc X 5, 3 dc in the same stitch, 1 dc X 2, 3 dc in the same stitch, (1 dc + dc 3 together) X 3, 4 dc
Info :
Cut the yarn and sew the letter to the 5th white base
Number 6 with orange - Row 1 :
R1: Chain 25, turn
Number 6 - Row 2 :
R2: starting from the 2nd chain: (dc X 2 + 2 dc in the same stitch) X 8
Info :
Cut the yarn and sew the letter to the 6th white base
Number 7 with red - Row 1 :
R1: Chain 24, turn
Number 7 - Row 2 :
R2: starting from the 4nd chain: dc X 5, 4 dc together, 12 dc
Info :
Cut the yarn and sew the letter to the 7th white base
Number 8 (your favorite color) - Row 1 :
R1: Chain 38, turn
Number 8 - Row 2 :
R2: starting from the 4nd chain: 2 dc in the same stitch X 10, 5 dc, 2 dc together X 10
Info :
Cut the yarn and sew the letter to the 8th white base
Number 9 - Row 1 :
R1: Chain 37, turn
Number 9 - Row 2 :
R2: starting from the 2nd chain: (dc X 2 + 2 dc in the same stitch) X 12
Info :
Cut the yarn and sew the letter to the 9th white base
Number 10 - Row 1 :
R1: Chain 26, turn
Number 10 - Row 2 :
R2: starting from the 2nd chain: dc X 5, 8 dc together, 12 dc (then R3 etc for arranging the 10 as two digits)
Number 10 - Info :
R3: Chain 24, slip stitch to the first one (work over the left yarn). R4: chain 2, dc X 6, 2dc in the same stitch X 5, dc X 7, 2dc in the same stitch X 5, sl to the first chain 2. Arrange it as in the picture (yarn on down right to look like in my pic), Cut the yarn and sew the letter to the 10th white base
— Squares for signs :
Squares for signs - Round 1 :
R1: Chain 13, turn
Squares - Round 2 - Round 10 :
R2 - .... - R10: sc X 12, turn
Squares - Round 11 :
R11: sc X 12, do not turn, continue in round: o Start with a sc in the same stitch (2 in total) o 8 X sc as you go down on the left side of the patch o 2 sc in the last stitch o 10 sc in base of row 1 (in the remaining loop of each chain) o 2 sc in the last stitch o 9 X sc as you go up on the right side of the patch
Squares - Round 13 :
R13: sl X 42; Cut the yarn, hide the thread;
Plus sign :
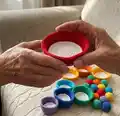
R1: chain X 12. R2: starting from the 3rd chain: sc X 10. Make 2 pieces and sew them one over the other like in the first picture
Minus sign :
R1: chain X 12. R2: starting from the 3rd chain: sc X 10. Make 1 pieces and sew like in the second picture
Equal sign :
R1: chain X 12. R2: starting from the 3rd chain: sc X 10. Make 2 pieces and sew them like in the 3rd picture
This counting toy set brings bright colors and tactile learning together in a handmade package you can be proud of. It makes an excellent gift for toddlers or a playful classroom aid that encourages counting and color recognition. Have fun customizing the colors and enjoy watching little hands learn through play! 🧶🧸