About This Caro-The Coral Girl Amigurumi Pattern
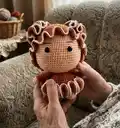
This pattern teaches you how to crochet Caro, the Coral Girl amigurumi, complete with curly coral buns and a ruffled dress. You will work the head, body, legs, arms, hat and decorative buns with clear round-by-round instructions. The design features simple increases, decreases, back/front loop work and attachment steps to create the character's signature ruffles. Photos and assembly notes guide placement and finishing for a polished result.

Perfect for crafters who enjoy playful details and surface shaping. The finished doll is small, delightful and a great gift.
Why You'll Love This Caro-The Coral Girl Amigurumi Pattern
I absolutely love this pattern because it combines classic amigurumi shaping with fun ruffled details that really bring the character to life. The curly buns and layered dress are playful and allow for creative color choices. I enjoy how each element is worked separately and then attached, which makes assembly neat and adjustable. Making Caro is rewarding because the shaping techniques are straightforward yet produce a very expressive finished doll.
Switch Things Up
I love how easily you can customize Caro by changing colors; try pastel shades for a soft look or bright contrasting hues to emphasize the ruffles.
I often make the dress curlier by adding an extra increase round when working the dress to get more pronounced loops and texture.
If you want a bigger doll, swap to a bulkier yarn and a larger hook — the shape stays the same but the final size grows quickly.
I also add embroidered freckles or tiny felt accessories to change the character's personality without altering the pattern structure.
For a safer toy for babies, skip the safety eyes and embroider the eyes with embroidery thread instead, and avoid attaching plastic pearls or small beads.
I sometimes make the buns extra fluffy by adding a thin wire inside before sewing to give them a posable look for display.
Try mixing yarn textures: a boucle or slightly fuzzy yarn for the dress will create a different surface and a whimsical feel.
Want seasonal variations? Use white and red for a festive version or sea-glass blues and greens to make a mermaid-inspired friend.
I recommend testing a small swatch when changing yarn weight — that helps determine any needed stitch adjustments before starting the full piece.
Don't be afraid to shorten or lengthen arms and legs for stylistic changes — the assembly steps are forgiving and let you personalize pose and proportion.
Common Mistakes & How to Fix Them
✗ Skipping stitch markers when joining legs to the body leads to misalignment; mark the join points and count carefully before connecting.
✗ Not changing yarns on the correct round will shift color placement and ruffle alignment; follow the round numbers exactly for color changes.
✗ Overstuffing the head or body can distort the shape and make sewing difficult; stuff gradually and shape while you go to maintain smooth curves.
✗ Forgetting to insert safety eyes at the indicated rounds will force you to reposition or re-open seams; place eyes between rounds 17-18, 8 sts apart on the head before closing.