🧢 Beautiful ✨ Detailed πŸ’ Adorable

Bunny Hand Puppet Amigurumi Pattern

Bunny Hand Puppet Amigurumi Pattern
4.6β˜… Rating
2-3 Hours Time Needed
1.3K Made This
βœ‚οΈ

Intermediate Level

Ideal for those with basic crochet experience, featuring slightly more advanced stitches and techniques to expand your skills.

⏱️

Bite-Sized Project

Finishes in 2-4 hoursβ€”perfect for an afternoon of creative relaxation.

🧸

Cute Companion

An adorable friend to cherish, handcrafted with love to bring comfort and joy for years to come.

About This Bunny Hand Puppet Amigurumi Pattern

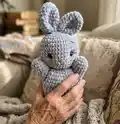
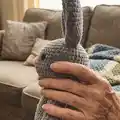
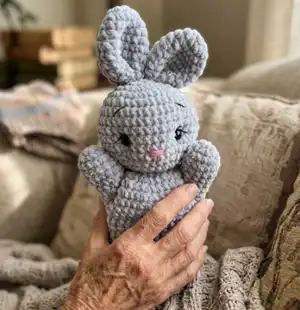
This pattern creates a 28 cm (11") bunny hand puppet made with super bulky plush yarn for a soft, tactile finish. You will crochet a round head, two ears, two small arms and a sleeved body to fit a hand. The design includes steps for inserting eyes, indenting them for expression, and simple embroidery for the nose and facial details.

Bunny Hand Puppet Amigurumi Pattern crochet pattern - detailed view of completed project

Worked in the round with single crochet increases and decreases, this puppet uses basic shaping techniques. Photos and detailed assembly instructions help you finish neatly and confidently.

Why You'll Love This Bunny Hand Puppet Amigurumi Pattern

I absolutely love this pattern because it combines super soft plush yarn with simple shaping to create an irresistibly cuddly puppet. I enjoy how quickly the head and body take shape, delivering a finished friend in just a few hours. The design lets me personalize expressions with embroidered details and eye placement, making each puppet unique. Sewing and finishing are relaxing and rewarding, and I love gifting these little puppets to children and friends.

Bunny Hand Puppet Amigurumi Pattern step 1 - construction progress Bunny Hand Puppet Amigurumi Pattern step 2 - assembly progress Bunny Hand Puppet Amigurumi Pattern step 3 - details and accessories Bunny Hand Puppet Amigurumi Pattern step 4 - final assembly and finishing

Switch Things Up

I love customizing this puppet by changing yarn colors to make different characters; try pastel shades for a sweet baby bunny or bold colors for a playful friend.

I sometimes substitute a slightly thicker or thinner yarn and adjust the hook to create mini keychain puppets or a giant puppet for dramatic play.

I often embroider different expressions: a small smile, an open mouth, or sleepy eyes to change personality quickly.

I add tiny accessories like a crocheted scarf or felt bow to personalize gifts and make each puppet unique.

I occasionally use safety eyes of different sizes or embroidered eyes only for baby-safe versions.

I experiment with placing the arms higher or lower on the body to change the puppet's silhouette and range of movement.

I sometimes add a small lining or felt pocket inside the body for extra durability if the puppet will be used often.

I like to vary ear shapesβ€”longer, rounder, or floppyβ€”to create distinct characters from the same basic pattern.

I recommend trying different facial embroidery threads (contrast vs tone-on-tone) to see how subtle changes affect the overall expression.

I find using contrasting yarn for the inner ear or a little blush on the cheeks (with yarn or fabric paint) brings so much warmth to the finished puppet.

Common Mistakes & How to Fix Them

βœ— Forgetting to place safety eyes before closing the head can make installation impossible; insert and secure eyes between rounds 10 and 11 as instructed before stuffing and closing the head. βœ— Overstuffing the head will distort the shape and make indenting eyes difficult; stuff gradually and lightly, checking the shape as you progress to keep a smooth surface. βœ— Skipping stitch markers makes it easy to lose track of rounds during increases and decreases; use a marker at the start of each round to maintain correct stitch counts. βœ— Crocheting too tightly with plush yarn can make stitches hard to work into; relax your tension slightly and choose the recommended 4.5 mm hook to keep stitches manageable and soft. βœ— Not leaving sewing tails on details prevents neat assembly; always leave the tail for sewing on ears and body edges and hide the tail after securing pieces.

Bunny Hand Puppet Amigurumi Pattern

Make a soft, cuddly bunny hand puppet using plush yarn and simple amigurumi techniques. This pattern guides you step-by-step through the head, ears, arms and body so you can create a charming toy for play or gifts. Clear round-by-round instructions and helpful finishing tips make this pattern friendly and satisfying.

Intermediate 2-3 Hours

Materials Needed for Bunny Hand Puppet Amigurumi Pattern

β€” Main Fabric

  • 01
    Super bulky plush yarn - Himalaya Dolphin Baby (120 m - 100 g) or similar; gray color (1 skein, No 80351)
  • 02
    Sport cotton yarn - Yarn Art Jeans (160 m - 50 g) or similar for embroidery: black color yarn for eyebrows and eyelashes
  • 03
    Sport cotton yarn - Yarn Art Jeans (160 m - 50 g) or similar for embroidery: pink color yarn for nose
  • 04
    Gray color cotton yarn for sewing pieces (small amount)
  • 05
    Fiber filler - for stuffing the head
  • 06
    Plastic safety eyes 8 mm (1 pair)

β€” Tools Required

  • 01
    Crochet hook 4.5 mm
  • 02
    Large needle (yarn needle) for sewing and embroidery
  • 03
    Knitting markers (stitch markers)

Progress Tracker

0% Complete

β€” Head :

Info :

Use the gray plush yarn, hook 4.5 mm.

Round 1 :

7 sc in MR (7)

Round 2 :

inc * 7 (14)

Round 3 :

inc * 14 (28)

Round 4 :

(3 sc, inc) * 7 (35)

Round 5 :

(4 sc, inc) * 7 (42)

Round 6 :

(13 sc, inc) * 3 (45)

Round 7-11 :

45 sc (5 rounds)

Round 12 :

(13 sc, dec) * 3 (42)

Round 13 :

(4 sc, dec) * 7 (35)

Round 14 :

(3 sc, dec) * 7 (28)

Info :

Insert safe plastic eyes. Fix eyes between 10 and 11 rounds from the head's top. The distance between the eyes is 9 sc.

Info :

Stuff the head with fiber filler.

Round 15 :

(2 sc, dec) * 7 (21)

Round 16 :

(1 sc, dec) * 7 (14)

Round 17 :

dec * 7 (7)

Info :

Draw the yarn through 7 loops and tighten. Cut and secure the yarn.

β€” Ears :

Info :

Use the gray plush yarn and crochet hook 4.5 mm.

Round 1 :

7 sc in MR (7)

Round 2 :

inc * 7 (14)

Round 3 :

sc (14)

Round 4 :

(1 sc, inc) * 7 (21)

Round 5-8 :

21 sc (4 rounds)

Round 9 :

(1 sc, dec) * 7 (14)

Round 10 :

14 sc, sl st

Info :

Leave the tail for sewing. Cut the yarn. Don't stuff the piece. Make 2 details.

Info :

Fold in half and then quadruple and sew on top of the head at a distance of 1-2 cm from each other.

β€” Eye Indentation :

Info :

Use the gray cotton yarn. Take the thread. Pull it through the back of the head and pull it out above the left eye. Leave the tail on back head's part.

Info :

Pass the needle from below under the left eye and pull out under the right eye. Make sure that the yarn falls from the inside of the left eye.

Info :

Next, pass the needle from above the right eye, making sure that the thread lies on the inside of the eye. And pull out the needle in the same place behind the head.

Info :

Tighten both threads so that the eyes are sunken. Tie a knot, hide the tail inside the head.

β€” Embroidery :

Info :

Use the pink yarn and a large needle. Embroider nose as shown on photos.

Info :

Use the thin black yarn and a large needle. Embroider eyelashes as shown on photos. Embroider eyebrows as shown on photos.

β€” Arms :

Info :

Use the gray plush yarn. Crochet hook 4.5 mm.

Round 1 :

6 sc in MR (6)

Round 2 :

inc * 6 (12)

Round 3 :

(2 sc, inc) * 4 (16)

Round 4-5 :

16 sc (2 rounds)

Round 6 :

(2 sc, dec) * 4 (12)

Round 7-9 :

12 sc (3 rounds)

Info :

Make sl st, cut the yarn. Don't stuff. Make 2 pieces.

β€” Body :

Info :

Use the gray plush yarn. Crochet hook 4.5 mm. Leave the tail for sewing, begin crochet without sl st.

Info :

Make 24 ch, sl st in the first loop. Make a circle.

Round 1 :

24 sc

Round 2 :

(3 sc, inc) * 6 (30)

Round 3 :

(4 sc, inc) * 6 (36)

Round 4 :

(5 sc, ins) * 6 (42)

Info :

R 5: crochet together with arm - 7 sc, 13 sc only on the body, 7 sc together with another arm, 15 sc only on the body (42)

Info :

Crochet sc2tog on both sleeves sides to avoid holes.

Info :

R 6: sc2tog, crochet only on the arm - 4 sc, sc2tog, 12 sc only on the body, sc2tog, 4 sc only on the another arm, sc2tog, 14 sc only on the body (38)

Round 7 :

dec, 2 sc, dec, 12 sc, dec, 2 sc, dec, 14 sc (34)

Round 8 :

34 sc, ch

Round 9-14 :

34 dc (6 rounds)

Info :

Sew the body to the head as shown in the photos.

Info :

CONGRATULATIONS! Your hand puppet is readyβœ”

Assembly Instructions

  • Attach ears: fold each ear in half then fold again (quadruple) and sew to the top of the head about 1-2 cm apart for symmetry.
  • Insert and secure 8 mm safety eyes between rounds 10 and 11 from the top of the head, leaving 9 single crochet stitches between them.
  • Sew the body to the head by aligning the opening of the crocheted body with the head base and whipstitching around evenly to close the seam.
  • Attach the arms when crocheting round 5 of the body: crochet together with arm - 7 sc (arm), 13 sc only on the body, 7 sc together with the other arm, 15 sc only on the body (42) to secure placement.
  • When joining arm sides with sc2tog, work sc2tog at sleeve-body junctions to avoid holes and create a smooth join.
  • Hide and secure all tails inside the head or body after sewing pieces in place; weave ends and knot inside to prevent unraveling.

Important Notes

  • πŸ’‘Use stitch markers to mark the beginning of each round to avoid losing your place during increases and decreases.
  • πŸ’‘Stuff the head firmly but not overpacked so the shape remains smooth and the eye indentation works correctly.
  • πŸ’‘Do not stuff the ears or arms; leave them flat and use the tail left for sewing to attach them neatly.
  • πŸ’‘Leave yarn tails for sewing on ears and body edges before fastening off to make assembly easier.

This sweet bunny hand puppet is a cozy, handmade friend perfect for storytelling, playtime, or gifting. Make one in a single afternoon and personalize it with embroidered features for extra charm. Soft plush yarn and simple shaping make it cuddly and child-friendly. 🐰🧢✨

You ask,

we answer.

FAQs

What size will the finished piece be?

The finished hand puppet measures approximately 28 cm (11") tall when made with the recommended super bulky plush yarn and 4.5 mm hook.

Can I use different yarn weights for this pattern?

Yes, you can use different yarn weights, but this will change the final size; adjust your hook accordingly and expect a smaller result with lighter yarn or a larger puppet with bulkier yarn.

Do I need prior crochet experience for this pattern?

This pattern is rated intermediate and assumes familiarity with single crochet, increases, decreases, working in the round, and basic assembly.

How long does this project typically take to complete?

Most crocheters finish this puppet in about 2-3 hours, though time may vary depending on experience and finishing detail choices.

How do I make the eyes indent?

Use gray cotton yarn to pull a thread through the back of the head and pass it under and over the eyes as shown, then tighten and knot to create a sunken eye effect.