About This Bull Amigurumi Pattern
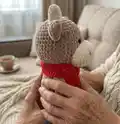
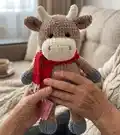
This pattern creates a soft, cuddly bull amigurumi approximately 39 cm tall using Alize Softy yarn. You will crochet the head, body, limbs, ears, horns, muzzle and tail, then assemble and embroider the final details. The pattern uses single crochet shaping and spiral rounds for smooth shaping. Photos are included to guide placement and finishing.

Details and instructions use two yarn strands for plush texture and stability. The pattern is translated into English and includes full round-by-round instructions and assembly notes.
Why You'll Love This Bull Amigurumi Pattern
I absolutely love this pattern because it turns simple stitches into a character full of personality and charm. I enjoy how the plush yarn creates a soft, huggable texture that children love to hold. The shaping is straightforward yet satisfying, giving a professional finish with little effort. I also love that you can easily customize colors and small details to make each bull unique.
Switch Things Up
I love how easy it is to change the look of this bull by swapping colors; try pastel shades for a nursery-friendly version or bright tones for a playful character.
You can change the size by substituting yarn weight and hook size — bulky yarn with a larger hook gives a chunky, cuddly bull while thinner yarn yields a dainty mini version.
I sometimes add a small crocheted scarf or hat as an accessory to give the bull personality and seasonal flair.
I also like embroidering different facial expressions; move the nostril placement or change the eye spacing to alter the mood.
For baby-safe toys, replace safety eyes with embroidered eyes and ensure all seams are tightly sewn for durability.
I often use a slightly firmer stuffing in the head and softer stuffing in the body to improve balance and make the bull sit nicely.
Try using textured yarns or boucle yarn held single for a vintage, fuzzy finish — adjust stuffing to suit the loft of the yarn.
You can make the limbs posable by inserting a bit of craft wire inside the arms or legs before closing, securing ends well to avoid poking out.
If you want a simpler project, omit the horns or make smaller ears; these small changes reduce assembly time while keeping charm.
I recommend experimenting with small accessories — a tiny crocheted bell, button, or embroidered flower adds a handmade touch and lets you personalize each finished bull.
Finally, I sometimes create matching sets by making smaller or larger bulls using the same color palette so they look like a family when displayed together.
Common Mistakes & How to Fix Them
✗ Not marking the beginning of each round causes lost stitch counts and uneven shaping; use a stitch marker or contrasting thread to mark the first stitch of every round.
✗ Skipping stuffing until later leads to unwanted lumps or flattening; stuff firmly and gradually while shaping to maintain smooth curves and correct volume.
✗ Changing color without securing ends can cause unraveling or loose bits; weave in or secure color changes with tight joins and leave adequate tail length for sewing if needed.
✗ Forgetting to count stitches after increases or decreases results in mismatched rounds and shape issues; count your stitches at the end of each round, especially after any inc/dec rounds.
✗ Overtight tension with plush yarn makes pieces stiff and difficult to fold; maintain relaxed, even tension and test with a small gauge to ensure correct drape and stuffing space.