About This Bulbasaur Crochet Amigurumi Pattern
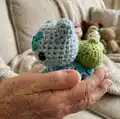
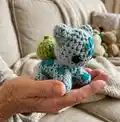
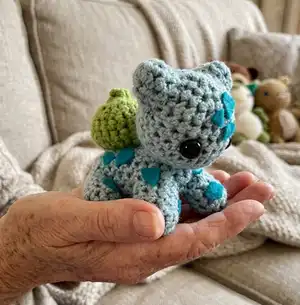
This pattern creates a pocket-sized Bulbasaur amigurumi using worsted weight yarn and a 3.5mm hook. It includes full round-by-round instructions for head, body, ears, pod, arms and legs, and simple finishing directions. The design uses felt markings glued on for the characteristic triangular spots.
Perfect for intermediate crocheters comfortable with single crochet, increases, and decreases. Youll finish a sweet little toy ideal for gifts or display in just a few hours.
Why You'll Love This Bulbasaur Crochet Amigurumi Pattern
I absolutely love this pattern because it captures the charm of Bulbasaur in a very small, easy-to-make amigurumi that still has loads of character. I enjoy how the simple shaping comes together quickly to form a recognizable silhouette. The pattern is compact but thoughtful — the pod, ears, and markings add personality without complicated techniques. I also love that it uses basic stitches so you can focus on assembly and finishing, which makes the final result feel extra satisfying.
Switch Things Up
I love customizing this pattern by changing color palettes; try pastel blues and greens for a softer look or bright teals for a bolder Bulbasaur.
I sometimes swap the yarn weight and hook to make a mini keychain or a larger plush; using thinner yarn and a smaller hook creates a tiny collectible, while bulky yarn makes a chunky cuddly version.
I add wire to the limb interiors for posability when I want a display piece; just insert thin craft wire before finishing stuffing and secure firmly at the base.
Instead of safety eyes, I often embroider eyes for a safer toy for small children; embroider small satin-stitched ovals and adjust placement to match the face proportions.
Try crocheting the pod in a slightly different green or adding embroidered veins to the pod for extra detail and character.
I like to make a set with different markings by cutting felt shapes in varying sizes and gluing them on to create personality for each Bulbasaur I make.
For a wearable twist, attach a small loop at the top of the head and make this into a bag charm or ornament using a jump ring and ribbon.
I sometimes surface-crochet a little mouth or freckles to change expression; small embroidered stitches can dramatically change the toy's personality.
If you want a sturdier toy, I use tighter tension and a smaller hook than recommended to reduce gaps and prevent stuffing showing through.
I also enjoy combining yarn textures — a slightly fuzzy yarn for the pod or felt appliques for markings gives a tactile contrast that looks great in photos and in hand.
Common Mistakes & How to Fix Them
✗ Placing safety eyes too close together can make the face look squashed; place the eyes five stitches apart as instructed between the increases to keep correct spacing.
✗ Not stuffing the head before closing will make finishing difficult and lumpy; stuff the head firmly as you go and finish stuffing before performing the final decreases.
✗ Skipping stitch counts during increases and decreases causes uneven shaping; count stitches at the end of each round and mark the start of rounds with a stitch marker.
✗ Sewing parts without pinning first may result in misaligned placement; pin or tack pieces in place and check photos for reference before permanently sewing.