About This Brighten Your Day Crochet Rainbow Stuffie Amigurumi Pattern
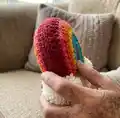
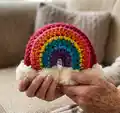
This pattern makes a small stuffed rainbow with colorful stripes and fluffy pom-pom clouds along the bottom. It is worked flat in two identical single crochet pieces (Front and Back) which are seamed and stuffed for a soft toy finish. The pattern uses chunky yarn and quick rows for a fast, satisfying project.
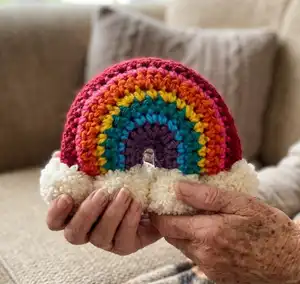
Easy color-change technique notes are included to keep your stripes neat and tidy. A simple pom-pom tutorial and finishing instructions are provided so you can assemble and style your rainbow easily.
Why You'll Love This Brighten Your Day Crochet Rainbow Stuffie Amigurumi Pattern
I absolutely love this pattern because it turns simple stitches into a joyful little piece that brightens any space. I enjoy designing quick makes that use bold color and texture to create personality with minimal fuss. This rainbow is perfect for gifting, decorating, or making multiples for a colorful set. I also love that it uses chunky yarn so the piece works up fast and feels wonderfully plush when finished.
Switch Things Up
I love customizing this rainbow by changing the color palette; try muted pastels for a nursery-friendly version or neon brights for a fun, modern look.
To make a larger rainbow, I switch to a thicker bulky yarn and a larger hook — just remember to adjust stuffing and seam placement as the size changes.
I sometimes add embroidered raindrops or tiny beads along the bottom for extra detail and sparkle on a special gift.
Want a portable keychain? I make a mini version using DK weight yarn and a 3.5 mm hook, then attach a keyring through a secure loop before stuffing.
I also experiment with different pom-pom textures — try faux fur yarn or fluffy eyelash yarn for different cloud effects.
If you prefer a flat ornament, skip the stuffing and seam the two pieces together with a small hanging loop at the top.
I often create sets in coordinated palettes and stitch them together to make a wall garland for a nursery or playroom display.
Try seaming with invisible mattress stitch instead of the flat slip stitch join for a different edge finish that hides the join well.
For gift packaging, I tie a small ribbon around the base or tuck the rainbow into a tiny gift box with a matching pom-pom — it makes the presentation extra special.
Lastly, I personalize pieces by adding initials or small felt appliques sewn onto one side to create a truly one-of-a-kind keepsake.
Common Mistakes & How to Fix Them
✗ Not finishing color changes correctly can leave loose floats or messy joins; work to the last 2 loops on the hook, yarn over with the new color and pull through 2 loops to secure the change cleanly.
✗ Skipping the recommended stuffing step can cause the rainbow to lose its shape over time; stuff firmly but evenly while shaping to maintain the arc and avoid lumps.
✗ Failing to align stripes when seaming will make the rainbow look uneven; place Front and Back with WS together and align stripes before sewing to keep the color bands matching.
✗ Trimming pom-poms too early or unevenly creates irregular shapes; cut loops and then trim gradually while rotating the pom-pom to achieve a smooth round cloud shape.