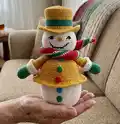
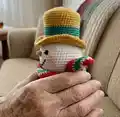
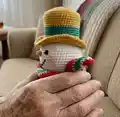
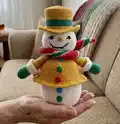
About This Snowman Gingerbread Amigurumi Pattern
This pattern creates a small snowman gingerbread amigurumi with a removable hat, embroidered face and colorful buttons. It uses cotton yarn and US crochet terminology and is designed to give a polished, gift-ready finish. The instructions include tips for embroidery, color changes and assembling the two-piece body for a neat inside insert.
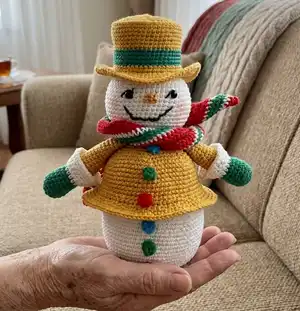
You will find clear, round-by-round directions, color charts and photo references to guide placement of eyes, nose and mouth. Materials and stitch abbreviations are listed to help you prepare before starting.
Why You'll Love This Snowman Gingerbread Amigurumi Pattern
I absolutely love this pattern because it blends classic amigurumi shaping with bright, festive details that make the character come to life. The removable hat and two-piece body make it both playful and decorative, and I enjoy the small sewing and embroidery steps that personalize each snowman. It is a satisfying project to finish in a weekend and makes a wonderful handmade gift. The included photo steps and clear round counts help me stay confident even when I change colors or add a tiny detail.
Switch Things Up
I love customizing this snowman by changing the color palette; try pastel shades for a softer, nursery-friendly version or deep jewel tones for an elegant holiday look.
To make the snowman larger or smaller change your yarn weight and hook size — bulky yarn with a larger hook gives a cuddly, oversized version, while a smaller hook and finer yarn creates a tiny keychain-sized snowman.
I often swap the solid hat for a striped one by alternating colors every two rounds for a candy-striped style, or add a small pompom on top for extra charm.
Try embroidering different facial expressions: move the mouth placement up or down or adjust the eye spacing to change the personality of your character before stitching permanently.
Make the buttons functional by sewing on small real buttons instead of crocheted ones, or use tiny wooden buttons for a rustic look — just ensure the size fits the button holes and stitching is secure.
For a poseable version, consider inserting thin wire into the arms before stuffing so you can bend them into cute positions; secure the wire ends inside with extra stuffing and stitches.
I like to make matching accessories like a tiny crochet scarf or a felt candy cane to tuck under the arm for seasonal displays — these little props make great photo accents.
To create a set, change only one color per snowman (hat, scarf, buttons) so they coordinate as a group on a mantel or tabletop.
If you want a sturdier base, add a round cardboard or plastic insert at the bottom before closing the body; this gives the snowman more stability for display.
Embroider additional details like freckles or stitched snowflakes on the body for a personalized touch — it’s a simple way to make each snowman unique and memorable.
Common Mistakes & How to Fix Them
✗ Skipping stitch markers during rounds can make placement of eyes and decorations difficult; use a marker at the start of each round to keep count and mark exact positions.
✗ Forgetting to change yarn cleanly at color boundaries will cause messy joins; finish the last yarn over with the new color and weave in ends neatly to hide joins.
✗ Not stuffing as you go leads to lumps or flat sections; add stuffing gradually and shape with your fingers so the head and body remain round and even.
✗ Sewing parts without pinning can result in misaligned pieces; always pin the hat, arms and body pieces in place and check symmetry before stitching.
✗ Pulling embroidery threads too tight will distort the face; pull gently and adjust placement as you stitch to keep a natural expression.