About This Boho Bunny Amigurumi Pattern
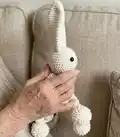
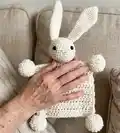
This pattern teaches you how to crochet a Boho Bunny lovey featuring a rounded amigurumi head, two floppy ears, a small blanket body, and pom corners. It uses super bulky yarn for a soft, chunky finish that works up quickly. The pattern includes step-by-step rounds for head and ears plus clear assembly and nose embroidery instructions.
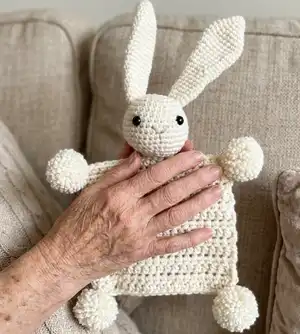
Perfect for gifting or snuggling, the Boho Bunny mixes amigurumi shaping with beginner-friendly blanket stitches. Follow the detailed rounds and photos to assemble a polished, one-of-a-kind lovey.
Why You'll Love This Boho Bunny Amigurumi Pattern
I absolutely love this pattern because it blends classic amigurumi shaping with a modern boho aesthetic that appeals to both kids and adults. I enjoy how quickly the blanket portion works up using a large hook and super bulky yarn, making it a satisfying afternoon project. The floppy ears and pom corners give so much personality with very little extra effort, and I always love seeing how different yarns change the final look. Stitching the embroidered nose is one of my favorite finishing touches — it makes each bunny feel handmade and unique.
Switch Things Up
I love customizing this pattern by swapping yarn colors to change the personality of each bunny; try soft pastels for a baby-friendly version or warm neutrals for a boho nursery look.
If you want a larger lovey, use a bulkier yarn and a larger hook for both the head and blanket; conversely, use lighter yarn and smaller hooks to make a petite, keychain-sized version.
I often add embroidered eyelashes or tiny felt cheeks to change facial expression and charm; these small details can dramatically alter the finished look.
Try making the blanket in alternate stitch rows (for example, alternate HDC and SC rows) to create texture and movement in the blanket portion.
You can replace the pom corners with small crocheted flowers or tassels for a different boho finish and personalized style.
Consider using wooden or engraved safety buttons as decorative accents sewn to the blanket (avoid small pieces for baby-safe versions).
I sometimes add a loop at the top of the head or corner to hang the lovey as a small decorative piece or stroller buddy.
Switch the ear shape by crocheting a slightly wider base for chunkier, more pillowy ears, or decrease rows sooner for a slimmer ear silhouette.
For a washable version, use 100% washable acrylic super bulky yarn and embroider features rather than using glued or felt details.
I recommend testing nose placement on a scrap or with pins before stitching permanently so you can experiment with different emotional expressions until you find the perfect one.
Common Mistakes & How to Fix Them
✗ Skipping a stitch marker while working in continuous rounds can cause you to lose track of the beginning of the round; place a marker at the start of every round and move it up as you work.
✗ Adding all the stuffing at once often creates lumps and uneven shaping; stuff gradually as you crochet and shape the head with small amounts of fiberfill.
✗ Placing eyes without counting stitches may result in uneven facial features; place amigurumi eyes between rounds 8 and 9 and count about 7 stitches between them before securing.
✗ Cutting tails too short when fastening off leaves nothing to sew with later; always leave a long tail when instructed to sew pieces together to make assembly easier.