About This Bobby the Bighorn Sheep Amigurumi Pattern
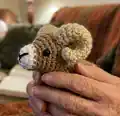
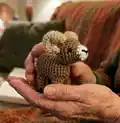
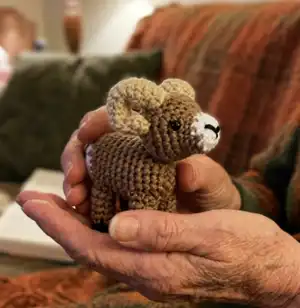
This pattern creates a small, stuffed bighorn sheep with curled horns and tiny hooves. The design is worked in pieces—head, body, legs, tail, and horns—and sewn together for a polished finish. It uses worsted weight yarn and basic amigurumi techniques, great for practicing shaping and color changes.
Clear round-by-round instructions guide you through construction and finishing. Perfect for gifting, keychains, or a small shelf friend.
Why You'll Love This Bobby the Bighorn Sheep Amigurumi Pattern
I absolutely love this pattern because it captures the personality of a bighorn in a tiny, cuddly form. I enjoy the compact shaping of the head and the creative fun of rolling and sewing the horns into place. Making four little legs and a weighted body gives the finished sheep a sweet, stable stance I find satisfying. The pattern uses mostly single crochet with increases and decreases, so it is a relaxing but rewarding make.
Switch Things Up
I love how easy it is to customize this little sheep by swapping yarn colors; try grays or creams for a different look.
I often change the horn color to a darker beige or even a variegated yarn to add texture and visual interest.
If you want a larger sheep, I use bulkier yarn and a larger hook to make a chunky version that’s great for cuddling.
To make a tiny keychain version, use sport weight yarn and a smaller hook and omit the penny weight so it stays light.
I like adding embroidered eyelashes or freckles to change the expression—small stitched details can make a big personality shift.
For a posed figure, try inserting a short piece of floral wire into the legs before stuffing to create a slightly posable toy.
I sometimes make tiny crocheted accessories like a scarf or a flower collar to dress up the sheep for gifting.
If you want different hooves, experiment with brown instead of black or use surface slip-stitching for a painted hoof effect.
Try stuffing the horns a little firmer or looser to change how tightly they curl when rolled and sewn onto the head.
I recommend testing eye placement with safety eyes or embroidery before permanently attaching to find the personality you like best.
Common Mistakes & How to Fix Them
✗ Placing safety eyes in the wrong rows can throw off facial proportions; place eyes between rows 5 and 6 and space them 8 stitches apart as instructed.
✗ Not changing color on the correct stitch causes uneven color transitions; change to brown yarn on the last stitch of the white section exactly as written.
✗ Understuffing the body will make the sheep floppy and unstable; stuff generously and add a penny to the bottom as recommended for weight.
✗ Skipping stitch counts when shaping the head will create mismatched rounds; count your stitches after each round, especially after increases and decreases.