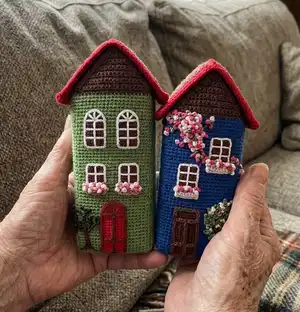
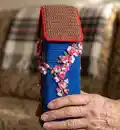
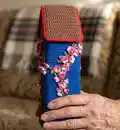
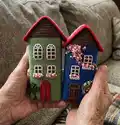
Create charming tall crochet houses with this detailed pattern that walks you through every round and assembly step. You will crochet both inner and outer housings, add cardboard supports, and decorate with felt and embroidery for a delightful finished piece. This pattern includes step-by-step photos and clear instructions so you can recreate the same cozy houses for gifts or home decor. Enjoy a satisfying, creative project that blends amigurumi technique with small home decor details.
Progress Tracker
0% Complete
— Abbreviations (US) :
Info :
MR - magic ring. CH - chain. SC - single crochet. INC - increase (make 2 sc into one loop). DEC - decrease (two sc together through front loops). SL ST - slip stitch. (...) *8 - work instructions within brackets as many times as directed. (18) - the number of sc in the row.
— The Required Materials :
Info :
DK weight yarn - Alize Cotton Gold (55% cotton/45% acrylic; 100 g/330 m). Alize Cotton Gold No. 485, 493, 56, 141 (green, brown, red, blue). Embroidery thread 100% cotton - brown, light brown, white, a few shades of pink, two to three shades of green. Thin and firm felt - brown, light brown, red, and white. 2.25 mm crochet hook. Tapestry needle. Scissors. Stitch marker (change to yarn strand of contrast color). Cardboard - for the bottom of the houses. Cardboard - for the wools of the houses. Cardboard - for the roofs of the houses. Glue for gluing the cardboard. White permanent marker - for drawing the front door of the blue home.
— Notes :
Info :
NOTE! Yarn consumption, size, and appearance of the toy depend on crochet density and how you hold the yarn. The presented toy is crocheted with V and X look single crochet: (First, you grab yarn over the hook, and for making the second stitch grab it under the hook). You may crochet with any desirable method you used to crochet. The finished house using the materials stated in this pattern is ~19.5 and 17.5 cm (7.7 and 6.9 inches) in height. Make sure you crochet tight enough; otherwise, the stuffing will show through the holes. You may use any desired color and brand of yarn. ENJOY CROCHETING.
— HOUSE No.1 (the outer part) :
Info :
Place a stitch marker in the 2nd stitch (3 sc) in order not to lose the corner.
Rnd 2 :
1 sc, (3 sc in 1 stitch), 1 sc, (3 sc in 1 stitch), 1 sc, (3 sc in 1 stitch), 1 sc, (3 sc in 1 stitch) (16)
Rnd 3 :
2 sc, (3 sc in 1 stitch), 3 sc, (3 sc in 1 stitch), 3 sc, (3 sc in 1 stitch), 3 sc, (3 sc in 1 stitch) (24)
Rnd 4 :
4 sc, (3 sc in 1 stitch), 5 sc, (3 sc in 1 stitch), 5 sc, (3 sc in 1 stitch), 5 sc, (3 sc in 1 stitch) (32)
Rnd 5 :
6 sc, (3 sc in 1 stitch), 7 sc, (3 sc in 1 stitch), 7 sc, (3 sc in 1 stitch), 7 sc, (3 sc in 1 stitch) (40)
Rnd 6 :
8 sc, (3 sc in 1 stitch), 9 sc, (3 sc in 1 stitch), 9 sc, (3 sc in 1 stitch), 9 sc, (3 sc in 1 stitch) (48)
Rnd 7 :
10 sc, (3 sc in 1 stitch), 11 sc, (3 sc in 1 stitch), 11 sc, (3 sc in 1 stitch), 11 sc, (3 sc in 1 stitch) (56)
Rnd 8 :
12 sc, (3 sc in 1 stitch), 13 sc, (3 sc in 1 stitch), 13 sc, (3 sc in 1 stitch), 13 sc, (3 sc in 1 stitch) (64)
Rnd 9 :
14 sc, (3 sc in 1 stitch), 15 sc, (3 sc in 1 stitch), 15 sc, (3 sc in 1 stitch), 15 sc, (3 sc in 1 stitch) (72)
Rnd 10 :
16 sc, (3 sc in 1 stitch), 17 sc, (3 sc in 1 stitch), 17 sc, (3 sc in 1 stitch), 17 sc, (3 sc in 1 stitch) (80)
Rnd 11 :
18 sc, (3 sc in 1 stitch), 19 sc, (3 sc in 1 stitch), 19 sc, (3 sc in 1 stitch), 19 sc, (3 sc in 1 stitch) (88)
Rnd 12 :
88 sc (between the posts)
Info :
* Crochet the next round through the posts between stitches. To do this, insert the hook in the first stitch and draw it out in the second stitch, grabbing the working yarn and making sc.
Rnd 13-15 :
88 sc (3 rounds)
Info :
Trace the bottom of the square on the cardboard and cut it out. If you use thin cardboard then cut two squares.
Rnds 16-60 :
88 sc (45 rounds). Insert the cardboard template into the bottom of the house. Do not cut yarn.
Info :
Prepare the cardboard for the wools of the house. The density of cardboard from a large box of Greenfield tea will suffice. Glue the cardboard and insert the template into the crocheted part.
Info :
Complete crocheting the required number of sc to the corner of the house - 4 sc. (guide on your part). Mark the corners of the house with markers. Count 22 stitches from four sides.
Info :
Attach brown yarn (Alize cotton Gold No. 493). Cut green yarn. Work in back and forth rows.
Info :
* From the next round, incomplete 1 sc to decrease the row.
Row 12 :
1 sc, turn. Break yarn.
Info :
Attach brown yarn to the marked point on the opposite side of the house. Work in back and forth rows similarly. Draw the yarn tails out to the outer side.
— HOUSE No.1 (the inner part) :
Info :
The bottom of the inner part will be smaller than the outer part by one row. YARN - Alize Cotton Gold No.485 (green) and a 2.25 mm crochet hook.
Rnd 2 :
1 sc, (3 sc in 1 stitch), 1 sc, (3 sc in 1 stitch), 1 sc, (3 sc in 1 stitch), 1 sc, (3 sc in 1 stitch) (16)
Rnd 3 :
2 sc, (3 sc in 1 stitch), 3 sc, (3 sc in 1 stitch), 3 sc, (3 sc in 1 stitch), 3 sc, (3 sc in 1 stitch) (24)
Rnd 4 :
4 sc, (3 sc in 1 stitch), 5 sc, (3 sc in 1 stitch), 5 sc, (3 sc in 1 stitch), 5 sc, (3 sc in 1 stitch) (32)
Rnd 5 :
6 sc, (3 sc in 1 stitch), 7 sc, (3 sc in 1 stitch), 7 sc, (3 sc in 1 stitch), 7 sc, (3 sc in 1 stitch) (40)
Rnd 6 :
8 sc, (3 sc in 1 stitch), 9 sc, (3 sc in 1 stitch), 9 sc, (3 sc in 1 stitch), 9 sc, (3 sc in 1 stitch) (48)
Rnd 7 :
10 sc, (3 sc in 1 stitch), 11 sc, (3 sc in 1 stitch), 11 sc, (3 sc in 1 stitch), 11 sc, (3 sc in 1 stitch) (56)
Rnd 8 :
12 sc, (3 sc in 1 stitch), 13 sc, (3 sc in 1 stitch), 13 sc, (3 sc in 1 stitch), 13 sc, (3 sc in 1 stitch) (64)
Rnd 9 :
14 sc, (3 sc in 1 stitch), 15 sc, (3 sc in 1 stitch), 15 sc, (3 sc in 1 stitch), 15 sc, (3 sc in 1 stitch) (72)
Rnd 10 :
16 sc, (3 sc in 1 stitch), 17 sc, (3 sc in 1 stitch), 17 sc, (3 sc in 1 stitch), 17 sc, (3 sc in 1 stitch) (80)
Rnd 11 :
80 sc (between the posts)
Info :
* Crochet the next round through the posts between stitches. Draw the yarn tail to the right side.
Rnds 12-56 :
80 sc (45 rounds)
Info :
Insert the inner part into the outer part. Check if the height of both parts matches. Adjust the height, completing or unraveling the row if needed. Complete crocheting the required stitches to the corner of the house. Break yarn.
Info :
Insert the inner part of the house into the outer part. Divide the top round into 22 and 18 stitches using the pins. The 18 stitches are the left and right sides of the house, and 22 stitches are the front and back sides of the house. Take off the inner part of the house.
Info :
Attach brown yarn (Alize cotton Gold No.493). Work in back and forth rows.
Info :
* From the next row, incomplete 1 sc to decrease the row.
Row 12 :
1 sc, turn. Break yarn.
Info :
Attach yarn to the opposite side of the house. Work in back and forth rows similarly. Draw the yarn tails out to the outer side. Insert the inner part of the house into the outer part. Hide all yarn tails between the parts.
— Join both parts of the house :
Join both parts (P1) :
Crochet 15 sc, (chain 1 on the top of the house) through both parts along the edge of the top of the house with brown yarn. Move downward, crocheting 15 sc through both parts. Hide the yarn tail inside the part and cut the excess yarn.
Join both parts on opposite side (P2) :
Crochet 15 sc, (chain 1 on the top of the house) through both parts to the top. Move downward, crocheting 15 sc through both parts. Hide the yarn tail inside the part and cut the excess yarn.
Join left and right parts :
Sew the left and right parts of the house with the yarn tail 50 cm (20 inches) long. Sew the last stitches on the outer part of the house into one stitch of the inner part. Since the outer side of the house has 22 stitches, and the inner side has 18. Hide the yarn tail inside the house. Cut the excess yarn.
— House Design & Finish :
Info :
Make the templates from a sheet of paper for four windows, a front door, and two trapeziums for flowerpots. Prepare felt pieces: felt in three colors (brown, light brown, red). Use scissors, pencil, tapestry needle and muline embroidery threads for decorating. Put the template of the front door on the red felt and trace around it, cut it out. Draw all vertical and horizontal lines on red felt with a pencil. Put templates of four windows on brown felt and trace around them. Trace small trapeziums on the light brown felt and embroider the front door with brown thread as guided in the photos.
These adorable Big Houses are designed to bring a cozy, handmade accent to your home decor and make lovely gifts for loved ones. 🧶
Follow the detailed photo steps to build the inner and outer housings, insert cardboards and add felt windows for charming personality. 🧵
Enjoy the meditative process of tiny stitches and embroidery as you create whimsical houses that delight both maker and recipient. ✨