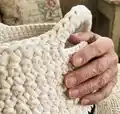
🧢 Beautiful ✨ Detailed πŸ’ Adorable

Any-Size Square Container Crochet Pattern

Any-Size Square Container Crochet Pattern
4.2β˜… Rating
2-4 Hours Time Needed
3.6K Made This
βœ‚οΈ

Beginner Friendly Level

Perfect for those just starting their crochet journey, with clear instructions and simple techniques

⏱️

Bite-Sized Project

Finishes in 2-4 hoursβ€”perfect for an afternoon of creative relaxation.

🏑

Cozy Accent

A warm touch for your space that transforms ordinary corners into inviting nooks filled with handmade charm.

About This Any-Size Square Container Crochet Pattern

This pattern creates a robust, square crochet container worked from the base up, with optional handles and customizable width, height and colours. It uses simple stitches and rounds to build a dense fabric that holds shape, making it ideal for storage or gifting. The instructions include alternatives for those unfamiliar with a magic loop and both American and British terms are provided.
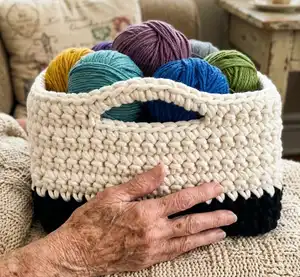
Any-Size Square Container Crochet Pattern crochet pattern - detailed view of completed project

Follow the basic base, sides and handle sections to create any size container you like. The cover photo example (24cm x 15cm) is noted throughout to help you match that size if desired.

Why You'll Love This Any-Size Square Container Crochet Pattern

I absolutely love this pattern because it turns leftover yarn into something both beautiful and useful, giving you a purposeful project that really shows off your stitches. I love that it is so flexible β€” you can make it tiny for trinkets or large for blankets and everything in between. I enjoy how quickly the square base grows into a sturdy container and how the stitch density gives a solid finished piece. I also appreciate offering simple options like handles and colour changes so makers can personalize each basket easily.

Any-Size Square Container Crochet Pattern step 1 - construction progress Any-Size Square Container Crochet Pattern step 2 - assembly progress Any-Size Square Container Crochet Pattern step 3 - details and accessories Any-Size Square Container Crochet Pattern step 4 - final assembly and finishing

Switch Things Up

I love experimenting with colour placement, so I often switch up the stripe pattern to create bold bands or subtle ombre effects using three or more colours.

I sometimes use a bulkier cord for a chunkier, faster finish and a more sculptural look; this increases the finished size too.

To make a mini version for desk storage or gifts, I use thinner cotton yarn and a smaller hook to reduce the dimensions while keeping the same pattern sequence.

I like to add contrast at the base by working one or two rounds in a darker colour to hide wear and create visual weight at the bottom.

If I want a very stiff container, I apply fabric stiffener inside once the piece is finished and dry it over a form to retain shape.

I also experiment with decorative handles: try crocheting an extra round around the handle edges for a padded, finished look or add a crocheted rim in a different texture.

For seasonal versions, I change the colours and add small crocheted embellishments glued or sewn to the outside for a themed storage solution.

I sometimes line the container with fabric to hide gaps and give a clean finish; this is especially nice if using coarser cord that has small gaps between stitches.

If I want a boxier shape, I stop adding rounds earlier and block the sides flat so they stand upright, creating a firmer rectangular profile.

I often pair multiple containers in graduated sizes and matching colours to create a cohesive storage set that looks great on shelves or in closets.

Common Mistakes & How to Fix Them

βœ— Not using a thick or non-stretchy yarn can lead to a floppy container; choose an aran-or-thicker yarn or cotton cord for structure. βœ— Using a crochet hook that's too large makes loose stitches and weak sides; use the smallest hook you can comfortably handle for denser stitches. βœ— Forgetting to place and move stitch markers at corners will cause the sides to lose their square shape; place markers between the 2 sc (dc) at each corner and move them up each round. βœ— Changing colours mid-round will create visible joins and uneven stripes; change colours on the ss join at the end of a round for neater colour transitions. βœ— Skipping the joining slip stitch at the end of each round can shift your starting point; always join with a ss into the 1st sc (dc) of the round to maintain shape and stitch counts. βœ— Not checking gauge may produce a container that is too large or floppy; make sure your stitches are dense enough to produce a relatively stiff container or adjust hook/yarn accordingly.
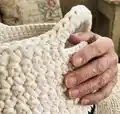
Any-Size Square Container Crochet Pattern

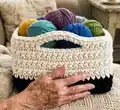
Make a sturdy, stylish square container you can customize to any size, color, or height. This versatile pattern is perfect for using up leftover yarn and creates a functional storage basket for your home. Clear, approachable instructions guide you from the square base up to optional handles and finishing tips. Ideal for crafters looking for a quick, rewarding project.

Beginner Friendly 2-4 Hours

Materials Needed for Any-Size Square Container Crochet Pattern

β€” Main Fabric

  • 01
    Thick yarn (aran weight or thicker) in a non-stretchy fibre such as raffia, cotton or jute (amount varies by size)
  • 02
    Bobbiny 5mm recycled cotton cord in Black (used in sample)
  • 03
    Bobbiny 5mm recycled cotton cord in Natural (used in sample)
  • 04
    Remaining yarn for stripes or colour changes as desired

β€” Tools Required

  • 01
    Crochet hook size 8mm (US L/11)
  • 02
    Stitch markers
  • 03
    Tapestry needle (if using yarn)
  • 04
    Glue (if using thick cord that cannot be sewn)
  • 05
    Scissors

Progress Tracker

0% Complete

β€” Abbreviations :

Info :

ch - chain. ch-2 sp - chain space made using 2 ch. CR - Corner = sc (dc) in ch-2 sp, ch 2, sc (dc) in same ch-2 sp. dc - double crochet. sc - single crochet. ss - slip stitch. st(s) - stitch(es). [ ] Square brackets show two or more stitches to be repeated as a set.

Info :

Gauge: The container in the photo has a gauge of 9 sts x 10 rounds = 10 x 10cm, however the gauge is not critical. The important thing is that your stitches are dense enough to produce a relatively stiff container.

Info :

Colour changes are optional. If you wish to change colours do so on the ss join at the end of a round.

Info :

The instructions below are to make any size of container, but at the end of some instructions there is an example given in brackets (e.g. 19 sts). Follow these (e.g....) if you want to replicate the container in the cover photo, which is 24cm wide and 15cm tall.

Info :

Alternative to magic loop: The base begins with a magic loop. If you don't know this technique ch 4, join with a ss into the 1st ch, ch 1, then work round 1 into this loop instead of into a magic loop.

Info :

Joining: At the end of every round join by working a ss into the 1st sc (dc) of the round.

β€” Base :

Round 1 :

[sc (dc), ch 2] 4 times into a magic loop. Join.

Round 2 :

ch 1 and turn, sc (dc) into every sc (dc) and CR into every ch-2 sp. Join.

Info :

Repeat round 2 until the base is the size you want (e.g. total of 9 rounds).

β€” Sides :

Round A :

ch 1 and turn, sc (dc) in every sc (dc) and 2 sc (dc) in every ch-2 sp, placing a st marker between the 2 sc (dc) at each corner. Join. Move the markers up on each round - they mark where each side starts/ends.

Round B :

ch 1 and turn, sc (dc) in every sc (dc). Join.

Info :

Repeat round B until the container is the height you want before the handles begin (e.g. repeat 9 times, changing colour after the 2nd repeat).

Info :

(If you are not making the handles, continue until the container is the full height you want then fasten off.)

Info :

The last round will be on the outside of the container, so if it's currently on the inside turn the container inside out now.

β€” Handles :

Info :

Count how many sts you have on each side. Each handle should be about half the width of one side, and you need to have the same number of sts to the left and right of it (e.g. the container in the photo has 19 sts on each side. The handle is 9 sts wide, with 5 sts to the left and 5 sts to the right).

Round 1 :

Ch 1 and turn, sc (dc) in every sc (dc) until you reach the first marker.

Round 2 :

Handle side: sc (dc) the number of sts to the right of the handle, ch the number of sts for the handle and skip the same number of sc (dc), then sc (dc) the number of sts to the left of the handle (e.g. 5 sc (dc), ch 9, skip 9 sc (dc), 5 sc (dc)).

Round 3 :

Sc (dc) in each sc (dc) along the next side.

Round 4 :

Repeat the handle side.

Round 5 :

Sc (dc) in every sc (dc) until the end of the round.

Info :

Join.

Round 6 :

Ch 1 and turn, sc (dc) in every sc (dc) and, in the space created by each handle, sc (dc) the same number of sts as there are ch in the handle (e.g. 9 sc (dc)). Join then fasten off.

β€” Finishing :

Info :

If you have used yarn sew in the ends on the inside, or if you have used a thick cord which can't be sewn glue the ends neatly on the inside.

Info :

If your fabric isn't as stiff as you had hoped, try painting the inside and/or the outside with fabric stiffener.

Assembly Instructions

  • Move and keep stitch markers at each corner and up the sides to ensure square sides and consistent increases at the corners.
  • If adding handles, count stitches carefully so each handle is centered and has the same number of stitches to the left and right before chaining the handle space.
  • When finishing a handle, sc (dc) into the chain space to close the handle, matching the number of sc to the number of ch used when creating the handle.
  • If you used yarn, weave in all ends on the inside of the container; if you used thick cord that cannot be sewn, glue the ends neatly on the inside.
  • If container fabric is not stiff enough, apply fabric stiffener to the inside and/or outside and let dry flat to retain shape.

Important Notes

  • πŸ’‘Use stitch markers at each corner and move them up each round to accurately track where each side starts and ends.
  • πŸ’‘Join each round with a slip stitch into the first sc (dc) to maintain stitch count and keep seams neat.
  • πŸ’‘Colour changes are best made on the slip stitch join at the end of a round to avoid visible joins and uneven stripes.
  • πŸ’‘If not using handles, continue repeating round B until the container reaches the full desired height and then fasten off.

This versatile square container pattern makes storage stylish and handmade. Customize the size, colours and handles to suit any room in your home. Make a set in coordinating shades for a cohesive look, or use leftover cords and yarn to create a unique piece. 🧢🏑

You ask,

we answer.

FAQs

What size will the finished piece be?

The finished size depends on your chosen base rounds and stitch gauge; the cover photo example is 24cm wide and 15cm tall when worked at the stated gauge.

Can I use different yarn weights for this pattern?

Yes, but the container's stiffness and size will change; use a thicker, non-stretchy yarn or cord for structure and adjust hook size accordingly.

Do I need prior crochet experience for this pattern?

This pattern is beginner friendly and uses basic stitches (sc/dc, ch, ss) though familiarity with rounds and the magic loop is helpful.

How long does this project typically take to complete?

Most makers finish a container in about 2-4 hours depending on size, yarn weight and experience, though larger containers will take longer.

How do I make the handles the same on both sides?

Count the number of stitches on each side and ensure the handle chain and the number of skipped stitches are symmetrical (for example, ch 9 with 5 sts each side).