🧢 Beautiful ✨ Detailed πŸ’ Adorable

Train Loris Amigurumi Pattern

Train Loris Amigurumi Pattern
4.2β˜… Rating
8-10 Hours Time Needed
1.5K Made This
βœ‚οΈ

Intermediate Level

Ideal for those with basic crochet experience, featuring slightly more advanced stitches and techniques to expand your skills.

⏱️

All-Day Adventure

Requires 8-10 hours, ideal for a full day of immersive crocheting.

🧸

Cute Companion

An adorable friend to cherish, handcrafted with love to bring comfort and joy for years to come.

About This Train Loris Amigurumi Pattern

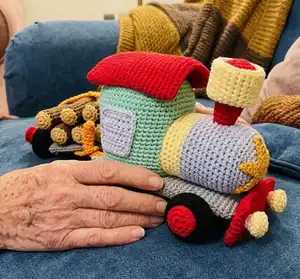
This pattern creates a colorful toy train amigurumi with a detachable log wagon and lots of small parts. You will crochet the chassis, roof, chimney, wheels, axles, logs and decorative pieces with full round-by-round instructions. Clear photos accompany many steps to help you visualize assembly and finishing.

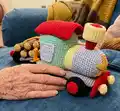
Train Loris Amigurumi Pattern crochet pattern - detailed view of completed project

Techniques used include magic ring, single crochet, increases, decreases and working in BLO. The pattern is modular so you can customize colors and small details easily.

Why You'll Love This Train Loris Amigurumi Pattern

I absolutely love this pattern because it combines simple amigurumi shaping with playful details like logs and a working rope for the wagon. I enjoy the step-by-step construction that makes assembly satisfying and predictable. As the designer, I took care to include clear round counts and finishing notes so you can reproduce the toy consistently. The design encourages color creativity and small finishing touches that really bring the train to life.

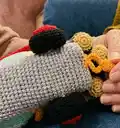
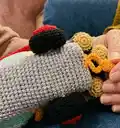
Train Loris Amigurumi Pattern step 1 - construction progress Train Loris Amigurumi Pattern step 2 - assembly progress Train Loris Amigurumi Pattern step 3 - details and accessories Train Loris Amigurumi Pattern step 4 - final assembly and finishing

Switch Things Up

I love how easy it is to personalize this train by swapping colors β€” try pastel shades for a nursery-friendly look or bold primaries for a playroom toy.

To make a larger version, I change to a thicker yarn and a larger hook; this gives a chunky, cuddly result that children adore.

If you want a mini keychain version, I use thinner yarn and a smaller hook, and reduce rounds proportionally to keep proportions similar.

I often add embroidered details instead of felt so the toy is fully washable and durable for little hands.

Consider adding wire in the axles for extra stability or to make a detachable wagon; cover any exposed wire with a crocheted tube for safety.

I sometimes replace the button closure on the rope with a snap for quicker opening, which is handy if the toy will be played with often.

For a quieter toy, avoid adding any bells or hard beads; instead use contrasting yarn to stitch wheel centers and windows.

Try making an entire set of different colored wagons that can be linked together β€” I crochet short loops to join wagons securely.

Mix textures by using boucle or cotton blends for the logs versus a smooth cotton for the chassis to create a tactile toy.

I recommend practicing the square chassis part on scrap yarn first to master shaping and even stuffing before assembling the final piece.

Common Mistakes & How to Fix Them

βœ— Not counting chains and stitches at the start can lead to an incorrect base shape; recount your foundation chain and first round before continuing. βœ— Overstuffing subfloors or small parts causes bulging and distortion; stuff gradually while crocheting and only fill final body sections firmly. βœ— Skipping the instruction to pick up remaining stitches with a yarn needle leaves holes at the ends; always pick up and close the remaining stitches as directed for a neat finish. βœ— Failing to change colors exactly where noted can misalign stripes and parts; follow the color-switch rounds carefully and fasten off or carry yarn neatly. βœ— Ignoring the note to not fill some subfloors will make joining sides difficult; leave these flat pieces unfilled then seam them as instructed.

Train Loris Amigurumi Pattern

Make a charming Train Loris amigurumi toy with this complete step-by-step crochet pattern. You will enjoy assembling colorful parts like the chassis, chimney, wheels and a log-carrying wagon. The instructions include all rounds, materials, and helpful photos so you can recreate this playful handmade train with confidence. Perfect for gifting or decorating a nursery.

Intermediate 8-10 Hours

Materials Needed for Train Loris Amigurumi Pattern

β€” Main Fabric

  • 01
    Peria baby soft cotton XL yarns (9 different colors you prefer) - I preferred grey, red, black, mustard, brown, blue, yellow, green, orange colored yarns
  • 02
    Assorted yarn for details (small amounts of red, black, yellow, mustard, brown)
  • 03
    Fiberfill for stuffing (small to medium bag)
  • 04
    Small button for wagon rope closure

β€” Tools Required

  • 01
    Crochet hook size 2.5 mm
  • 02
    19 cm long 2.5 mm wire (for handle/axle covering)
  • 03
    Scissors
  • 04
    Yarn needle for sewing and picking up stitches
  • 05
    Stitch markers
  • 06
    Polyester stuffing (fiberfill)
  • 07
    Small button

Progress Tracker

0% Complete

β€” Grey Subfloors of Train :

Subfloors of Train :

Start grey colored yarn;

Round 1 :

Make 20 ch, insert your hook to the 2nd ch from the hook and 18sc, 3-sc inc on the last chain, turn to the other side of the chain, 17sc, 1inc = 40sc

Round 2-36 :

40sc (35 rnds)

Round 37 :

Don't fill the subfloor with fiberfill. At the end of 37th round, combine two side by single crochet, cut and hide the yarn.

β€” Grey Subfloors of Train (cont.) :

Subfloors of Logs :

Start grey colored yarn;

Round 1 :

Make 20 ch, insert your hook to the 2nd ch from the hook and 18sc, 3-sc inc on the last chain, turn to the other side of the chain, 17sc, 1inc = 40sc

Round 2-29 :

40sc (28 rnds)

Round 30 :

Don't fill the subfloor with fiberfill. At the end of 27th round, combine two side by single crochet, cut and hide the yarn.

β€” Wheels of Train (X8) :

Wheels - Start :

Start red colored yarn;

Round 1 :

6sc in MR = 6sc

Round 2 :

6inc = 12sc

Round 3 :

Blo 12sc = 12sc

Round 4 :

12sc (1rnd)

Color Change :

Switch to black colored yarn;

Round 5 :

Blo (1sc, 1inc)*6 = 18sc

Round 6 :

(2sc, 1inc)*6 = 24sc

Round 7 :

(3sc, 1inc)*6 = 30sc

Round 8 :

Blo 30sc = 30sc

Round 9-10 :

30sc (2 rnds)

Round 11 :

Blo (3sc, 1dec)*6 = 24sc

Round 12 :

(2sc, 1dec)*6 = 18sc

Round 13 :

(1sc, 1dec)*6 = 12sc

Round 14 :

6dec = 6sc, pick up the remaining 6 stitches with the yarn needle, cut the yarn long for sewing.

β€” Axles Of Wheels (X4) :

Axles - Start :

Start black colored yarn;

Round 1 :

6sc in MR = 6sc

Round 2 :

6inc = 12sc

Round 3-20 :

12sc (18 rnds)

Round 21 :

6dec = 6x

Info :

Pick up the remaining 6 stitches with the yarn needle. Fix the yarn and hide.

Info :

Sew both ends to the wheels as in the image.

β€” Logs (X6) :

Logs - Start :

Start mustard colored yarn;

Round 1 :

6sc in MR = 6sc

Round 2 :

6inc = 12sc

Round 3 :

switch to brown colored yarn, Blo 12sc = 12sc

Round 4-27 :

12sc (24 rnds)

Round 28 :

switch to mustard colored yarn again, 12sc = 12sc

Round 29 :

Blo 6dec = 6sc, pick up the remaining 6 stitches with the yarn needle, finish the log cutting and hiding the yarn.

β€” Chassis of Train :

Chassis - Start :

Start with the green colored yarn;

Round 1 :

6sc in MR = 6sc

Round 2 :

6inc = 12sc

Round 3 :

(1sc, 1inc)*6 = 18sc

Round 4 :

(2sc, 1inc)*6 = 24sc

Round 5 :

(3sc, 1inc)*6 = 30sc

Round 6 :

(4sc, 1inc)*6 = 36sc

Round 7 :

Blo 36sc = 36sc

Round 8-17 :

36sc (10 rnds)

Round 18-22 :

Switch to the yellow colored yarn, 36sc (5 rnds)

Info :

Fasten up the yarn with 1 sl st and cut the yarn long for sewing.

β€” Square Part of The Chassis :

Square Part - Start :

Crochet the part with green colored yarn;

Round 1 :

4sc in MR = 4sc

Round 2 :

(3-sc inc)*4 = 12sc

Round 3 :

1sc, 3-sc inc, (2sc, 3-sc inc)*3, 1sc = 20sc

Round 4 :

2sc, 3-sc inc, (4sc, 3-sc inc)*3, 2sc = 28sc

Round 5 :

3sc, 3-sc inc, (6sc, 3-sc inc)*3, 3sc = 36sc

Round 6 :

4sc, 3-sc inc, (8sc, 3-sc inc)*3, 4sc = 44sc

Round 7 :

5sc, 3-sc inc, (10sc, 3-sc inc)*3, 5sc = 52sc

Round 8 :

6sc, 3-sc inc, (12sc, 3-sc inc)*3, 6sc = 60sc

Round 9 :

Blo 60sc = 60sc

Round 10-30 :

60sc (21 rnds)

Info :

Fill with fiberfill as crocheting.

Round 31 :

10sc, 3-sc dec, (12sc, 3-sc dec)*3, 2sc = 52sc

Round 32 :

8sc, 3-sc dec, (10sc, 3-sc dec)*3, 2sc = 44sc

Round 33 :

6sc, 3-sc dec, (8sc, 3-sc dec)*3, 2sc = 36sc

Round 34 :

4sc, 3-sc dec, (6sc, 3-sc dec)*3, 2sc = 28sc

Round 35 :

2sc, 3-sc dec, (4sc, 3-sc dec)*3, 2sc = 20sc

Round 36 :

1sc, 3-sc dec, (2sc, 3-sc dec)*3, 1sc = 12sc

Round 37 :

(3-sc dec)*4 = 4sc

Info :

Pick up the remaining 4 stitches with the needle, Finish the part cutting and hiding the yarn.

β€” Roof of The Chassis :

Roof - Start :

Crochet the part with red colored yarn;

Round 1 :

Start to make 23 ch, insert your hook to the 2nd ch from the hook and 21sc, 3-sc inc on the last chain, turn to the other side of the chain, 20sc, 1inc = 46sc

Round 2-22 :

46sc (21 rnds)

Round 23 :

Don't fill the subfloor with fiberfill. At the end of 22th round, combine two side by single crochet, cut and hide the yarn.

β€” Chimney :

Chimney - Start :

Crochet the chimney with red colored yarn;

Round 1 :

6sc in MR = 6sc

Round 2 :

6 inc = 12sc

Round 3 :

(1sc, 1inc)*6 = 18sc

Round 4 :

Blo 18 sc = 18sc

Round 5-7 :

18sc (3 rnds)

Round 8 :

(4sc, 1dec)*3 = 15sc

Round 9 :

(3sc, 1dec)*3 = 12sc

Round 10-12 :

12sc (3 rnds)

Round 13 :

(2sc, 1dec)*3 = 9sc

Round 14 :

9sc (1 rnd)

β€” Top Part of The Chimney :

Top Chimney - Start :

Crochet the part with yellow colored yarn;

Round 1 :

7ch, insert your hook to the 2nd ch from the hook and 5sc, 3-sc inc on the last chain, continue to the other side of the chain, 4sc, 1inc = 14sc

Round 2-25 :

14sc (24 rnds)

Round 26 :

Don't fill the part with fiberfill. At the end of 25th round, combine two side by single crochet, cut and hide the yarn. Roll the part, and combine the two ends by sewing.

β€” Windows (X2) :

Windows - Start :

Crochet the window with blue colored yarn;

Row 1 :

10ch, insert your hook to the 3rd ch from the hook and 7dc = 7dc

Row 2-6 :

turn the other row with 2ch, 7dc (5 rows)

Row 7 :

enclose the part with sc making 1inc in the corners. Finish the crochet making 1sl st and cut the yarn long for sewing.

β€” Front Part of The Chassis :

Front Part - Start :

Crochet the front part of the chassis with red colored yarn;

Round 1 :

20ch, insert your hook to the 2nd ch from the hook and 18sc, 3-sc inc on the last chain, turn to the other side of the chain, 17sc, 1inc = 40sc

Round 2 :

40sc (1 rnd)

Round 3 :

1inc, 18sc, 1inc, 20sc = 42sc

Round 4 :

42sc (1 rnd)

Round 5 :

(1inc, 20sc)*2 = 44sc

Round 6 :

44sc (1 rnd)

Round 7 :

1inc, 20sc, 1inc, 22sc = 46sc

Round 8 :

46sc (1 rnd), cut the yarn long tail for sewing.

β€” Front Lamps (X2) :

Front Lamps - Start :

Crochet the front lamps with yellow colored yarn;

Round 1 :

6sc in MR = 6sc

Round 2 :

6inc = 12sc

Round 3 :

Blo 12sc = 12sc

Round 4-5 :

12sc (2 rnds)

Info :

Fill the lamp with fiberfill

Round 6 :

6dec = 6sc

Round 7 :

6sc (1 rnd), 1 sl st and cut the yarn long for sewing.

β€” Star in Front of The Chassis :

Star - Start :

Crochet this part with orange colored yarn;

Row 1 :

12sc in MR = 12sc

Row 2 :

6ch, insert your hook to the 3rd ch from the hook and 2dc, 2 half double crochet, join to ring 1sl st (repeat 5 times) Cut the yarn long for sewing. Sew the star to in front of the chassis.

β€” The Crochet, Covering Wire At The Back Of Train :

Wire Cover - Start :

Crochet this part with orange colored yarn;

Round 1 :

8sc in MR = 8sc

Round 2-22 :

8sc (21 rnds)

Info :

Bend the wire and insert to this part. Sew this part to back side of train chassis

β€” Wagon Parts of Train :

Rope Holding The Logs :

Crochet the rope holding logs with orange colored yarn;

Row 1 :

5ch, insert your hook to the 3rd ch from the hook and 2dc = 3dc

Row 2-19 :

turn the other row with 2ch, 2dc = 3dc (18 rows)

Info :

Sew one end of the rope to the grey wagon subfloor middling. Make a buttonhole to other end of the rope and join to other side of the wagon subfloor with a button. Make a wagon holder apparatus in front of the wagon. For this; 20ch, 20 sl st

Info :

Sew 4 wheels to the wagon and place logs to the under of wagon rope.

Assembly Instructions

  • Sew both ends of each axle into the centers of the wheels as shown in the images, secure with a few stitches and hide ends.
  • Attach the four wheels to the bottom of the grey wagon subfloor evenly spaced, then place and arrange the logs on top and secure with the orange rope and button.
  • Sew the square part and roof onto the chassis body, then attach the front part, aligning edges and using the long tails left for sewing to join the pieces securely.
  • Sew the chimney to the roof opening, then sew the yellow top of the chimney in place after rolling and stitching the edges together.
  • Sew the windows to the sides of the chassis and sew the star to the front of the chassis as a decorative element.
  • Insert the bent wire into the crocheted covering tube, then sew that covered wire to the back of the chassis so the handle is stable and hidden.

Important Notes

  • πŸ’‘Do not fill flat subfloor pieces with fiberfill when the pattern specifically instructs not to; leave them flat and join sides by single crochet.
  • πŸ’‘Pick up remaining stitches with the yarn needle to close small openings neatly, then cut and hide the yarn.
  • πŸ’‘Fill larger sections gradually while crocheting to avoid lumps and to keep even shaping.
  • πŸ’‘Fasten up color changes and ends with a slip stitch or secure knot and leave a long tail for sewing where noted.
  • πŸ’‘Use stitch markers to help track rounds, especially when working long even rounds or switching colors frequently.

This Train Loris amigurumi is a playful handmade toy full of colorful details and charm. The modular design lets you customize colors and finishes to your liking. Perfect as a unique gift or decorative piece for a child's room. πŸ§ΆπŸš‚

You ask,

we answer.

FAQs

What size will the finished piece be?

The finished amigurumi measures approximately 20-25 cm long when using Peria baby soft cotton XL and a 2.5 mm hook; final size will vary by yarn and tension.

Can I use different yarn weights for this pattern?

Yes, you can use different yarn weights but this will affect the final size and number of rounds; adjust hook size accordingly and expect changes in texture and stuffing amounts.

Do I need prior crochet experience for this pattern?

This pattern is rated intermediate; familiarity with magic ring, single crochet, increases, decreases and color changes is recommended for best results.

How long does this project typically take to complete?

Most crocheters complete this project in 8-10 hours, though time may vary based on experience level, customization, and assembly complexity.