Make a charming toast-shaped crochet bag you can wear or gift. This pattern guides you through crocheting two bread slices, adding a crust, sewing on adorable limbs and a strap, and finishing the face details. It uses simple amigurumi techniques and is highly customizable so you can change colors, faces, and strap styles. Follow step-by-step photos and clear instructions to create your very own Toastie!
Progress Tracker
0% Complete
— Information :
Info :
Level: Advanced beginner
Infos :
Abbreviations (US Terminology): ch - Chain. sl st - Slip stitch. sc - Single crochet. inc - Increase (2 sc in the same stitch). dec - Decrease (sc 2 stitches together). sc blo - Single crochet in back loop only. sk - Skip a stitch. st - Stitch.
Info :
Materials: DK weight yarn in cream, light brown, dark brown, and black. I used milk cotton yarn and approximately 28g cream, 21g light brown, 21g dark brown, and 1g black for the entire bag. 4mm hook (G-6) and 3.5mm hook (E-4). Tapestry needle. Stitch marker. Stuffing.
Info :
Gauge: Single crochet stitch 4x4" square = 20 stitches by 23 rows.
— Front and back slice :
Info :
In cream yarn and using 4mm hook. Make a slip knot and ch 26. Turn.
Row 1 :
Sc in 2nd st from the hook. Sc in every st until the end of the row. Ch1, turn. (25)
Row 2-25 :
Sc in every st. Ch1, turn. (25)
Info :
You should end up with a rectangle like this by the end of row 25. If you want your bread to be shorter and more squarish, you can adjust the number of sc rows or number of stitches in the starting chain.
Row 26 :
Inc in first 2 st. Sc in every st until you have 2 st left. Inc in last 2 st. Ch1, turn. (29)
Row 27 :
Inc in first st. Sc in every st until you have 1 st left. Inc in last st. Ch1, turn. (31)
Row 28-29 :
Sc in every st. Ch1, turn. (31)
Row 30 :
Dec. Sc in every st until you have 2 st left. Dec. Ch1, turn. (29)
Row 31 :
Sc in every st. Ch1, turn. (29)
Row 32 :
Dec, dec. Sc in every st until you have 4 st left. Dec, dec. Ch1, turn. (25)
Row 33 :
Dec. Sc in every st until you have 2 st left. Dec. Ch1, turn. (23)
Row 34 :
Dec. Sc in every st until you have 2 st left. Dec. Cut yarn and fasten off. (21)
Info :
You have now completed the front slice. Repeat rows 1-34 to make the identical back slice.
— Bread crust :
Info :
In light brown yarn and using 4mm hook.
Row 1 :
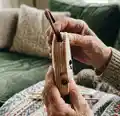
Start by making a standing sc on the top row of the front slice. A standing sc will achieve a neater finish as compared to the usual method of attaching the yarn to your work then ch 1. It may sound intimidating but it's really easy! To make a standing sc, make a slip knot on your hook. Insert your hook with the slip knot into the first st, yarn over, pull through, yarn over, then pull through both loops, as if you are making a regular sc. You may watch this video tutorial by Tamara Kelly for clearer instructions: https://youtu.be/8MsVeld2UY
Info :
Continue to sc around the entire slice, forming the bread crust. Follow the diagrams below to know how many sc to place in each st.
Step 1 :
Starting from the standing sc, continue to sc in every st along the top row until you have 1 st left. Place 2 sc in the last st of the row.
Step 2 :
Place 2 sc in every hole you see along the curved portion. You should make a total of 9 inc, including the one done in the previous step.
Step 3 :
Sc next 2 st together (dec).
Step 4 :
Place 1 sc in every hole along the vertical portion of the slice till you reach the bottom left-hand corner. You should have made 22 sc. Place 3 sc in the hole at the bottom left-hand corner. This will form the corner turn.
Step 5 :
Place 1 sc in every st along the bottom of the slice till you reach the bottom right-hand corner. You should have made 23 sc. Place 3 sc in the last st at the bottom right-hand corner. This will form the corner turn.
Step 6 :
Sk 1 st. This is to ensure that there are the same number of sc on each side of the bread. Sc along the vertical portion of the slice till you reach the curved portion. You should have made 22 sc.
Step 7 :
Sc next 2 st together (dec).
Step 8 :
Place 2 sc in every hole you see along the curved portion until you reach the first standing sc. Place 1 sc in the same st you made the standing sc in. You should end up with a total of 9 inc, including the one done with the standing sc. Sl st into the first st. Ch 1.
Row 2 :
Sc in the st that you did the sl st in and continue to sc in every st until the bottom left-hand corner of the slice. Place 2 sc in the 2nd st of the corner turn. Sc in every st until the bottom right-hand corner of the slice. Place 2 sc in the 2nd st of the corner turn. Sc in every st until the first st. Sl st in the first st. Ch1.
Row 3 :
Scblo in every st. To ensure that the st made are more secure, instead of just going through the back loop, I recommend going through the bumps at the back when doing scblo. It may be hard to go through the back bumps but you may use your finger to help push your hook through. Continue doing scblo in every st until the first st. Sl st into the first st. Ch 1.
Row 4 :
Sc in every st. Sl st into the first st. Ch 1.
Row 5 :
Sc in every st. Sl st into the first st. Fasten off and cut yarn. Note: You may repeat row 4 to make the bag as thick as you want.
Info :
Repeat rows 1-5 to make the bread crust for the back slice but do not fasten off for the second slice. Ch 1.
— Joining both slices :
Info :
Place a stitch marker on the st that you did the sl st in. Count 23 st to the left and place another stitch marker in that st. This will form the opening of the bag. Repeat with the other slice and put stitch markers to mark the opening.
Info :
Place both slices back-to-back with the 'right' sides facing each other. The slice with the working yarn end should be the slice nearer to you. Sc the two slices together in the direction of the white arrow, starting from the red dot (the st right after the stitch marker) to the blue dot (the st right before the stitch marker).
Info :
Fasten off and cut yarn. Flip the bag inside-out and remove stitch markers. The main body of the bag is now complete.
— Eyes (make 2) :
Info :
In black yarn and using 4mm hook.
Round 1 :
Make a magic ring and place 7 sc in it (7). Pull the magic ring close. Sl st into the first st. Fasten off and cut yarn, leaving a long tail for sewing.
Info :
Right eye: Thread the starting yarn from the magic ring into the selected hole on the main body where you want the eye placed. I selected the hole in between the 18th and 19th row from the bottom, and the 6th hole from the right of the slice as indicated by the tapestry needle in the photo. Thread the long tail end of the yarn one hole to the right of the hole where the starting end of the yarn was threaded.
Info :
Left eye: For the left eye, select the hole in the same row, but the 7th hole from the left side of the slice. Thread the long tail end of the yarn one hole to the right of where the starting end of the yarn was threaded.
Info :
To secure both eyes, tie a knot at the back using the two ends to fix the placement, then proceed to sew them on tightly onto the main body.
— Mouth :
Info :
In black yarn and using tapestry needle, embroider the mouth on according to the following steps. You may change up the face if you wish!
Info :
It is normal for the smile to look a little crooked now. Sew over the smile once more to thicken the line and smoothen it out. Adjust your tension such that the smile looks as even as possible.
— Arms (make 2) :
Info :
In dark brown yarn and using 3.5mm hook. When making the arms and legs, you will work in the round. Do not sl st to join after every round. I highly recommend using a stitch marker to keep track of the first st of every round as you go along. Feel free to adjust the length of the limbs by adjusting the number of sc rows.
Row 1 :
Make a magic ring and place 6 sc in it (6). Pull the magic ring close.
Row 2 :
Inc in every st (12)
Row 3-4 :
Sc in every st (12)
Row 5 :
(Sc, sc, dec) repeat 3 times till the end of the round (9)
Row 6 :
Dec, then sc in in every st until the end of the round (8)
Row 7-14 :
Sc in every st (8). Stuff and shape arm.
Row 15 :
Flatten the opening of the arm and sew or slip stitch it shut like in the photo. Ensure that the part where you sew shut is not slanted. Fasten off and cut yarn, leaving a long tail for sewing.
— Legs (make 2) :
Info :
In dark brown yarn and using 3.5mm hook.
Row 1 :
Make a magic ring and place 6 sc in it (6). Pull the magic ring close.
Row 2 :
Inc in every st (12)
Row 3 :
(Sc, inc) repeat until the end of the round (18)
Row 4-7 :
Sc in every st (18)
Row 8 :
(Dec, sc) repeat 4 times. Sc in the next 6 st (14)
Row 9 :
(Dec, sc) repeat 3 times. Sc in the next 5 st (11)
Row 10 :
Dec, then sc in every st until the end of the round (10)
Row 11-18 :
Sc in every st (10). Stuff and shape leg.
Row 19 :
Flatten the opening of the leg and sew or slip stitch it shut like in the photo. Ensure that the part where you sew shut is not slanted. Fasten off and cut yarn, leaving a long tail for sewing.
— Assembling the arms and legs :
Info :
Arrange how you wish to connect the legs and arms onto the main body and place stitch markers to mark them out. I vertically aligned the two legs to the eyes, and the two arms to the same height as the mouth.
Info :
Sew both the arms on using a tapestry needle as shown in the photos. Here, the arms are sewn vertically such that they stick straight out. However, you may choose to sew the arms horizontally instead such that they droop downwards if you prefer.
Info :
Sc both legs on instead of sewing to ensure more support. This helps the legs stay up and slightly slanted towards the front instead of dangling straight down. Please ensure that the legs are facing front before beginning to sc. There should be 4 sc done. Fasten off, cut yarn, and weave in ends.
— Sling strap :
Info :
In dark brown yarn and using 4mm hook. Leave a long tail for sewing when making a slip knot. This will be used for sewing the strap later. Ch 6.
Row 1 :
Sc in 2nd st from the hook. Sc in every st until the end of the row. Ch1, turn. (5)
Row 2 :
Sc in every st. (5)
Info :
Repeat row 2 until the desired length. Fasten off and cut yarn, leaving a long tail for sewing. Note: Do take into consideration how much the strap will stretch after things are placed into the bag. You may line the strap with fabric if you do not want it to stretch at all.
Info :
Mark out where you want to sew the straps on using stitch markers and sew them on using a tapestry needle. Ensure that the straps are symmetrically attached.
Info :
Congratulations, you have completed your very own Toastie Bread Bag! You may line the inside of the bag with fabric or add a zipper or button closure if you wish. You can even make it into a backpack or shoulder bag by changing up the straps. Feel free to customise your Toastie with different facial expressions, colours or add toppings to make it your own.
This Toastie Bread Bag pattern turns a cozy crochet idea into a wearable, whimsical accessory you’ll love to make and show off. Customize the face, add toppings, or change strap styles to create many playful variations. Perfect as a thoughtful handmade gift or a charming statement piece for yourself. 🧶✨