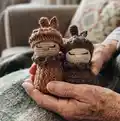
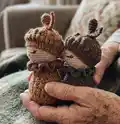
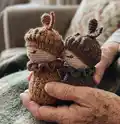
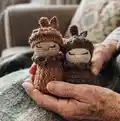
About This The Magic of Autumn Pine Cone Amigurumi Pattern
This pattern creates a sweet pine cone amigurumi with a textured bobble-body, a cute embroidered face and a tiny hat with a stalk and leaf. It uses basic amigurumi shaping combined with a small collar and bobble stitch detailing for a cozy autumn look. The instructions include a step-by-step bobble stitch tutorial and clear round-by-round directions to help you follow along.
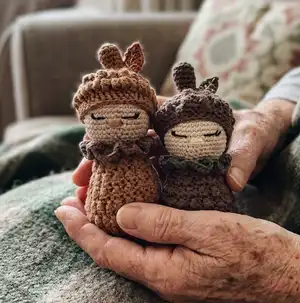
Perfect as a small gift or seasonal decoration, the finished toy measures about 14 cm tall. Full material lists, color charts and assembly photos are included to guide your finish.
Why You'll Love This The Magic of Autumn Pine Cone Amigurumi Pattern
I absolutely love this pattern because it combines simple amigurumi shaping with the delightful texture of bobble stitches, creating a unique little character. I enjoy how quickly the project comes together while still offering satisfying detail work like the ruffled collar and embroidered features. The pattern allows for easy color variations so I can make matching sets for gifts and displays. It feels cozy to crochet and always brightens my day when I see the finished tiny pine cones sitting together.
Switch Things Up
I love how easy it is to customize this pattern by changing colors; try soft pastels for a spring-themed pine cone or deep jewel tones for a rich autumn set.
I often swap the main yarn for a slightly thicker yarn and a larger hook to make a chunky, cuddle-friendly version that doubles as a small pillow or decoration.
I sometimes make tiny keychain versions by using fingering weight yarn and a 1.75mm hook, then attaching a keyring to the hat stalk — perfect for gifts.
I add embroidered freckles or different mouth shapes to give each amigurumi its own personality; move the eye placement to change the expression dramatically.
I like to play with the bobble stitch size: repeat the bobble more times for bigger, puffier scales or fewer times for a subtle texture.
I also experiment with metallic or sparkly thread to embroider leaf veins for a festive holiday variation that catches the light.
Try adding tiny crocheted accessories like a scarf, miniature basket, or a little acorn to create a themed set for display or gifting.
If I want a more realistic leaf, I use a two-tone green yarn and embroider additional veins in a contrasting shade for depth.
For a safer baby toy version, I skip small attachments like beads and embroider the face fully, and ensure all parts are firmly sewn and ends are hidden.
I encourage you to combine colors from the variation chart and the main chart to create coordinated pairs that make delightful gift sets or seasonal decorations.
Common Mistakes & How to Fix Them
✗ Skipping stitch markers during continuous rounds causes lost stitch counts; place a marker at the start of every round and move it as you work to keep accurate counting.
✗ Not stuffing as you go can create lumps or uneven shaping; stuff gradually and evenly during shaping rounds to maintain a smooth silhouette.
✗ Using a larger hook than recommended will make stitches loose and the bobble texture sloppy; use the specified 2.5mm hook or go down a size to keep tight amigurumi fabric.
✗ Forgetting to hide or leave long sewing tails makes assembly difficult; fasten off leaving enough yarn for sewing and weave ends neatly for secure joins.