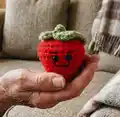
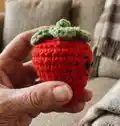
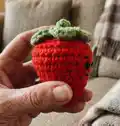
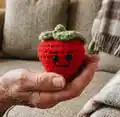
About This Stanley the Strawberry Amigurumi Pattern
This pattern creates a tiny, adorable strawberry amigurumi named Stanley approximately 2.5" tall when made with the recommended yarn and hook. It uses basic amigurumi techniques worked in continuous rounds, plus a small leafy top and optional safety eyes. Youll enjoy a fast, satisfying make that still includes charming details like embroidered features and crocheted leaves.
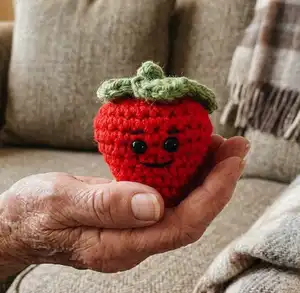
Designed for quick makes and perfect for gifting, this pattern keeps stitches simple while delivering a delightful finished toy. It includes clear rounds, finishing notes, and assembly tips to help you finish with confidence.
Why You'll Love This Stanley the Strawberry Amigurumi Pattern
I absolutely love this pattern because it turns simple stitches into a character full of personality with very little time investment. I enjoy how the tiny size makes it perfect for quick gifts, decorations, or collectibles. The leaf detail and little stem add a lot of charm without complicated shaping, which I find very satisfying to crochet. I also appreciate that it is accessible to beginners but still fun for experienced makers who want a relaxing, fast project.
Switch Things Up
I love customizing this tiny strawberry by changing colors and textures; try pastel tones for a softer, whimsical version or bright neons for a playful look.
I sometimes substitute a sport weight yarn and a smaller hook to make a mini keychain-sized strawberry that fits perfectly on a zipper pull.
If you want a chunkier, cuddlier version I use bulky yarn with a larger hook and increase the stuffing slightly for a plush feel.
I often add embroidered seeds using a contrasting color for extra detail and personality—try different seed placements to create unique expressions.
I like to swap the simple chain stem for a braided cord or tiny crocheted vine to give the strawberry a more organic finish.
For a seasonal twist I make a set of strawberries in varying sizes and attach felt leaves for a mixed-media look that stands out.
I recommend experimenting with safety eye sizes or embroidered eyes to change the expression from cute to quirky depending on placement and spacing.
To make an ornament, I add a loop of thread before finishing and then lightly stuff so it hangs nicely on a branch or bag.
I sometimes stitch a tiny pocket on the back and add a small bell to turn Stanley into a charming keyring companion.
If youre gifting multiple, I create matching little gift tags or miniature hats to make a coordinated set thats extra special.
I also enjoy embroidering small smiles or freckles to give each strawberry its own personality, and it only takes a few extra minutes to make each one unique.
Common Mistakes & How to Fix Them
✗ Skipping a stitch marker while working continuous rounds leads to losing track of your round start; place a stitch marker at the start of every round and move it up as you work.
✗ Not stuffing as you go can make shaping difficult and result in lumps; stuff gradually and evenly, adding small amounts of fibre fill as the piece takes shape.
✗ Inserting safety eyes too late risks distorting the fabric when you force them through; insert safety eyes between rounds 8 and 9 (or embroider eyes) before stuffing too firmly.
✗ Pulling the invisible decrease too tightly can create dents in the body; work invdec with even tension and adjust stuffing before closing so the shape remains smooth.