🧢 Beautiful ✨ Detailed πŸ’ Adorable

SpaceBall Amigurumi Pattern

SpaceBall Amigurumi Pattern
4.3β˜… Rating
5-7 Hours Time Needed
3.5K Made This
βœ‚οΈ

Intermediate Level

Ideal for those with basic crochet experience, featuring slightly more advanced stitches and techniques to expand your skills.

⏱️

Weekend Treat

Takes 5-7 hours, making it an enjoyable project to finish over a couple of days.

🧸

Cute Companion

An adorable friend to cherish, handcrafted with love to bring comfort and joy for years to come.

About This SpaceBall Amigurumi Pattern

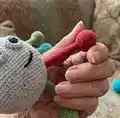
This pattern creates a tactile SpaceBall amigurumi with eight pullable arms that can be moved in multiple directions. The design is playful and bright, using yarn colors to create a cheerful toy that kids will love to handle. Instructions cover crocheting the arms, building the body while attaching arms, making eyes, and adding embroidered details.

SpaceBall Amigurumi Pattern crochet pattern - detailed view of completed project

You will learn to attach arms during the body construction and finish with surface embroidery for personality. Recommended for crafters comfortable with basic amigurumi techniques.

Why You'll Love This SpaceBall Amigurumi Pattern

I absolutely love this pattern because it combines simple amigurumi techniques with a playful, interactive design that really engages children. I enjoy the process of crocheting the long arms and seeing them transformed into movable features as they are attached to the body. The embroidery step lets me add small personal touches that make each toy unique and charming. Creating a balanced spherical body while attaching the arms is a satisfying challenge that yields an adorable, tactile finished piece.

SpaceBall Amigurumi Pattern step 1 - construction progress SpaceBall Amigurumi Pattern step 2 - assembly progress SpaceBall Amigurumi Pattern step 3 - details and accessories SpaceBall Amigurumi Pattern step 4 - final assembly and finishing

Switch Things Up

I love customizing this pattern by changing yarn colors for each arm to make a rainbow effect or by using two tones for a subtle look.

I sometimes replace the long arms with shorter ones to create a compact version that's easier for small hands to hold.

I like to use slightly thicker yarn and a larger hook to make a chunky, more cuddly SpaceBall; remember this will change final size and stuffing needs.

I often add a small bell or rattle inside one of the arms to make auditory stimulation for babies and a different sensory experience.

I recommend experimenting with embroidered facial expressions to change the toy's personality β€” a smile, surprised mouth, or sleepy eyes all work well.

I sometimes sew small felt patches or tiny crocheted accessories to the arms to create themed versions like space, ocean, or forest friends.

For a keychain or bag charm, make a mini version using thinner yarn and a very small hook and shorten the arms considerably.

I also try using safety eyes for an alternative eye finish, or embroider eyes with white and black yarn for a fully fabric-safe toy for very young children.

If you want a more robust toy for heavy play, reinforce the arm openings by working an extra round of SC and sewing a small fabric lining inside the body for extra strength.

I enjoy gifting sets of SpaceBalls in different color palettes β€” pastel, neon, or monochrome β€” to match nursery themes or seasonal holidays.

Common Mistakes & How to Fix Them

βœ— Attaching arms without checking placement can misalign openings; mark and double-check opposite placements before sewing them into the body. βœ— Overstuffing the arms and body makes the toy stiff and distorts shape; stuff gradually and shape as you go for a nice sphere. βœ— Leaving loose ends untrimmed inside openings leads to filler escape when arms are pulled; tuck and trim excess stuffing and weave ends securely. βœ— Skipping the single crochet finishing rounds around openings results in fraying; work the two finishing rounds described to secure and tidy each hole.

SpaceBall Amigurumi Pattern

Make a playful SpaceBall amigurumi toy that delights children with eight movable, pullable arms. This colorful crochet pattern teaches you how to crochet the arms, assemble them into the body, and add eyes and embroidered details. You will love creating a tactile learning toy that develops fine motor skills and looks adorable on display.

Intermediate 5-7 Hours

Materials Needed for SpaceBall Amigurumi Pattern

β€” Main Fabric

  • 01
    YarnArt Jeans 50 g / 160 m; 55% cotton, 45% acrylic; color 80 (grey) - main body
  • 02
    YarnArt Jeans 50 g / 160 m; 55% cotton, 45% acrylic; color 53 (black) - eyes and mouth
  • 03
    YarnArt Jeans 50 g / 160 m; 55% cotton, 45% acrylic; color 03 (white) - eye highlights and securing eyes
  • 04
    YarnArt Jeans 50 g / 160 m; 55% cotton, 45% acrylic; color 26 (red) - arm color
  • 05
    YarnArt Jeans 50 g / 160 m; 55% cotton, 45% acrylic; color 69 (green) - arm color
  • 06
    YarnArt Jeans 50 g / 160 m; 55% cotton, 45% acrylic; color 35 (yellow) - arm color
  • 07
    YarnArt Jeans 50 g / 160 m; 55% cotton, 45% acrylic; color 33 (blue) - arm color
  • 08
    Small amounts of red, yellow, green and blue yarn for cross-stitch embroidery spots

β€” Tools Required

  • 01
    Crochet hook size 2.0 mm
  • 02
    Fiber filler (polyester stuffing)
  • 03
    Scissors
  • 04
    Large eye needle
  • 05
    Wooden stick (chopstick) for pushing filler
  • 06
    Stitch markers (if necessary)
  • 07
    Yarn needle for sewing and finishing

Progress Tracker

0% Complete

β€” Arms (make 4) :

Info :

Begin crocheting in any color you like. You should make pieces in 4 different colors. I used red, green, yellow, and blue. I began with red.

Round 1 :

6 MR (6)

Round 2 :

INC *6 (12)

Round 3 :

(1 SC, INC)*6 (18)

Round 4 :

(2 SC, INC)*6 (24)

Round 5-8 :

4 rnds straight: 24 SC

Round 9 :

(DEC, 2 SC)*6 (18)

Info :

Stuff tightly.

Round 10 :

(DEC, 1 SC)*6 (12)

Round 11 :

(DEC, 2 SC)*3 (9)

Info :

Further on leave the pipe part of 9 SC hollow. Go on crocheting 60 rows.

Round 12-71 :

60 rnds straight: 9 SC

Round 72 :

(INC, 2 SC)*3 (12)

Round 73 :

(1 SC, INC)*6 (18)

Round 74 :

(2 SC, INC)*6 (24)

Round 75-78 :

4 rnds straight: 24 SC

Round 79 :

(DEC, 2 SC)*6 (18)

Info :

Stuff tightly.

Round 80 :

(DEC, 1 SC)*6 (12)

Round 81 :

DEC*6 fasten off.

β€” Body :

Info :

Begin crocheting with grey yarn. Be very attentive, as you are going to attach arms pieces as you crochet the body.

Round 1 :

6 MR (6)

Round 2 :

INC *6 (12)

Round 3 :

(1 SC, INC)*6 (18)

Round 4 :

(2 SC, INC)*6 (24)

Round 5 :

(3 SC, INC)*6 (30)

Round 6 :

(4 SC, INC)*6 (36)

Round 7 :

(5 SC, INC)*6 (42)

Info :

Take red and yellow arm pieces at this stage.

Round 8 :

Chain 3, skip 3 SC, put the yellow arm and continue crocheting the round. 3 SC, INC, (6 SC, INS)*2, 3 CH, put the red arm, 3 SC, INC, (6 SC, INC)*2. The arms should be placed opposite each other symmetrically. (48)

Round 9 :

(7 SC, INC)*6 (54) (work 1 SC into each CH)

Round 10 :

(8 SC, INC)*6 (60)

Round 11 :

(9 SC, INC)*6 (66)

Round 12 :

(10 SC, INC)*6 (72)

Round 13 :

(11 SC, INC)*6 (78)

Round 14 :

(12 SC, INC)*6 (84)

Round 15-18 :

4 rnds straight : 84 SC

Round 19 :

In this round you want to attach green and blue arms. 6 SC, 3 CH, skip 3 SC, put the green arm, 39 SC, 3 CH, skip 3 SC, blue arm, 33 SC.

Round 20-24 :

5 rnds straight: 84 SC

Round 25 :

In this round place the remaining loose ends of blue and green arms. 3 SC, 3 CH, skip 3 SC, put the blue arm, 39 SC, 3 CH, skip 3 SC, green arm, 36 SC (84). Yellow and red pieces should go between the green and blue pieces inside the toy.

Round 26-29 :

4 rnds straight: 84 SC

Info :

Further on work decreases.

Round 30 :

(DEC, 12 SC)*6 (78)

Round 31 :

(DEC, 11 SC)*6 (72). Stuff the piece.

Round 32 :

(DEC, 10 SC)*6 (66)

Round 33 :

(DEC, 9 SC)*6 (60)

Round 34 :

(DEC, 8 SC)*6 (54)

Round 35 :

(DEC, 7 SC)*6 (48)

Round 36 :

In this round attach the r loose ends of red and yellow arm pieces. DEC, 1 SC, 3 CH, skip 3 SC, put the red arm, 2 SC, DEC, (6 SC, DEC)*2, 1 SC, 3 CH, skip 3 SC, put the yellow arm, 2 SC, (DEC, 6 SC)*2 (42)

Round 37 :

(DEC, 5 SC)*6 (36). Work 1 SC into each CH.

Round 38 :

(DEC, 4 SC)*6 (30)

Info :

Stuff tightly. Shape a nice sphere.

Round 39 :

(DEC, 3 SC)*6 (24)

Round 40 :

(DEC, 2 SC)*6 (18)

Round 41 :

(DEC, 1 SC)*6 (12)

Round 42 :

DEC*6 fasten off.

β€” Eyes (make 2) :

Info :

Begin crocheting in black yarn.

Round 1 :

6 MR (6)

Round 2 :

INC *6 (12)

Round 3 :

(1 SC, INC)*6 (18), SL ST, fasten off.

Info :

Place the eyes between rounds 25 to 29, 4 SC apart. I don’t sew them with black thread, but only secure them on place with white thread. Embroider 3 white stitches on top of the eyes and stitch semicircles at the bottom of each eye.

Info :

Now you need to single crochet round the eyes. Insert your hook into the body and work 15 SC around the eyes. Do 2 rounds.

β€” Embroider mouth :

Info :

Embroider a mouth in black under the left eye between rounds 30 and 32, make 2 stitches.

β€” Embroidery :

Info :

Embroider small spots over the top of the head above the right eye and over the back using red, yellow, green, and blue yarn with cross-stitch. You can add these spots wherever and however you like, the key thing is to make the toy bright and attractive.

β€” Please note :

Info :

Quite tricky is the issue of the filler, which might come out when the arms are pulled. I always test the arms, and push the filler back in with a chopstick, and I simply cut the excess stuffing with scissors.

Info :

For the best effect, you could single crochet round each opening, from where the arms come out (that is, 8 openings). Insert your hook into the corner of the hole on the body and work 3 SC, 2 SC to the corner, 3 SC, 2 SC - round 1 is done. Round 2 - 10 SC, SL ST.

Assembly Instructions

  • Attach the red and yellow arm pieces during Round 8 of the body: Chain 3, skip 3 SC, put the yellow arm and continue the round as instructed, then attach the red arm opposite to it before continuing the round.
  • Attach the green and blue arms in Round 19 by placing them where instructed: 6 SC, 3 CH, skip 3 SC, put the green arm, continue the counts exactly, then place the blue arm as shown so pieces are symmetrical.
  • Place remaining loose ends of blue and green arms in Round 25, follow counts exactly so yellow and red pieces sit between the green and blue inside the toy, then crochet rounds 26-29 to secure.
  • Stuff the body gradually (begin stuffing at Round 31 and more firmly at Round 38), shape a nice sphere, and finish decreases through Round 42 before fastening off.
  • Sew or secure eyes between Rounds 25-29 with white thread and embroider 3 white stitches on top and semicircles at the bottom of each eye, then single crochet two rounds of 15 SC around each eye into the body.
  • Embroider the mouth between Rounds 30-32 under the left eye using black yarn (two stitches), and add cross-stitch colored spots on top/back as desired.
  • After assembly, test each arm by pulling gently; push filler back with a chopstick if it protrudes and trim any excess stuffing for a clean finish.

Important Notes

  • πŸ’‘Work slowly when attaching arms to ensure symmetrical placement and avoid misaligned openings.
  • πŸ’‘Test the arms after assembly and push any protruding stuffing back with a chopstick; trim excess stuffing carefully with scissors.
  • πŸ’‘Single crochet around each opening (two rounds) to secure and tidy the holes where the arms are inserted.

This playful SpaceBall is a tactile, colorful companion that encourages fine motor play and imaginative fun. Whether you gift it or keep it, it brings joy to little hands and brightens any nursery. Crochet one in your favorite color palette and make it uniquely yours. 🧢✨

You ask,

we answer.

FAQs

What size will the finished piece be?

The finished toy's arm size from the recommended materials is about 30 cm; the full toy measures roughly the size of a small soft ball depending on stuffing and yarn tension.

Can I use different yarn weights for this pattern?

Yes, you can use different yarn weights but it will affect the final size; choose an appropriate hook and expect arm length and body size to change accordingly.

Do I need prior crochet experience for this pattern?

This pattern is rated intermediate and assumes familiarity with magic ring, increases, decreases, and single crochet in rounds; basic amigurumi experience is recommended.

How long does this project typically take to complete?

Most crocheters complete this project in 5-7 hours, though time may vary based on experience, finishing, and embroidery detail.

How should I secure the stuffing so it doesn't escape when arms are pulled?

Test arms and push the filler back in with a chopstick as needed, trim excess stuffing, and single crochet two rounds around each opening to secure the edges and prevent stuffing escape.