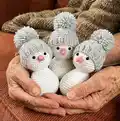
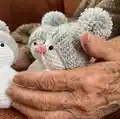
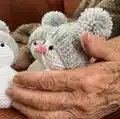
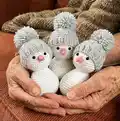
About This Snowman Friends Amigurumi Pattern
This pattern creates sweet little Snowman Friends approximately 5.6 inches (14.22 cm) tall when made with the recommended yarn and hook. You will crochet the head and body in one piece, make a small nose, and knit a textured pom-pom hat. The pattern includes assembly and finishing instructions for eyes, nose placement, and optional embroidered initials. It mixes simple amigurumi shaping with a tiny knitted hat for a charming handmade gift.
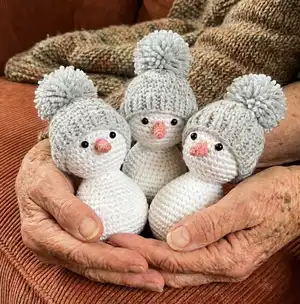
Perfect for using up leftover yarn and adding personalized embroidered initials or buttons. Clear round-by-round crochet instructions are included along with a knitting chart for the hat.
Why You'll Love This Snowman Friends Amigurumi Pattern
I absolutely love this pattern because it combines the simplicity of amigurumi with the cozy detail of a knitted hat that sparkles. I enjoy how quick each snowman is to crochet, yet each one feels unique with simple embroidered initials or a tiny pom-pom. The design is playful and brings out a lot of personality with minimal stitches — perfect for gifting. I also love that you can use different yarns or colors to make a whole family of snowmen with just small adjustments. Sharing these little snowmen always brightens my day and I hope they do the same for you.
Switch Things Up
I love customizing these snowmen by changing hat colors and using variegated yarn for a playful look.
I sometimes swap the knitted hat for a tiny crocheted beanie made from the same yarn to keep everything crochet-only.
I often embroider different initials, faces, or tiny cheek blushes to give each snowman a unique personality.
To make a keychain version, use thinner yarn, a smaller hook, and attach a keyring to the top of the hat.
I like to add tiny accessories like a crocheted scarf, felt mittens, or a little button snowflake for more detail.
If you want larger snowmen, use a bulkier yarn and a larger hook — the stuffing and proportions remain the same.
Try metallic or sparkly yarn held with the main yarn for subtle shimmer on the hat just like the sample.
I also experiment with different eye sizes — smaller beads give a cuter, gentler look while larger eyes are more expressive.
For baby-safe versions, embroider the eyes instead of using safety eyes and use a soft, washable yarn.
I recommend testing a small sample swatch to decide on yarn and hook combinations before making a whole set to ensure you like the scale and texture.
Common Mistakes & How to Fix Them
✗ Skipping a stitch marker will make it hard to track your rounds and shaping; always place a marker at the start of each round to maintain accurate stitch counts.
✗ Forgetting to stuff as you go can lead to uneven shaping and lumps; stuff firmly and gradually, especially at the head-to-body join to maintain shape.
✗ Using a yarn with very different thickness will change the finished size and tension; match the recommended yarn weight and hook size or adjust hook size accordingly for consistent results.
✗ Placing safety eyes too close together changes the face expression and balance; attach safety eyes between rows 8 and 9, spaced 4 stitches apart as instructed to maintain the intended look.