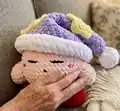
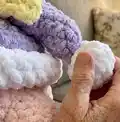
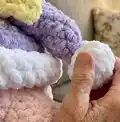
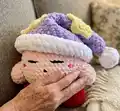
About This Sleeping Pink Puff (Sleeping Kirby) Amigurumi Pattern
This pattern creates a sleepy Kirby-style puff amigurumi complete with a floppy hat, pom pom, and decorative stars or circles. It uses bulky and worsted weight yarn options to achieve a soft, plush texture and compact shape. The pattern is worked in continuous rounds with clear round-by-round instructions for each piece.
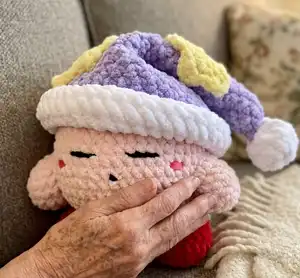
You can easily customize the hat colors, star shapes, or add tiny details to make your Kirby unique. Detailed finishing notes help you position facial features and sew parts securely.
Why You'll Love This Sleeping Pink Puff (Sleeping Kirby) Amigurumi Pattern
I absolutely love this pattern because it turns simple stitches into a lovable character with personality and charm. I enjoyed designing the floppy sleepy hat and the tiny stars which give Kirby a whimsical bedtime look. The pattern is satisfying to make because each small piece quickly becomes recognizable and fun to assemble. I also love how customizable the hat and decorations are — you can make many versions with different colors and details to keep the process fresh and playful.
Switch Things Up
I love how versatile this pattern is for customization; I often change the hat colors to create seasonal or themed Kirbys.
You can make the hat pastel for a soft look, or bright and contrasting for a bolder character — the stars can be swapped for hearts or moons.
To make a smaller keychain version I use a thinner yarn and a 4 mm or smaller hook and reduce some rounds proportionally.
If you want a larger huggable Kirby, try a chunkier blanket yarn and a larger hook; be mindful of stuffing needs as size increases.
I sometimes embroider different eye expressions or add felt cheeks instead of yarn blush for a slightly different face style.
For posability, add thin wire inside the arms before stuffing so they can be bent into different poses.
Try different textures for the hat border — a bobble or puff stitch in worsted weight gives a playful raised edge instead of the folded border.
I like to make matching accessories like a tiny blanket or a mini star plush to go with Kirby as a set of gifts.
Experiment with placement of stars and count stitches so decorations are spaced evenly; pin them first before sewing to get the perfect layout.
When gifting, I personalize color combos or add embroidered initials to the underside of the hat to make each piece truly unique.
Common Mistakes & How to Fix Them
✗ Skipping stitch markers when working in continuous rounds often causes you to lose track of the round start; place a marker at the first stitch of each round and move it up as you work to stay accurate.
✗ Overstuffing the body and head makes the toy lose its soft, flattened puff shape; stuff gradually and check the hat fit as you go to maintain the intended proportions.
✗ Forgetting to change color neatly between the hat base and the white border creates an uneven edge; switch yarns at the end of a round and weave in ends before folding the border to get a raised clean finish.
✗ Sewing arms or feet without pinning first can lead to asymmetrical placement; pin or baste parts in place and try the hat on the head to confirm positioning before sewing permanently.