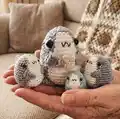
🧢 Beautiful ✨ Detailed πŸ’ Adorable

Sharkito the Polite Shark Amigurumi Pattern

Sharkito the Polite Shark Amigurumi Pattern
4.0β˜… Rating
2-4 Hours Time Needed
3.6K Made This
βœ‚οΈ

Beginner Friendly Level

Perfect for those just starting their crochet journey, with clear instructions and simple techniques

⏱️

Bite-Sized Project

Finishes in 2-4 hoursβ€”perfect for an afternoon of creative relaxation.

🧸

Cute Companion

An adorable friend to cherish, handcrafted with love to bring comfort and joy for years to come.

About This Sharkito the Polite Shark Amigurumi Pattern

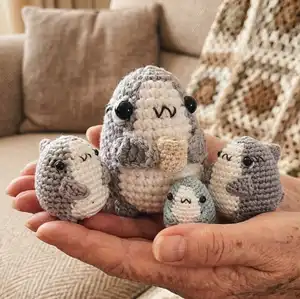
This pattern creates Sharkito, a small, polite shark amigurumi with a white belly and grey body. The pattern includes the head/body rounds, fins, tail, feet, dorsal fin and a tiny cup accessory. Color-coded sections show where to switch yarn colors and small photos guide placement and finishing. It is designed for clear reading and enjoyable stitching.

Sharkito the Polite Shark Amigurumi Pattern crochet pattern - detailed view of completed project

Perfect for making pocket-sized sharks or a slightly larger Sharkito Mama version. Detailed assembly and face-detail guidance help you finish professional-looking pieces.

Why You'll Love This Sharkito the Polite Shark Amigurumi Pattern

I absolutely love this pattern because it combines simple, repeatable rounds with charming finishing details that bring Sharkito to life. I enjoyed designing the little cup and fins so they look like he is politely holding a drink. I love how approachable the shaping is β€” even new crocheters can achieve a cute, rounded amigurumi. I also enjoy seeing how everyone personalizes the face details and colors to make each Sharkito unique.

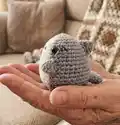
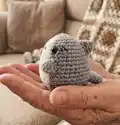
Sharkito the Polite Shark Amigurumi Pattern step 1 - construction progress Sharkito the Polite Shark Amigurumi Pattern step 2 - assembly progress Sharkito the Polite Shark Amigurumi Pattern step 3 - details and accessories Sharkito the Polite Shark Amigurumi Pattern step 4 - final assembly and finishing

Switch Things Up

I love customizing Sharkito by changing the color palette; try pastel greys or blues, or even a vibrant rainbow for a fun twist.

To make Sharkito larger or smaller, I change my yarn weight and hook size β€” bulky yarn with a larger hook gives a cuddly, large version while fine thread with a tiny hook makes a pocket-sized mini.

I often add little accessories like a tiny bow, scarf, or a felt collar to personalize each shark and give them character.

Try different eye sizes or embroidered eyes for a softer, more child-safe toy β€” 3mm safety eyes for mini versions and 8mm for larger ones work well.

Experiment with stitch tension when switching to the white belly to create smoother color transitions; using a slightly smaller hook at the switch helps the edges sit neatly.

I sometimes embroider alternative facial expressions β€” a smile, surprised mouth, or closed eyes β€” to change personality without altering the construction.

For posable limbs, consider adding thin wire to the fins before sewing them in (secure the wire ends well inside the body to keep little hands safe).

Make a family set by changing only hook size and yarn weight: one pattern creates multiple sizes that look great grouped together on a shelf.

If you want a plush bigger friend, use worsted weight yarn and adjust stuffing density to get a softer or firmer finish depending on your preference.

Play with textured stitches on the belly or back for a unique look β€” a row of puff stitches or bobbles can look like playful scales.

Common Mistakes & How to Fix Them

βœ— Placing safety eyes too high or low will affect expression; insert safety eyes between rounds 6 and 7 about two stitches from the white belly for correct placement. βœ— Crocheting too loosely will cause stuffing to show through at color switch edges; use a slightly smaller hook and tighter tension where colors change to keep stitches neat. βœ— Forgetting to leave long tails when instructed makes sewing pieces difficult; always leave a long tail when cutting thread for fins, dorsal fin and tail to simplify attaching. βœ— Not pinning parts before sewing leads to uneven placement; pin dorsal fin, feet and side fins first and check placement before stitching to ensure symmetry.

Sharkito the Polite Shark Amigurumi Pattern

Make a lovable Sharkito with this friendly, color-coded amigurumi pattern. You will enjoy clear step-by-step rounds, small accessory patterns (cup, fins, tail) and helpful assembly notes. Perfect for gifting or creating a tiny shark family, this pattern guides you from first stitch to finishing touches. Grab your yarn and enjoy a relaxing crochet session!

Beginner Friendly 2-4 Hours

Materials Needed for Sharkito the Polite Shark Amigurumi Pattern

β€” Main Fabric

  • 01
    Monaco Mercerized Cotton Thread (Monaco Mercerized Cotton 8) for Mini Sharkito, color as desired
  • 02
    4-ply Medium Worsted Weight Acrylic Yarn for Sharkito Mama, colors: grey and white
  • 03
    White felt for eye details (Sharkito Mama)
  • 04
    Small amounts of ecru or tan yarn for cup accessory (or equivalent)

β€” Tools Required

  • 01
    Crochet hook size 1.10mm (for Mini Sharkito)
  • 02
    Crochet hook size 2.25mm (for Sharkito Mama)
  • 03
    Safety eyes 3mm (2 pieces) for Mini Sharkito
  • 04
    Safety eyes 8mm (2 pieces) for Sharkito Mama
  • 05
    Tapestry/sewing needle
  • 06
    Stitch marker
  • 07
    Embroidery/sewing threads in black
  • 08
    Toy stuffing (polyfill)
  • 09
    Scissors
  • 10
    Glue

Progress Tracker

0% Complete

β€” Head/Body :

Round 1 :

6sc in MR (6)

Round 2 :

inc x6 (12)

Round 3 :

(inc, 2sc) x2, inc, 2sc, inc, 2sc (16)

Round 4 :

(inc, 3sc) x2, sc, sc in same st, 4sc, sc in same st, 3sc (20)

Round 5 :

3sc, inc, 4sc, inc, 2sc, 2sc, inc, 2sc, 2sc, inc, sc (24)

Round 6 :

sc, (inc, 5sc) x2, sc, sc in same st, 6sc, sc in same st, 4sc (28)

Round 7 :

16sc, 7sc, 5sc (28)

Round 8 :

2sc, (inc, 6sc) x2, inc, 6sc, inc, 4sc (32)

Round 9 :

2sc, (inc, 7sc) x2, sc, sc in same st, 8sc, sc in same st, 5sc (36)

Round 10 :

21sc, 9sc 6sc (36)

Round 11 :

inc, 12sc, inc, 7sc, 9sc, 6sc (38)

Round 12 :

8sc, inc, 9sc, inc, 4sc, 4sc, inc, 4sc, 5sc, inc (42)

Round 13 :

25sc, 10sc, 7sc (42)

Round 14 :

inc, 19sc, inc, 4sc, 10sc, 7sc (44)

Info :

Insert the eyes between rounds 6 & 7 around 2 stitches from the white belly.

Round 15 :

27sc, 10sc 7sc (44)

Round 16 :

dec, 19sc, dec, 4sc, 10sc, 7sc (42)

Round 17 :

(dec, 5sc) x3, dec, 2sc, 3sc, dec, 5sc, dec, 5sc (36) cut off white yarn.

Round 18 :

(dec, 4sc) x6 (30)

Round 19 :

(dec, 3sc) x6 (24)

Round 20 :

(dec, 2sc) x6 (18) Stuff amigurumi well.

Round 21 :

(dec, sc) x6 (12)

Round 22 :

(dec) x6 (6) Finish off and sew close.

β€” Dorsal fin :

Info :

Make in grey. The belly may look rough around the edges but they will be covered by the fins.

Round 1 :

4sc in MR (4)

Round 2 :

(inc, sc) x2 (6)

Round 3 :

(inc, 2sc) x2 (8)

Round 4 :

(inc, 3sc) x2 (10)

Round 5 :

(inc, 4sc) x2 (12)

Info :

Cut thread leave long tail for sewing.

β€” Fins :

Info :

Make 2 in grey. Leave long tail before you start your chain.

Instruction :

Ch 7, sk 2nd ch from hook, hdc, dc, dc, tc, tc

Info :

Cut thread leave long tail for sewing.

β€” Feet :

Info :

Make 2 in grey.

Round 1 :

8sc in MR (8)

Info :

Cut thread leave long tail for sewing.

β€” Tail :

Info :

Make in grey. 1st piece:

Round 1 :

ch2, 4sc in 2nd ch from hook (4)

Round 2 :

(inc, sc) x2 (6)

Info :

Cut thread and fasten off, then start on the 2nd piece.

Info :

2nd piece:

Round 1 :

ch2, 4sc in 2nd ch from hook (4)

Info :

You will now have 2 pieces of the tail. Join the 2nd piece that's on the hook to the 1st piece we made by crocheting the next round with the combined pieces [img A] [Watch video demo: Joining the tail]

Joined round :

(inc, 2sc) x2, to the 1st piece, (inc, sc) x2, to the 2nd piece (14) [img B]

Info :

Cut thread and leave long tail for sewing. Do not stuff tail.

β€” Bonus: Cup of green tea :

Info :

Sharkito Mama always holds a cup of green tea. Start in ecru or tan yarn.

Round 1 :

6sc in MR (6)

Round 2 :

inc x6 (12)

Round 3 :

BLO sc around (12)

Round 4-6 :

sc around [3 rounds] (12)

Info :

Stuff cup with polyfill

Round 5 :

s2green BLO sc around (12)

Round 6 :

dec x6 (6)

Info :

Cut green yarn and sew hole shut, insert needle through the center of the tea and exit through the center MR on the other side. Pull down yarn tail hard. With the yarn used for the cup, cut long tail to sew on to the belly later.

β€” Assembly :

Info :

Note: Pin the parts before sewing to see if you're happy with the placement.

Step 1 :

Sew the fins slightly slanted facing the belly laying flat on Rounds 9-11. If you will be letting them hold the cup of tea. Sew on the cup to the belly first and then attach the fins to the cup to let him hold it.

Step 2 :

Pin the dorsal fin at the back of the shark's body (between rounds 5 & 9) then sew it in place straight. Attach the tail at the back of the base of the body where it starts to curve. The larger tail fin is above the lower tail fin. [Watch video demo: Sewing dorsal fin]

Step 3 :

Sew the feet on the junction of the shark's belly where the grey and white yarns switches on Round 17. [Watch video demo: Sewing feet]

Info :

4. Face details: Embroider a "w" mouth on the belly part on Round 6. It should be in line with the eyes and have 2 white stitches on either side. With black yarn, embroider the gills beside the eyes on round 7 by making 2 slanting lines. (Optional) Embroider the eye details with white yarn/felt. [Watch video demo: Face details]

Assembly Instructions

  • Sew the fins slightly slanted facing the belly laying flat on Rounds 9-11; sew the cup to the belly first if you plan to have Sharkito hold the cup, then attach the fins to the cup so the fins can hold it.
  • Pin and sew the dorsal fin at the back of the body between rounds 5 and 9, sewing it straight in place; attach the tail at the back base where the body starts to curve, placing the larger tail fin above the lower tail fin.
  • Sew the feet at the junction of the grey and white yarn on Round 17, spacing them evenly and checking symmetry with pins before stitching.
  • Embroider facial details after assembly: embroider a small "w" mouth centered on Round 6 and add two small white stitches on either side; embroider two slanting gill lines beside each eye on Round 7 with black yarn.

Important Notes

  • πŸ’‘Use stitch markers to keep track of the start of each round since this pattern is worked in continuous rounds.
  • πŸ’‘Use a slightly smaller hook than recommended and crochet tightly where color switches occur to keep the belly edge neat.
  • πŸ’‘Leave long yarn tails where instructed (fins, dorsal fin, tail, cup) to make sewing pieces in place much easier.
  • πŸ’‘Pin parts in position before sewing to confirm placement and symmetry for the fins, dorsal fin, feet and tail.

This charming Sharkito pattern is a joy to stitch and makes a delightful handmade gift for friends and family. Create a mini shark family or a larger Sharkito Mama using the same instructions with different yarn and hook sizes. Have fun personalizing faces, colors, and tiny accessories to make each shark unique. 🧢🐟😊

You ask,

we answer.

FAQs

What size will the finished piece be?

Using a 1.10mm hook with Monaco Mercerized Cotton 8 the mini Sharkito measures about 3.5 cm tall; using a 2.25mm hook with worsted acrylic yarn Sharkito Mama measures about 7 cm tall.

Can I change yarn weight or hook size?

Yes, changing yarn weight and hook size will change the finished size; if you use thicker yarn and a larger hook you will get a larger, squishier shark, and a thinner yarn will give a smaller shark.

Are these instructions suitable for beginners?

Yes, the pattern is rated beginner friendly and uses basic stitches like sc, inc and dec; familiarity with continuous rounds and the magic ring is recommended for best results.

Where should I place the safety eyes?

Insert the safety eyes between rounds 6 and 7, positioned about two stitches from the edge of the white belly to achieve the look shown in the photos.

Do I need to stuff the tail?

No, the pattern instructs not to stuff the tail; leave the tail unstuffed and sew it in place using the long tail left for sewing.