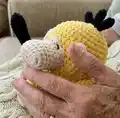
About This Psyduck Baby Amigurumi Pattern
This pattern creates a small, plush Psyduck baby amigurumi worked mostly in single crochet rounds using three colour sections. The design includes instructions for a combined body and head, wings, beak and hair strands, plus detailing tips for the feet and face. It uses chunky/chenille-style yarn for a soft, squishy texture and quick results.
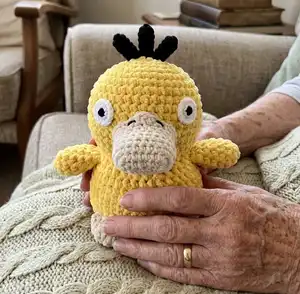
The pattern is written round-by-round with placement notes for safety eyes and sewing guidance for assembly. It is perfect for crafters who enjoy quick, tactile projects with cute finishing details.
Why You'll Love This Psyduck Baby Amigurumi Pattern
I absolutely love this pattern because it captures Psyduck's quirky charm in a compact, huggable package. I enjoy how the plush chenille texture makes each piece irresistibly soft and quick to work up. I love the simple shaping that still gives the doll a distinct personality and chubby silhouette. I also appreciate the small finishing touches—like the flat beak and three hair strands—that make the character expressive and fun to customize.
Switch Things Up
I love how easy it is to customize this Psyduck Baby pattern by changing colors; try pastel yellow for a softer look or bright neon for a playful version.
I often experiment with different yarn textures — using a slightly thinner yarn and smaller hook will give you a smaller, more detailed Psyduck.
If I want a sturdier toy, I use polyester fiberfill tightly stuffed in the body and a bit looser in the head for a cute contrast.
I like swapping the safety eyes for embroidered eyes or glued felt pieces for a child-safe alternative.
To change the expression, I adjust the placement of the beak and the embroidered nose — moving them slightly up or down changes his personality.
I sometimes attach small accessories like a crocheted bow or tiny hat to personalize each Psyduck as a gift.
For a keychain version, I make a miniature size by using a finer yarn and hook and leave off stuffing or use minimal stuffing.
I like to play with wing placement — sewing them diagonally gives a more dynamic pose compared to horizontal placement.
If you want a more detailed finish, I add a tiny embroidered belly or lines on the feet to suggest toes.
Finally, I recommend trying different eye styles and bead sizes to change the overall look from cute to quirky; have fun and let your creativity lead the way.
Common Mistakes & How to Fix Them
✗ Skipping the foundation chain details can make the piece lopsided; follow the exact chain counts and work into the specified side of the foundation chain to maintain the correct shape.
✗ Forgetting to switch colors at the indicated round will cause visible color lines; change to Color B exactly at Rnd 4 as noted to keep the feet and body colors aligned.
✗ Not stuffing the body and head at the recommended stages leads to incorrect shaping; start stuffing the body at Rnd 12 and the head at Rnd 18 to achieve the intended chubby form.
✗ Stuffing the wings will flatten their shape and make sewing difficult; do not stuff the wings and leave the opening unclosed so they sew flat to the body as instructed.