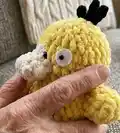
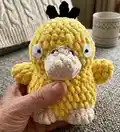
🧢 Beautiful ✨ Detailed πŸ’ Adorable

Psyduck-Baby Amigurumi Pattern

Psyduck-Baby Amigurumi Pattern
4.5β˜… Rating
5-7 Hours Time Needed
3.2K Made This
βœ‚οΈ

Intermediate Level

Ideal for those with basic crochet experience, featuring slightly more advanced stitches and techniques to expand your skills.

⏱️

Weekend Treat

Takes 5-7 hours, making it an enjoyable project to finish over a couple of days.

🧸

Cute Companion

An adorable friend to cherish, handcrafted with love to bring comfort and joy for years to come.

About This Psyduck-Baby Amigurumi Pattern

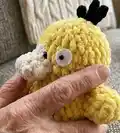
This pattern creates a plush Psyduck-Baby amigurumi using chunky plush yarn for a soft, squishy finish. You will crochet the body and head as one piece, plus wings, beak, tail and small hair strands for character. Simple shaping techniques and clear round-by-round instructions make assembly straightforward for intermediate crocheters.
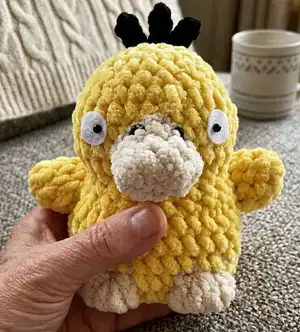
Psyduck-Baby Amigurumi Pattern crochet pattern - detailed view of completed project

Includes stitch abbreviations, materials list, and step-by-step photos to guide you through finishing and detailing. Perfect as a unique handmade gift or a charming addition to your amigurumi collection.

Why You'll Love This Psyduck-Baby Amigurumi Pattern

I absolutely love this pattern because it turns basic stitches into a charming, expressive Psyduck-Baby with minimal fuss. I enjoy how the plush yarn gives such a tactile, huggable finish that appeals to both kids and adults. The pattern is compact but full of personality, letting me add little details like the beak and hair for lots of character. Making this was a joy β€” it is forgiving, quick to finish, and perfect for gifting or decorating.

Psyduck-Baby Amigurumi Pattern step 1 - construction progress Psyduck-Baby Amigurumi Pattern step 2 - assembly progress Psyduck-Baby Amigurumi Pattern step 3 - details and accessories Psyduck-Baby Amigurumi Pattern step 4 - final assembly and finishing

Switch Things Up

I love customizing this Psyduck-Baby by changing yarn colors β€” try pastel shades for a softer nursery-friendly version or neon for a playful twist.

You can make the toy bigger or smaller simply by swapping yarn weight and hook size; bulky yarn and a larger hook gives a chunky friend while light yarn shrinks the pattern into a keychain-sized mini.

I often add tiny crocheted accessories like a scarf or a tiny hat to give each Psyduck its own personality and seasonal flair.

Try embroidered expressions instead of safety eyes for a fully washable toy β€” experimenting with eye placement will change the character's mood.

Switch the wing placement (horizontal vs diagonal) to create different poses and expressions; diagonal wings give a more whimsical, surprised look.

Use felt or small beads for eye details if you prefer glued-on features for display-only toys; always supervise children if beads are used.

Combine textures β€” use a different yarn for the beak or feet to create subtle contrast and tactile interest.

Give your Psyduck a little companion by making multiple sizes using the same pattern with varied yarn weights.

Personalize with initials or tiny embroidered motifs on the back or feet to turn the toy into a memorable gift.

I sometimes add a small loop at the top to turn the Psyduck into an ornament or bag charm for a practical and cute variation.

Common Mistakes & How to Fix Them

βœ— Skipping the stitch counts during increases and decreases leads to uneven shaping; count stitches at the end of each round and use markers to track repeat locations. βœ— Forgetting to switch color at the correct round causes mismatched feet/beak details; follow the Note and change to Color B exactly as indicated in Rnd 4. βœ— Overstuffing the head or body will distort the shape and make sewing parts harder; stuff gradually, shape as you go, and stop when the piece is firm but still slightly pliable. βœ— Not placing safety eyes at the right rounds makes the face look off-center; insert safety eyes between rnd 15 and 16 spaced about 5-6 stitches apart for the correct expression.
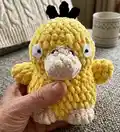
Psyduck-Baby Amigurumi Pattern

Make a cuddly Psyduck-Baby amigurumi with this cheerful crochet pattern. You will create a plush, squishy duck with clear step-by-step rounds, photos, and finishing notes so you can assemble and detail with confidence. This pattern is perfect for those who enjoy making small toys and personalized gifts. Grab your plush yarn and hooks and create a charming pocket-sized Psyduck-Baby.

Intermediate 5-7 Hours

Materials Needed for Psyduck-Baby Amigurumi Pattern

β€” Main Fabric

  • 01
    Plush yarn - Color A: yellow (body) - amount: small skein (sample used Premier yarn)
  • 02
    Plush yarn - Color B: beige (feet/beak) - small amount for feet and beak
  • 03
    Plush yarn - Color C: black (detailing/hair) - small amount for hair and detailing
  • 04
    Premier plush yarn (sample brand noted)

β€” Tools Required

  • 01
    Crochet hook size 4.5mm
  • 02
    10-12mm safety eyes
  • 03
    Polyfill stuffing
  • 04
    Embroider needle
  • 05
    Stitch markers
  • 06
    Scissors
  • 07
    Darning/embroidery needle for detailing
  • 08
    Optional: Felt fabric (white)
  • 09
    Optional: Black bead (for eyes)
  • 10
    Optional: Superglue (to glue bead)

Progress Tracker

0% Complete

β€” Body and Head (make 1) :

rnd 1 :

foundation chain: ch 10; starting in the 2nd loop from hook: 8 sc, 3 sc in the last chain, (on the other side of foundation chain) 7 sc, inc [20]

rnd 2 :

inc, 7 sc, 3 inc, 7 sc, 2 inc [26]

rnd 3 :

sc, inc, 7 sc, (sc, inc) x3, 7 sc, (sc, inc) x2 [32]

Info :

Note: switch to Color B as indicated in Rnd 4. See "Detailing" on how to finish Psyduck feet (next to last page).

rnd 4 :

2 sc, (sc + hdc) in 1 stitch, hdc-inc, (hdc, sc) in 1 stitch, 3 sc, (sc + hdc) in 1 stitch, hdc-inc, (hdc + sc) in 1 stitch, 21 sc [38]

rnd 5 :

2 sc, 3 dec, 3 sc, 3 dec, 21 sc [32]

rnd 6-8 :

sc all around for 3 rounds [32]

rnd 9 :

3 dec, 3 sc, 3 dec, 17 sc [26]

Info :

Continue to next page...

β€” Body and Head - cont. :

rnd 10 :

(11 sc, dec) x2 [24]

rnd 11 :

(4 sc, dec) x4 [20]

rnd 12 :

(sc, inc) x10 [30]

Info :

Start stuffing the Body. Make sure to shape our Psyduck so that he is chubby.

rnd 13-16 :

sc all around for 4 rounds [30]

Info :

Insert the safety eyes between rnd 15 and 16, about 5-6 stitches apart. Alternatively, you can also glue white felt + black beads. See Figure 5.

rnd 17 :

sc, 3 dec, 4 sc, 3 dec, 13 sc [24]

rnd 18 :

sc all around for 1 round [24]

Info :

Start stuffing the Head.

rnd 19 :

(2 sc, dec) x6 [18]

rnd 20 :

(sc, dec) x6 [12]

Info :

Finish stuffing the Head.

rnd 21 :

dec x6 [6]

Info :

Fasten off and leave a yarn tail to close the opening.

β€” Wings (make 2) :

rnd 1 :

6 sc in Magic Circle [6]

rnd 2 :

(sc, inc) x3 [9]

rnd 3-4 :

sc all around for 2 rounds [9]

Info :

Fasten off and leave a yarn tail for sewing the Wings to the Body. Do not close the opening. Do not stuff the Wings. Sew the Wings to the Body between rnd 9 and 11, about 7-8 stitches apart. You can choose to sew the Wings horizontally or diagonally. I did diagonally. Optional: you can sew the Wings to the Head for Psyduck's *confused* look.

β€” Beak (make 1) :

rnd 1 :

foundation chain: ch 4; starting in the 2nd loop from hook: 2 sc, 3 sc in the last chain, (on the other side of foundation chain) sc, inc [8]

rnd 2 :

sc all around for 1 round [8]

rnd 3 :

sc, (3 sc in 1 stitch) x2, 5 sc [12]

Info :

Fasten off. Leave a yarn tail for sewing. Do not stuff the Beak. Fold the Beak flat at the front (rnd 1) to create a flat front. Fold the opening to create a triangle. See Figure 10. Sew to the Head between rnd 12 and 15. Use black yarn to embroider his nose detail. See Figure 11.

β€” Tail (make 1) :

rnd 1 :

6 sc in Magic Circle [6]

rnd 2 :

(sc, inc) x3 [9]

rnd 3 :

(2 sc, inc) x3 [12]

rnd 4 :

(3 sc, inc) x3 [15]

Info :

Fasten off and leave a yarn tail for sewing. Do not stuff the Tail. Fold the Tail flat and sew the Tail to the back of the Body between rnd 5 and 7.

β€” Hair (3 strands) :

Info :

To make his hair, in Color C, insert the hook at the middle of his Head: [chain 4, (starting from the 2nd chain from hook) 3 sc, slst into the same hole on the head] x3 strands

β€” Detailing :

Info :

Use a darning needle and Color B, sew flat the Feet so they resemble his flat duck feet. (See photos for placement and shaping.)

Assembly Instructions

  • Insert the safety eyes between rnd 15 and 16, spacing them about 5-6 stitches apart or glue white felt + black bead as an alternative.
  • Sew the Wings to the Body between rnd 9 and 11, spacing the two wings about 7-8 stitches apart; choose horizontal or diagonal placement for different expressions.
  • Fold the Beak flat and sew it to the Head between rnd 12 and 15; leave a long yarn tail when fastening off to secure it neatly and embroider the nose with black yarn.
  • Fold and sew the Tail to the back of the Body between rnd 5 and 7, aligning the base so the tail sits centered on the lower back.
  • Sew the Feet to the lower front of the Body and use Color B to flatten them so they resemble duck feet; pin parts before sewing to ensure correct positioning.

Important Notes

  • πŸ’‘Switch to Color B exactly as indicated in Rnd 4 for feet and beak detailing to maintain accurate color placement.
  • πŸ’‘Start stuffing the Body at Rnd 12 and shape gradually so the Psyduck remains chubby and even in profile.
  • πŸ’‘Insert safety eyes before closing the head; place them between rnd 15 and 16 about 5-6 stitches apart for best expression.
  • πŸ’‘Fasten off and leave yarn tails for sewing and closing openings; weave ends securely to avoid loosening.

This adorable Psyduck-Baby pattern is designed to make a soft, huggable amigurumi perfect for gifting and display. It uses plush yarn for a squishy texture and simple shaping to create an expressive, chubby duck. Make one in bright yellow for a cheerful handmade friend! 🧢πŸ₯

You ask,

we answer.

FAQs

What size will the finished piece be?

The finished Psyduck-Baby measures approximately 12-15 cm tall depending on your tension and the exact plush yarn used.

Can I use different yarn weights for this pattern?

Yes, you can use different yarn weights, but the final size and texture will change; choose an appropriate hook for your yarn and expect a different finished height.

Do I need prior crochet experience for this pattern?

This pattern is rated intermediate so basic knowledge of single crochet, increases and decreases, and reading rounds is recommended for best results.

How long does this project typically take to complete?

Most crocheters finish this Psyduck-Baby in 5-7 hours, depending on experience and the speed of stitching.