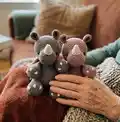
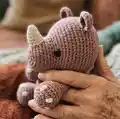
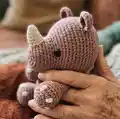
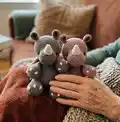
About This Pino Amigurumi Pattern
This pattern teaches you how to crochet Pino, a sweet little rhino amigurumi with removable details and embroidered features. It includes complete round-by-round instructions for each piece—legs, arms, body, head, ears, horn and nails. The instructions use US terminology and continuous rounds for a seamless finish. You will also find helpful assembly photos to guide placement and finishing.
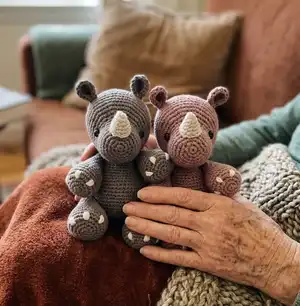
Designed to be made with cotton yarn and a 2.5 mm hook for a firm, neat fabric. The final toy measures approximately 16 cm / 6.3 inches when using the recommended yarn and hook.
Why You'll Love This Pino Amigurumi Pattern
I absolutely love this pattern because it combines simple amigurumi techniques with charming details that give Pino personality. I enjoy how the continuous rounds produce a smooth body shape that is easy to assemble. I also love the small finishing touches like embroidered nails and a tiny horn, which make the rhino feel handcrafted and special. Working on this project feels relaxing and rewarding, and I find it makes a perfect gift that shows real thought and care.
Switch Things Up
I love how easy it is to customize Pino by changing colors; try soft pastels for a baby shower gift or bold shades for a playful look.
I sometimes make a tiny keyring version by using thinner yarn and a 1.75mm hook to create a pocket-sized Pino.
I often swap the safety eyes for embroidered eyes for a fully child-safe baby toy, using white cotton and black embroidery thread for details.
To vary the size, change yarn weight and hook size: bulky yarn and a larger hook gives a chunky cuddly Pino, while thinner yarn makes a delicate mini version.
I add little accessories like crocheted scarves, tiny bows, or a miniature blanket to personalize each Pino for the recipient.
Try embroidering freckles, different eyebrow shapes, or a smile to change his expression and personality.
I recommend experimenting with textured stitches for the body if you want a more tactile surface—seed stitch or alternating BLO rows work nicely.
For a poseable version, I add floral wire inside the limbs before stuffing so the arms and legs can be adjusted slightly.
I sometimes combine two yarns held together for a marled effect—this creates a unique color and a slightly sturdier fabric.
When gifting, I like to tuck a small, embroidered name tag into the neck seam to make each Pino feel truly custom and special.
Common Mistakes & How to Fix Them
✗ Skipping the stitch marker when working continuous rounds can make placement incorrect; place and move a marker at the start of each round to keep alignment consistent.
✗ Stuffing too tightly creates a rigid shape and can distort stitches; stuff gradually and evenly, focusing on shaping rather than overfilling to maintain soft curves.
✗ Forgetting to mark joint positions before folding openings will result in lopsided joins; use pins and compare both sides to ensure symmetry before sewing.
✗ Not checking stitch counts after increases and decreases leads to uneven shaping; count your stitches after each round especially during shaping rounds and correct mistakes immediately.
✗ Closing openings without aligning round joints can misplace limbs and seams; fold edges together so the joints are parallel and adjust stitch numbers if necessary.