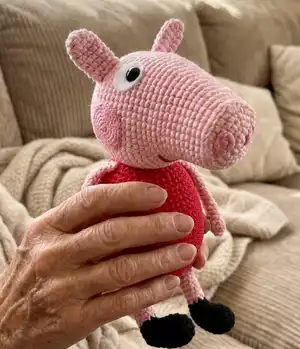
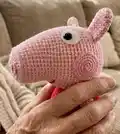
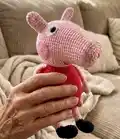
Make your very own Peppa Pig amigurumi with this detailed crochet pattern. You will love how the clear step-by-step rounds and helpful photos guide you through making the head, body, limbs, and cute details. The design captures the character style and is great for gifting or display. Follow the full instructions and tips to create a polished finished toy.
Progress Tracker
0% Complete
— Head :
Round 6 :
BLO sc in each st around (30)
Round 7-10 :
(4 rows) sc each st around (30)
Round 11 :
14 sc, inc (32)
Round 12-13 :
(2 rows) sc in each st around (32)
Round 15 :
15 sc, 6 hdc-inc, 15 sc (42)
Round 16 :
sc in each st around (42)
Round 17 :
15 sc [sc,inc] 6 times 15 sc (48)
Round 18 :
sc in each st around (48)
Round 19 :
15 sc [2 sc, inc] 6 times,15 sc (54)
Round 20-30 :
(11 rows) sc in each st around (54)
Info :
Attach safety eyes between row 22 and 23, 8 stitches apart.
Info :
Close the opening and weave in the end.
Info :
Stuffing the head, add more stuffing as you go
— Ear :
Item Name (P1) :
Ear (make 2)
Round 3-8 :
(6 rows) sc in each st around (10) DO NOT stuffing
Info :
Cut the yarn leaving a tail to sew.
— Nostrils :
Item Name (P1) :
Nostrils (make 2)
Info :
Cut the yarn leaving a tail to sew
— Cheek :
Info :
Make 2 (I used crochet hook 2,5mm and 2 ply yarn for cheeks and nostrils). You can use the yarn and hook of your preference increasing until your desired size.
Round 4 :
1 sc, inc [2 sc, inc] rep 5 x, 1 sc (24)
Round 6 :
2 sc, inc [4 sc, inc] rep 5 x , 2 sc (36)
— Arm :
Item Name (P1) :
Arm (Make 2)
Round 2-4 :
(3 rows) sc in each st around (5)
Info :
Make 3 pieces - DO NOT cut the yarn on the third piece (picture 1).
Round 5 :
When you finish the 3rd piece, insert your hook on the first stitch of the last row of the second piece, then join the second piece to the third (picture 2).
Round 6 :
Make 2 sc (picture 3)
Round 7 :
Join the first piece: make 5 sc (picture 4)
Round 8 :
Make 3 sc on the other side of the second piece (picture 5)
Round 9 :
Make 5 sc on the third piece. (15) (picture 6)
Round 12-17 :
(10 rows) sc each in st around (5)
Info :
Fasten off leaving a long tail to sew.
Info :
Do not stuff the arms or hands. Leave them as they are stitched. See picture on the left.
— Body :
Info :
(Size up your crochet hook 0,25 if you want, with red yarn)
Round 4 :
1 sc, inc [2 sc, inc] 5 x, 1 sc (24)
Round 6 :
2 sc, inc [4 sc, inc] 5 x, 2 sc (36)
Round 8 :
3 sc, inc [6 sc, inc] 5 x, 3 sc (48)
Round 10 :
4 sc, inc [8 sc, inc] 5x, 4 sc (60)
Round 11 :
BLO sc in each stitch around (60)
Round 12-21 :
(10 rows) sc in each stitch around (60)
Round 23 :
sc in each stitch around (54)
Round 25 :
sc in each stitch around (48)
Round 27 :
sc in each stitch around (42)
Round 29 :
sc in each stitch around (36)
Round 31 :
sc each stitch around (30 sc)
Info :
Stuffing the body firmly. Cut the yarn, leaving a long tail to sew body to the head.
— Foot :
Info :
Foot: (make 2, black yarn)
Round 3-6 :
(4 rows) sc in each stitch around (12)
Round 8 :
sc each stitch around (9)
Round 10 :
sc each stitch around (6)
Info :
Stuffing the foot. Fasten off, leaving a tail to sew the foot to the leg.
— Leg :
Info :
Leg (make 2, pink yarn)
Round 2-12 :
(11 rows) sc in each stitch around (6)
Info :
Add toy stuffing as you go
Info :
Fasten off, leaving a long tail to sew the leg to the body.
— Tail :
Round 2 :
From the second stitch from the hook, 3 sc in each chain stitch.
Info :
Fasten off, leaving a long tail to sew.
— Eyes :
Info :
Cut 2 circles of white felt or you can make 16 double crochet MR using white yarn. Black yarn: 6 sc in a MR or safety eyes 12mm.
— Final size :
Info :
The finished size will vary according to the weight of yarn you use and the size of the crochet hook. On this toy, I used a DK yarn, 100% cotton, and 3.5 mm main crochet hook and 3,75 mm for the body. For the cheeks and the nostrils, I used fingering yarn and 2.5 mm crochet hook. The final size 30 cm tall.
— Assembly :
Step 1 :
Sew the ears to the head: I placed the ears at the row 28 and 29, 7 stitches apart
Step 2 :
Glue the eyes on the piece of felt. Attach safety eyes between row 22 and 23, 8 sts apart
Step 3 :
Glue or sew the the checks on the face bellow eyes
Step 4 :
Glue or sew the nostrils on the snout
Step 5 :
Embroider the mouth between rows 15 and 16
Step 6 :
Sew the body to the head
Step 7 :
Sew the arms on the sides between rows 29 and 30
Step 8 :
Sew the feet on the leg
Step 9 :
Sew the legs on the body positioning them between rows 6 and 7, 7 stitches apart
Step 10 :
Sew the tail over row 11, at the centre back of the body.
This Peppa Pig amigurumi pattern is designed to bring a smile to your crafting time and the finished toy will be a delightful handmade keepsake. Follow the clear round-by-round instructions to shape the head, snout, body and details with confidence. Perfect as a gift or display piece — enjoy the stitching and make it your own! 🧶🧸