About This Ninja Turtle Amigurumi Pattern
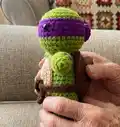
This pattern guides you through making a plush Ninja Turtle amigurumi with full step-by-step rounds for head, body, arms, legs, shell and accessories. It uses blanket chenille yarn for a soft, squishy finish and shows where to place safety eyes and color changes. You can customize mask colors to create all four turtles and sew the pieces together for a polished look.
Includes materials list, abbreviations, and assembly instructions with helpful tips for sewing and stuffing. Suitable for crocheters who know basic amigurumi techniques and want a fun, slightly detailed project.
Why You'll Love This Ninja Turtle Amigurumi Pattern
I absolutely love this pattern because it combines a simple amigurumi structure with cute, customizable details that make each turtle unique. I enjoy the soft texture from the blanket chenille yarn and how forgiving it is when stuffing and sewing. The color-change mask rounds let me get creative and build a whole set of characters with minimal extra work. I also love that the pattern includes clear assembly instructions so the finished toy looks neat and professional. Making a set is so satisfying — each turtle has personality and charm.
Switch Things Up
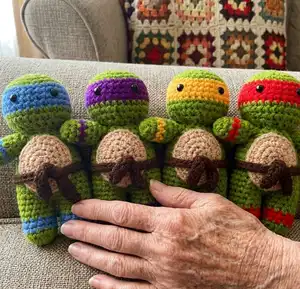
I love to change the mask colours to make a full set of turtles; try classic red, blue, purple and orange or mix your own vibrant palette.
You can change the size by swapping yarn weight and hook size; a thicker yarn with a larger hook creates a chunkier toy while a thinner yarn makes a mini version.
I often add embroidered mouths or freckles to give each turtle a different expression and personality.
Try attaching a small loop and key ring to make a turtle keychain for a portable tiny treasure.
Use felt or safety eyes of different sizes for varied expressions and to match the scale if you change yarn weight.
For a posable version, consider adding thin wire inside the arms and legs before stuffing to allow movement.
Customize the shell by stitching surface details or using a different stitch for texture, like a puff or bobble stitch, to create a unique shell pattern.
I sometimes make the belly a contrasting pastel for a softer look or use variegated yarn for fun stripes on the mask or limbs.
Swap the waist strap for a tiny crocheted accessory like a sash or badge to give each turtle a themed outfit or name tag.
When gifting, I add a small crocheted accessory like a tiny pizza slice or mask-shaped tag to match the Ninja Turtle theme.
Common Mistakes & How to Fix Them
✗ Skipping stitch markers during rounds can make increases and decreases hard to track; use a marker at the start of every round to stay on track.
✗ Forgetting to stuff as you go can create lumps and uneven shaping; stuff gradually after shaping rounds to maintain a smooth silhouette.
✗ Changing colour without securing ends can cause loose tails; carry the yarn neatly or weave in ends as you change colours for a clean finish.
✗ Closing off pieces too tightly will distort joins when sewing; leave tails for sewing and use mattress or whipstitch to attach parts smoothly.
✗ Not placing safety eyes at the correct rounds will affect facial proportions; follow the recommended rounds and spacing to position eyes correctly.