About This Minimals Rabbit Amigurumi Pattern
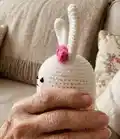
This pattern guides you through crocheting a tiny, minimalist rabbit with a ruffled skirt and a bow. It uses worsted/fingering weight yarn on a 3mm hook and includes detailed round-by-round instructions. Photos and symbol charts help you place eyes, nose and accessories accurately.
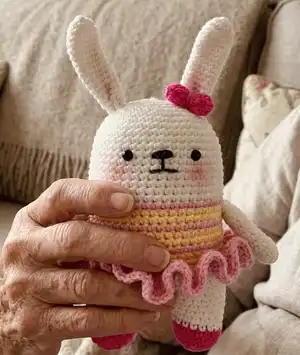
Worked in continuous rounds, the doll is constructed from head through body and legs with separate pieces for ears, arms, ribbon and skirt. Clear assembly notes and placement diagrams make finishing simple.
Why You'll Love This Minimals Rabbit Amigurumi Pattern
I absolutely love this pattern because it turns simple stitches into a charming, personality-filled companion. I enjoy the playful skirt detail — it adds movement and character with only a couple of extra rounds. The construction is thoughtful: head, body and legs are worked continuously for a smooth finish and easy stuffing. I also appreciate how the photo guides show exact placement for the face and accessories, which makes finishing relaxing and accurate.
Switch Things Up
I love making variations of this rabbit by changing color palettes; try mint with coral accents for a fresh look or neutral tones for a modern aesthetic.
I sometimes swap the yarn weight and hook size to create different sizes — using DK yarn and a 3.5mm hook gives a slightly larger rabbit, while fingering yarn on 2.5mm makes a tiny keychain.
I often add embroidered eyelashes or tiny freckles to change the face personality; small changes to eye spacing or mouth shape make the expression unique.
You can make the skirt longer or shorter by adding or removing the dc rounds; a longer skirt creates a more delicate silhouette while a short ruffle is playful.
Try substituting the plastic eyes for embroidered eyes if the amigurumi is for a baby or small child to make it safer.
I sometimes attach tiny accessories like a crocheted flower or a mini scarf to match seasons or gift recipients.
For a posable version, I add thin wire inside the limbs before finishing; this lets me pose the arms while keeping the appearance soft.
Mix-and-match stripes by changing color frequency in the body rounds; alternate two-row stripes or single-row accents to build your own color story.
If you want a different texture, try working the skirt in a slightly fluffier yarn to make the ruffle stand out more against the body.
When sewing parts, I pin everything in place first and take a photo or two to check alignment before the final whipstitch — this saves time and gives a perfect finish.
Common Mistakes & How to Fix Them
✗ Skipping the stitch marker when dividing the legs leads to wrong stitch placement; use markers to mark the 31st stitch and the 6 stitch center gap before splitting.
✗ Forgetting to change yarn colors at the rows indicated on the symbol chart will create incorrect stripes; follow the symbol patterns and change colors exactly as shown between rounds 20 and 36.
✗ Overstuffing the head or legs can distort shaping and make seams difficult to close neatly; stuff gradually and check the shape often to maintain smooth curves.
✗ Closing the leg opening without weaving through the front loops will not create a neat closure; weave the yarn tail through the front loop of each remaining stitch and pull tight to close evenly.
✗ Not flattening the arms and ears before sewing can leave bulky seams and awkward shapes; flatten these parts (do not stuff) and align edges before sewing for a clean finish.