About This Miniature Pippi Amigurumi Pattern
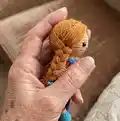
This pattern creates a miniature Pippi-style amigurumi doll (approximately 7 cm tall) with colorful striped legs, a little dress and braided hair. The instructions include step-by-step rounds for each piece and suggestions for both yarn and mohair rope hair. Small-scale construction makes this a delightful gift or collector piece.

You will crochet separate parts and assemble them, following clear round-by-round directions. The pattern uses fine lace yarn and small hooks for tight stitches and neat detail.
Why You'll Love This Miniature Pippi Amigurumi Pattern
I absolutely love this pattern because it captures so much personality in a tiny package. I enjoy working with fine yarn and creating the whimsical striped legs and playful braids. The construction is compact but clever, so you learn small-scale shaping and finishing. It makes a perfect pocket-sized gift that brings a smile every time.
Switch Things Up
I love how easy it is to customize this tiny Pippi — you can swap the striped leg colors for pastels or jewel tones to create different personalities.
If you want a chunkier doll try using a thicker yarn and larger hook; your finished size will increase and the doll becomes cuddlier.
I often change the dress color and add tiny embroidered pockets or buttons for extra detail.
For hair you can replace the mohair rope with embroidery thread or fine yarn to create different textures and braids.
I sometimes make keychain loops by leaving a long tail at the top and adding a metal ring before closing the head.
Try adding tiny accessories like a hat, scarf or miniature bag — crochet them very small and stitch them on after assembly.
I recommend experimenting with different eye sizes to change the doll's expression; smaller eyes look more delicate and larger ones look more whimsical.
If you want a sturdier doll, use a tiny wire armature inside the legs to help it stand or pose slightly.
Try embroidering freckles or a small smile to personalize each face — different placements change the look a lot.
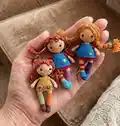
I enjoy making sets with different color schemes; make a trio with matching dresses and mixed-striped legs for a charming display.
Common Mistakes & How to Fix Them
✗ Skipping stitch markers at joining points can make leg alignment difficult; place markers when joining the two legs to set your starting point and check symmetry.
✗ Understuffing the body or head leads to a floppy finished doll; stuff gradually and firmly, especially before closing rounds where shaping matters.
✗ Changing colours without weaving ends securely results in loose stitches later; carry color threads neatly or secure ends with a small knot and weave in immediately.
✗ Placing safety eyes too close or too far apart will change the face expression; follow the pattern note to position eyes between rounds 38-39 with a distance of 6 sc to match shown proportions.