About This Mini Seal Amigurumi Pattern
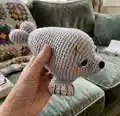
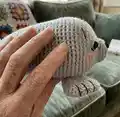
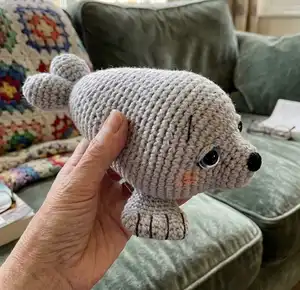
This pattern creates a charming mini seal amigurumi crocheted from the front of the head to the back of the body. It uses worsted weight (#4) yarn and simple single crochet shaping for a compact, cuddly result. The design includes instructions for sunken eyes, sewn fins, and embroidered facial details for personality. Plenty of step-by-step photos make assembly and finishing easy.
Perfect for intermediate crocheters looking to expand their amigurumi skills with shaping and finishing techniques. Includes materials list, abbreviations, helpful tips, and a short video reference for setting sunken eyes.
Why You'll Love This Mini Seal Amigurumi Pattern
I absolutely love this pattern because it balances simple stitches with thoughtful shaping to create a characterful little seal. I enjoy the process of hiding the eye backs for the sunken-eye effect — it adds so much personality with a small detail. The pattern photos make assembly so much easier and reduce frustration when placing the fins and facial features. I also love how customizable the design is; changing colors or eye sizes gives the seal a whole new mood. Sharing finished seals from crafters always makes my day because each one is unique.
Switch Things Up
I love offering ideas for customizing this mini seal — try changing the main yarn color to create a colorful or spotted seal.
Use variegated yarn for a playful textured look that adds depth without extra sewing or color changes.
If you want a smaller seal, choose a lighter-weight yarn (sport or fingering) and a smaller hook; this makes adorable keychain or dangle-size seals.
To make a larger, cuddlier seal, switch to bulky yarn and a larger hook for a chunky, plush result that works well as a kid-friendly toy.
I often swap safety eyes for embroidered eyes for a fully washable toy or if making the seal for very young children.
Add wire inside the fins or body for a posable version; secure and wrap the wire before final sewing to avoid shifting.
Try using felt or tiny crocheted accessories like a scarf, hat, or small bow to personalize your seal for gifting or seasonal themes.
Experiment with face details: change eyebrow shapes, add a stitched smile, or vary the nose size to give different expressions and personalities.
For a dreamy sleepy seal, use the gray yarn sleepy-eye technique described in the pattern to create soft, closed eyes with simple stitches.
I also like adding blush with a small amount of peach or pink crayon for soft cheeks; test on a scrap first to control color intensity.
Consider combining yarns (held together) for a tweed effect or to introduce a sparkle thread for a whimsical, shimmery finish.
Common Mistakes & How to Fix Them
✗ Placing the safety eyes too close or too far apart can distort the face; count the holes carefully and follow the instructions to leave 10 holes between eyes to ensure balanced placement.
✗ Forgetting to remove some stuffing before attaching eye washers will make placing the backs impossible; remove most stuffing, place the washers, then restuff to secure them properly.
✗ Not using a stitch marker can lead to losing track of rounds in the spiral method; place a marker at the start of every round and move it as you work to maintain accurate counts.
✗ Overstuffing the head and body will distort shapings and make sewing pieces together difficult; stuff gradually and shape as you go, adding small amounts until you reach the desired firmness.
✗ Skipping counting after increases and decreases causes uneven shaping and mismatched rounds; count after each shaping round, especially after decrease rounds, to verify stitch totals.