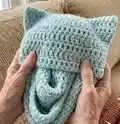
About This Kitty Scarf Amigurumi Pattern
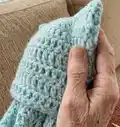
This pattern creates a warm, textured kitty scarf with an attached cat-ear hat section worked off-center. It uses two strands held together for a plush, squishy fabric and large hook for fast progress. The instructions are beginner friendly and rely mainly on double crochet rows and simple finishing.
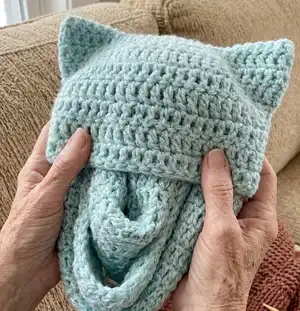
You can easily adjust width and length to suit your style, and the off-center hat makes the scarf wear evenly. Photos and step-by-step notes help you place the hat and finish neatly.
Why You'll Love This Kitty Scarf Amigurumi Pattern
I absolutely love this pattern because it turns a simple scarf into a playful wearable with minimal extra work. I enjoy how the off-center hat section creates adorable cat ears without complicated shaping. The two-strand technique gives the fabric a luxurious, squishy feel that is both warm and quick to make. I also love seeing testers create different color combinations — each version has its own personality and charm.
Switch Things Up
I love to vary yarn choices to completely change the look; try holding two different colors together for marled effects or use a single bulky yarn for a simpler fabric.
I sometimes swap double crochet for half double crochet to create a slightly denser fabric and a different stitch texture.
To make a mini keychain or pocket version, reduce the chain count and shorten the hat section — a tiny cat-ear square is instant charm.
If you want more dramatic ears, increase the hat panel height before folding and seaming so the ear tips stand taller when finished.
I often add embroidery or small felt accents for eyes or whiskers to personalize each hat and give it character.
For a reversible look, experiment with front loop/back loop techniques on alternating rows so both sides have interesting texture.
I sometimes add a contrasting border around the scarf edges with single crochet to tidy the edges and add a pop of color.
Want a snuggly gift? Use soft blends like alpaca and merino held with a cotton strand to balance warmth and structure.
I recommend blocking the scarf lightly if your yarn benefits from shaping — it evens stitches and gives a polished finish.
To change the fit, adjust the starting chain for wider or narrower scarves and measure on yourself as you go to ensure the hat sits where you want it.
For a playful version, stitch small removable pompoms to the ear tips or add a loop for a button so you can change embellishments easily.
Common Mistakes & How to Fix Them
✗ Skipping measuring your initial chain can lead to a scarf that is too narrow or too wide; measure your chain across with a tape measure and make adjustments before starting rows.
✗ Not counting or marking the middle when adding the hat section causes uneven scarf lengths; place a stitch marker at the middle and a second marker approx. 11cm away to align the hat correctly.
✗ Crocheting with inconsistent tension will make the hat section fit poorly; keep consistent, relaxed tension and check measurements frequently as you work.
✗ Forgetting to turn and chain consistently at the start of rows results in uneven edges; always chain two at the beginning of each row and turn as instructed.