🧢 Beautiful ✨ Detailed πŸ’ Adorable

Kirby Hello Kitty Amigurumi Pattern

Kirby Hello Kitty Amigurumi Pattern
4.6β˜… Rating
2-3 Hours Time Needed
4.1K Made This
βœ‚οΈ

Intermediate Level

Ideal for those with basic crochet experience, featuring slightly more advanced stitches and techniques to expand your skills.

⏱️

Bite-Sized Project

Finishes in 2-4 hoursβ€”perfect for an afternoon of creative relaxation.

🧸

Cute Companion

An adorable friend to cherish, handcrafted with love to bring comfort and joy for years to come.

About This Kirby Hello Kitty Amigurumi Pattern

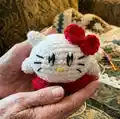
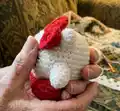
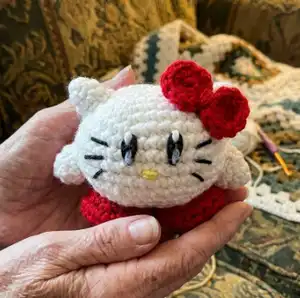
This pattern creates a tiny Kirby-style Hello Kitty amigurumi with embroidered facial features and small accessories. It uses DK yarn and a 3 mm hook for a firm, neat fabric. The design includes body, ears, arms, legs, a little bow and clear assembly instructions. Photos guide placement and finishing for a polished small toy.

Kirby Hello Kitty Amigurumi Pattern crochet pattern - detailed view of completed project

Perfect for gifting or collecting, the finished toy measures about 2 inches (5 cm) tall. You can easily change colors or yarn weight to adapt size and style.

Why You'll Love This Kirby Hello Kitty Amigurumi Pattern

I absolutely love this pattern because it combines two beloved characters into a single adorable mini amigurumi that is quick to make. I designed it to be compact and satisfying, so you get a finished piece in just a few hours. The mix of simple shaping and embroidered details lets me add personality without complicated techniques. I enjoy how customizable it is β€” changing yarn colors or eye placement completely changes the expression and mood.

Kirby Hello Kitty Amigurumi Pattern step 1 - construction progress Kirby Hello Kitty Amigurumi Pattern step 2 - assembly progress Kirby Hello Kitty Amigurumi Pattern step 3 - details and accessories Kirby Hello Kitty Amigurumi Pattern step 4 - final assembly and finishing

Switch Things Up

I love to change up colors to make this pattern feel new; try pastel shades or monochrome for a different vibe.

I often make a larger version by switching to worsted weight yarn and a larger hook to create a cuddly-sized toy instead of a mini one.

I sometimes swap the red bow for felt or a tiny ribbon for a different texture and quicker assembly.

I like to add wire into the arms if I want posable limbs; slip the wire down the center and secure the ends before stuffing.

I vary the facial expression by moving the embroidered eyes slightly closer or farther and experimenting with eyebrow stitches for mood.

I add tiny accessories like a scarf or crocheted mini hat to make seasonal or themed versions for gifts.

I recommend trying different yarn fibers β€” acrylic for durability or cotton for a firmer finish β€” depending on how you plan to use the toy.

I sometimes embroider freckles or blush with a small dab of yarn or fabric paint to personalize each piece.

I encourage using contrasting thread for the whiskers to make them stand out, or tone-on-tone for a subtler look.

I often join a set of matching minis in different colorways to give as a themed gift set, and I include a small tag with care instructions when gifting.

Common Mistakes & How to Fix Them

βœ— Skipping the stitch marker in continuous rounds can make counting difficult; place a marker at the start of every round to avoid losing your place. βœ— Stuffing the body too late or unevenly leads to lumps and a misshapen piece; stuff gradually while you work and shape as you go for even filling. βœ— Pulling embroidery thread too tightly will distort the fabric and make the eyes look squashed; use gentle tension and anchor thread securely before finishing. βœ— Forgetting to cut a long sewing tail makes assembly awkward; always leave a generous tail for sewing and finishing so you can position and secure parts easily. βœ— Not hiding tails properly results in loose threads later; weave ends back into the piece and knot discreetly to secure. βœ— Skipping counts after increases or decreases causes mismatched shaping; count your stitches after shaping rounds to catch errors early.

Kirby Hello Kitty Amigurumi Pattern

Make a tiny, charming Kirby Hello Kitty crossover amigurumi that fits in the palm of your hand. This pattern walks you through shaping, simple embroidery and small accessories so you can create a polished mini collectible. Perfect as a gift or a sweet desk companion, you can customize colors and details to make it truly yours.

Intermediate 2-3 Hours

Materials Needed for Kirby Hello Kitty Amigurumi Pattern

β€” Main Fabric

  • 01
    Acrylic double knitting yarn (DK / 8-ply) white - approximately 10g (main body)
  • 02
    Acrylic double knitting yarn (DK / 8-ply) red - approximately 8g (legs, bow)
  • 03
    iLauke yarn (used by designer) - optional substitute for DK yarn
  • 04
    Black embroidery thread - small amount for eyes and whiskers
  • 05
    Blue embroidery thread - small amount for eye highlights
  • 06
    White embroidery thread - small amount for eye highlights
  • 07
    Yellow embroidery thread - small amount for nose detail
  • 08
    Polyester fiberfill stuffing - small amount to fill body and legs

β€” Tools Required

  • 01
    Crochet hook D/3 (3 mm) or according to the yarn you use
  • 02
    Stitch marker or piece of scrap yarn to mark rounds
  • 03
    Scissors
  • 04
    Yarn needle for sewing and embroidery
  • 05
    Embroidery needle for facial details
  • 06
    Pins for assembly (optional)

Progress Tracker

0% Complete

Info :

This pattern uses US crochet terminology with UK terminology given in italics in round brackets () afterward.

Info :

Crochet in continuous rounds without joining the round with a slip stitch. Do not turn at the end of each round. Use the stitch marker or piece of scrap yarn to mark the start of each round.

β€” Body :

Info :

Use white yarn.

Round 1 :

6 sc in the magic loop [6 sts]

Round 2 :

(inc in each st) x 6 [12 sts]

Round 3 :

(1 sc, inc) x 6 [18 sts]

Round 4 :

(2 sc, inc) x 6 [24 sts]

Round 5 :

(3 sc, inc) x 6 [30 sts]

Round 6 :

(4 sc, inc) x 6 [36 sts]

Round 7-11 :

sc in each st around [36 sts]

Round 12 :

(4 sc, dec) x 6 [30 sts]

Round 13 :

(3 sc, dec) x 6 [24 sts]

Round 14 :

(2 sc, dec) x 6 [18 sts]

Round 15 :

(1 sc, dec) x 6 [12 sts]

Info :

Fill with polyester fiber stuffing.

Round 16 :

(dec) x 6 [6 sts]

Info :

Cut the yarn leaving a tail to close the piece.

Info :

With the needle, thread the yarn through the front loops of the 6 stitches.

Info :

Pull tightly to close.

Info :

Fasten and hide the tail in the piece.

β€” Face Embroidery :

Info :

I used iLauke yarn to embroider the face. You can use any thread that is comfortable and suitable for you.

Info :

Using black, blue and white thread, embroider the eyes in the middle at the level of 6-7 rounds.

Info :

First, make one vertical stitch for each eye with black thread.

Info :

Then make one stitch each with blue and white thread over the black thread.

Info :

Using yellow thread, embroider a nose in the middle between the eyes (1 stitch).

Info :

Using a thinner black thread, embroider a mustache (3 stitches on the right and the left).

β€” Ears (Make 2) :

Info :

Use white yarn.

Round 1 :

4 sc in the magic loop [4 sts]

Round 2 :

inc, 3 sc [5 sts]

Round 3 :

(inc in each st) x 5 [10 sts]

Info :

Cut the yarn leaving a tail for sewing.

β€” Arms (Make 2) :

Info :

Use white yarn.

Round 1 :

6 sc in the magic loop [6 sts]

Round 2 :

(1 sc, inc) x 3 [9 sts]

Round 3 :

sc in each st around [9 sts]

Info :

Cut the yarn leaving a tail for sewing.

β€” Bow :

Info :

Use red yarn.

Step 1 :

make the magic loop

Step 2 :

ch 2

Step 3 :

3 hdc into the magic loop

Step 4 :

ch 2

Step 5 :

1 sc into the magic loop

Info :

Make another part just like the previous one by repeating steps 2-5.

Step 6 :

sl st to first ch

Info :

Fasten off and leave a long tail. Tighten the magic ring.

Info :

Reel up the yarn tightly around the middle of the bow a few times. Tie a knot leaving a tail for sewing.

β€” Legs (Make 2) :

Info :

Use red yarn.

Round 1 :

6 sc in the magic loop [6 sts]

Round 2 :

(inc in each st) x 6 [12 sts]

Round 3 :

(1 sc, inc) x 6 [18 sts]

Round 4 :

BLO sc in each st around [18 sts]

Round 5 :

2 sc, 7 dec, 2 sc [11 sts]

Info :

Cut the yarn leaving a tail for sewing.

Info :

Fill with polyester fiber stuffing.

β€” Assembly :

Info :

Sew the ears on top and the legs on the bottom.

Info :

Sew on the arms, start at the level of the 8th round, and move down. Sew on the bow.

Info :

Well done! Your kitty is ready!

Assembly Instructions

  • Sew the ears on top of the head, spacing them symmetrically and securing with the tail left from the ear pieces.
  • Sew the legs to the bottom of the body, spacing them evenly so the toy sits balanced; use the long tails to sew through several rounds for a firm attachment.
  • Sew the arms starting at the level of the 8th round and move downward, positioning the hands slightly forward for a natural pose.
  • Attach the bow to the top corner of the head above one ear, secure by sewing through the center wrap and hiding the tail.
  • Embroider the eyes at the level of rounds 6-7: first black vertical stitches, then add blue and white highlights, and finish with a yellow nose and whiskers.

Important Notes

  • πŸ’‘Use a stitch marker to mark the start of each round to keep your rounds aligned and counting accurate.
  • πŸ’‘Stuff the body gradually as you crochet to maintain a smooth, even shape and avoid lumps when closing.
  • πŸ’‘Leave long sewing tails when you cut yarn from small parts so you have enough length to securely attach and weave in ends.
  • πŸ’‘Work with consistent tension and the recommended hook size to achieve the stated finished dimensions and stitch gauge.

This sweet Kirby Hello Kitty mini is designed to be fun, fast, and utterly collectible. It fits comfortably in your hand and makes a perfect tiny gift or desk companion. Customize the colors, expression, or bow to make it uniquely yours. 🧢✨

You ask,

we answer.

FAQs

What size will the finished piece be?

The finished amigurumi measures about 2 inches (5 cm) tall using the recommended DK yarn and 3 mm hook.

Can I use different yarn weights for this pattern?

Yes, you can change yarn weight, but the final size will vary; adjust your hook accordingly to maintain neat stitches.

Do I need advanced crochet skills for this pattern?

This pattern is rated intermediate because it includes shaping decreases, invisible decrease techniques, and embroidery details; basic experience with these stitches is helpful.

How long does this project typically take to complete?

Most crocheters finish this small amigurumi in 2-3 hours, depending on experience and whether you embroider by hand.