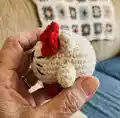
About This Kirby Hello Kitty Amigurumi Pattern
This pattern creates a tiny Kirby-shaped Hello Kitty amigurumi combining round Kirby proportions with Hello Kitty features. You will crochet a small stuffed body, ears, arms, legs, and a bow, then embroider the sweet facial details. It uses DK/8-ply yarn and a 3 mm hook for a neat, compact finish.
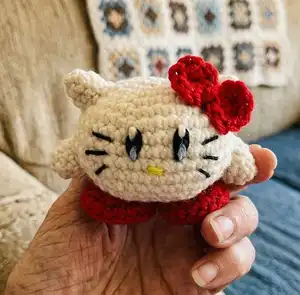
Techniques include continuous rounds, basic increases and decreases, and simple surface embroidery for eyes, nose and whiskers. The finished toy measures about 2 inches (5 cm) tall with the recommended materials.
Why You'll Love This Kirby Hello Kitty Amigurumi Pattern
I absolutely love this pattern because it blends two iconic characters into a tiny, heartwarming amigurumi you can finish quickly. I enjoy the clean, round shaping required for Kirby and the small, satisfying embroidery that brings personality to the face. The pattern feels rewarding to make in one sitting and makes a great little gift or decoration. I also love how customizable it is — a simple color change turns it into your own unique character.
Switch Things Up
I love how easy it is to customize this pattern by changing colors — try pastel shades for a soft look or neon tones for a playful twist.
I often experiment with different yarn weights: use bulky yarn and a larger hook for a cuddly chunky version or fingering yarn for a delicate mini keychain.
I sometimes add tiny accessories like a crocheted scarf, tiny glasses or a miniature prop to give each kitty its own personality.
Swap the eye embroidery for safety eyes if the toy is for non-infant display only — this changes the expression instantly.
Try embroidering different whisker styles or mouth shapes to alter the mood of the character.
I recommend making a set in alternating colors to create a little family of kitties — they look adorable together on a shelf.
For a more posable version, I have added thin wire to the arms in other projects; you can wrap wire and insert it carefully before stuffing.
Make matching bows in different sizes and positions — left, right or even two bows for a unique look.
I also like to add a few felt details or tiny embroidered accessories like a heart or star to the body for seasonal themes.
Don’t be afraid to tweak stitch counts for slightly different proportions; increasing one extra round before shaping makes the body a touch larger without changing the overall character.
Common Mistakes & How to Fix Them
✗ Skipping the stitch marker makes it easy to lose the start of the round; always place a stitch marker or a scrap loop to mark the beginning of each round so your increases and decreases stay accurate.
✗ Not stuffing evenly can make the body lumpy or misshapen; stuff gradually, adding small amounts of fiberfill as you work to maintain a smooth round shape.
✗ Pulling embroidery thread too tight will pucker the fabric and distort the face; use gentle tension when embroidering the eyes, nose and whiskers to keep the surface flat.
✗ Forgetting to count stitches during increases and decreases causes incorrect stitch counts; count after each shaping round and write down totals if needed to stay on track.
✗ Cutting yarn too short when finishing parts prevents secure sewing; always leave a generous tail for sewing and hiding inside the piece.